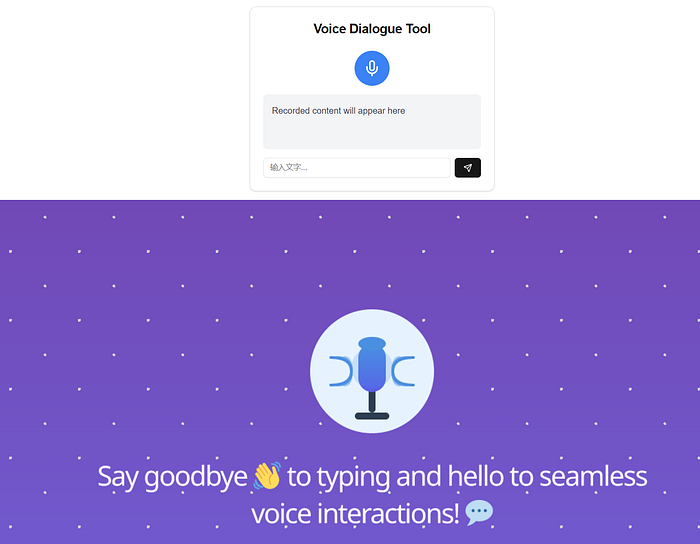

One of the main motivations behind our project is to bring large language models to a general audience. Allowing users to interact with the system using voice instead of a keyboard offers many advantages. It is more efficient, safer, and appeals to a broader audience, such as seniors or professionals whose work requires constant use of their hands, like factory workers and drivers.
In this blog post, we'll explore how to build a voice-to-text and text-to-speech system using FastAPI, OpenAI's Whisper, a text-to-speech engine, and AWS S3 for file storage. We'll break down the code structure, outline the key steps, highlight the essential tech stacks for setting up the application, and share the insights gained from this project.
Tech Stack Overview
Before we dive into the code, let's review the tech stack and its roles in the project: 1. FastAPI: A modern, fast web framework for building APIs in Python. 2. OpenAI Whisper & GPT-4: For transcription (voice-to-text) and language model capabilities (text generation). 3. AWS S3: For storing audio files and text files securely in the cloud. 4. Docker: To containerize the application, making it easy to deploy and run on any platform. 5. Python Libraries: — pydantic: For input validation. — requests: For making HTTP requests to the FastAPI server. — sounddevice, numpy, and scipy: For recording and handling audio locally. - boto3: For interacting with AWS services (like S3).
Work Steps
Step 1: FastAPI Setup We begin by setting up the FastAPI application. This involves creating a simple API with a /voicebot endpoint that supports both voice and text inputs. FastAPI Application
 ```python
 from fastapi import FastAPI, HTTPException, Form, UploadFile, File
 from pydantic import BaseModel
 import os
 import openai
 from dotenv import load_dotenv
 import uuid
 import boto3
 from io import BytesIO

 load_dotenv()
 app = FastAPI()
 openai.api_key = os.environ['OPENAI_API_KEY']

 # Set up CORS middleware
 from fastapi.middleware.cors import CORSMiddleware
 app.add_middleware(
 CORSMiddleware,
 allow_origins=["*"],
 allow_credentials=True,
 allow_methods=["*"],
 allow_headers=["*"],
 )

 # Input and Output models
 class QueryInput(BaseModel):
 input_wav_url: str

 class QueryResponse(BaseModel):
 output_wav_url: str = None
 return_text: str
 ```
Here, we configure FastAPI with CORS middleware to allow requests from any origin. We define input and output models (QueryInput and QueryResponse) to ensure clean API responses. Step 2: Voicebot Endpoint The /api/voicebot/ endpoint processes both text and audio. If the client uploads an audio file, it will first be transcribed using OpenAI's Whisper model. Otherwise, if text is provided, it goes directly to GPT-4 for processing.
 ```python
 @app.post("/api/voicebot/", response_model=QueryResponse)
 async def voicebot_endpoint(
 audio: UploadFile = File(None), # Audio file (optional)
 text: str = Form(None) # Text input (optional)
 ):
 # Initialize AWS S3 client
 s3 = boto3.client('s3')
 bucket_name = 'voicebot-text-to-speech'

 if audio:
 # Process uploaded audio
 content = await audio.read()
 file_extension = os.path.splitext(audio.filename)[1]
 file_name = f"input_{uuid.uuid4()}{file_extension}"

 # Upload audio to S3
 file_buffer = BytesIO(content)
 s3.upload_fileobj(file_buffer, bucket_name, file_name)

 # Transcribe audio using Whisper
 transcript = openai.Audio.transcribe(
 model="whisper-1",
 file=(audio.filename, content),
 response_format="text"
 )
 elif text:
 transcript = text
 else:
 raise HTTPException(status_code=400, detail="Audio or text input required")

 # Send transcript to GPT-4
 response = openai.Completion.create(
 model="gpt-4–1106-preview",
 messages=[
 {"role": "system", "content": "You are a helpful assistant."},
 {"role": "user", "content": transcript}
 ]
 )

 # Convert GPT-4 response to speech
 gpt_response = response.choices[0].message.content
 speech_response = openai.Audio.create_speech(
 model="tts-1",
 voice="nova",
 input=gpt_response
 )

 # Upload speech to S3
 speech_file = BytesIO()
 for chunk in speech_response.iter_bytes(chunk_size=4096):
 speech_file.write(chunk)
 speech_file.seek(0)
 speech_file_name = f"speech_{uuid.uuid4()}.mp3"
 s3.upload_fileobj(speech_file, bucket_name, speech_file_name)

 # Generate URL to access speech file
 url = s3.generate_presigned_url('get_object', Params={'Bucket': bucket_name, 'Key': speech_file_name}, ExpiresIn=3600)

 return QueryResponse(output_wav_url=url, return_text=gpt_response)
 ```
Step 3: Dockerizing the Application Containerizing the application with Docker ensures that the API can run anywhere, from your local machine to a cloud platform like AWS or Railway.
 Dockerfile

 ```dockerfile
 FROM python:3.9.6

 WORKDIR /code

 COPY requirements.txt .
 RUN pip install — no-cache-dir — upgrade -r requirements.txt

 COPY ./app/ ./app

 EXPOSE 8000

 RUN useradd -m appuser
 USER appuser

 CMD ["uvicorn", "app.main:app", " — host", "0.0.0.0", " — port", "8000"]
 ```
This Dockerfile sets up the Python environment, installs dependencies, and uses uvicorn to serve the FastAPI application. Step 4: Recording and Sending Audio We also implement a Python client to record audio and send it to the API. This allows us to test the voicebot locally. Client-Side Audio Recording
 ```python
 import sounddevice as sd
 from scipy.io.wavfile import write
 import requests
 import numpy as np

 # Recording configuration
 fs = 44100 # Sample rate
 duration = 5 # Recording length

 print("Recording…")
 myrecording = sd.rec(int(duration * fs), samplerate=fs, channels=1)
 sd.wait()

 # Save recording as a WAV file
 audio_file = './data/audio_input.wav'
 write(audio_file, fs, np.int16(myrecording * 32767))

 # Send audio to FastAPI endpoint
 def send_audio(file_path):
 with open(file_path, 'rb') as f:
 files = {'audio': (file_path, f, 'audio/wav')}
 response = requests.post("http://localhost:8000/api/voicebot/", files=files)
 return response

 response = send_audio(audio_file)
 print(response.json())
 ```
Step 5: Deploying to the Cloud Once the application is tested locally, you can deploy it to services like AWS EC2, Railway, or any other container-based cloud provider. AWS ECS: Launch an EC2 instance, SSH into it, install Docker, and run the FastAPI container. Railway: Push your code to Railway, which automatically builds and deploys the app.
Challenges and Lessons learned:
It is easy to develop a proof of concept (POC) using a notebook, but building a running web app is much more challenging. In addition to learning how to write backend APIs and set up databases, we encountered many issues with building the frontend app. One of the main challenges was ensuring seamless communication between the backend and frontend without significant latency. Initially, we tried limiting GPT responses, but eventually, storing audio files in the browser cache and directly triggering the endpoint allowed us to provide a good user experience with minimal lag between voice recording and responses.
Cost: We initially deployed the API on AWS ECS, which made it straightforward to set up clusters and control HTTP inbound and outbound traffic. However, this convenience came with a high cost. With minimal traffic, our cluster generated a $10 bill over a single weekend, which we knew wasn't sustainable. We then switched to Railway.app, signing up for their hobbyist membership. With a $5 monthly fee, we were able to deploy and host the web app successfully without worrying about excessive costs.
CI/CD: During development, we built and tested the API locally, then deployed the code to a Docker container for further testing. Eventually, we deployed the Docker image on Railway.app. Manual code updates quickly became unsustainable, so we connected Railway to our GitHub repository. Now, it automatically updates the FastAPI online whenever we push new code updates, enabling continuous deployment. The process is quite impressive.
Conclusion In this tutorial, we've demonstrated how to build a voice bot that handles voice-to-text and text-to-speech using FastAPI, OpenAI models, and AWS S3 for storage. We also containerized the app with Docker for easy deployment. The next step is to expand the app to address specific customer issues. The app serves as a vehicle to bring our research in Retrieval-Augmented Generation (RAG), model training, and evaluation to the end user. The possibilities are endless!
There is no doubt there will be challenges and road blocks, but if we've come this far, we might as well keep going. Happy coding!
The authors thank OpenAI Research Funding for providing testing tokens for this project.