


Table of Contents
- Foreplay
- Let's Create a library
- Challenges on the Way
- Project Setup
- Creating Changeset Semantic Versioning
- Building Library Deployment Pipelines
- Creating an Npm Token and Allowing All The Necessary Permissions
- Initial Publish to NPM
- Deployment Pipeline On Action
- Thank You For Coming And See You on the Next One
- Shameless Self Promotion 😈
All the code written in this article can be found in here
Foreplay
Creating a library has always been a mystery to me. Like all devs, I am also using a bunch of different libraries while making my applications. It always seemed magical to me how this process works.
Just with an npm install command, node can download somebody else's code into my machine 🤯 and there is more than that. While changing the version with npm update or manually changing the number in package.json and executing again npm install, it installs another version of code!
When we command + click a variable/function imported, it goes to the library code. Sometimes this code is well organized and sometimes complete spaghetti.
And how all these work?
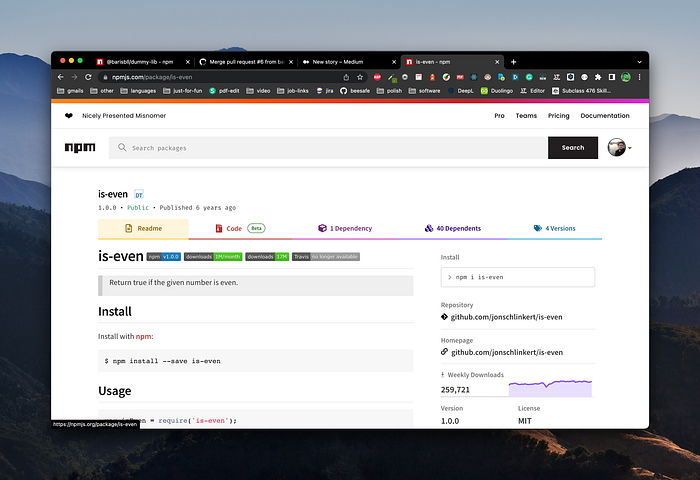
In this article, we will dive deep into the mysterious land of open source and library creation. Who knows, maybe after this article you will also be able to create a library that tells people if a number is even or odd.
Let's Create A Library
Challenges on the Way
While trying to create a library, we have some challenges on the way.
First, we have some self-respect. Therefore, we will go with TypeScript!
We want our users to have type safety of our functions.
TypeScript means problems, we will have a build step, and we will build 3 different file formats
.d.ts(for type files (your users will see this file's content when they click to your functions)).js(compiled JS code, this one will execute when users project build).mjs(much more readable version of.jsfiles (built fornode))
Thanks to the great JS ecosystem, we have some great solutions to handle complexity. The great library called tsup will handle file generation for us.
That's not all, we will also have a problem with semantic versioning. We want to separate patch, minor and major changes. Also we want to log each one of those changes in some sort of Changelog so that our users can read what we add in newer versions.
For that purpose, we will use another great library called changeset, changeset will take care of
- semantic versioning,
- changelog update
- automatic deployment pipeline
And finally, we need to create GitHub action workflows to automate all these redeployment processes. Nobody has time to manually put things to npm each time we need to change something.
Wow, we have plenty of work to do, let's start now!
Project Setup
We start by creating a new npm project. A decent one.
$ mkdir dummy-lib
$ cd dummy-lib
$ npm init -y
In this dummy-lib, we will create some util functions for people to easily calculate if a number is odd or even, because why not?
We will create an index.ts folder in the src directory
src/index.ts
Also, please add atsconfig file.
tsc --initNow we need a build step that builds our code to library format.
Let's add tsup for that
Throughout this article, I will use pnpm over npm, but if you want to use something else, be my guest.
pnpm install tsupAfter installing, we will add a build script, with additional package.json data
Now when we run
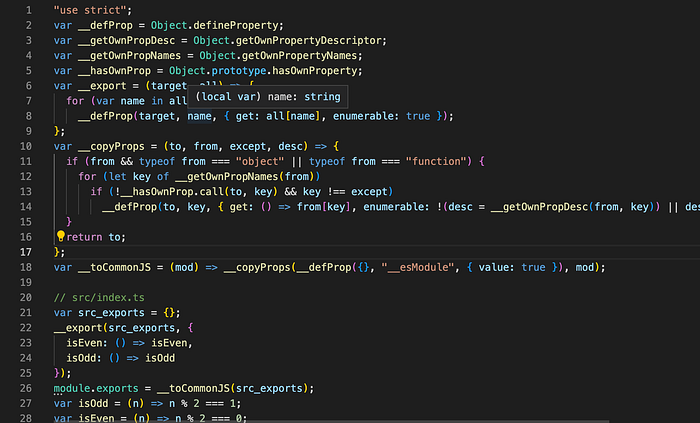
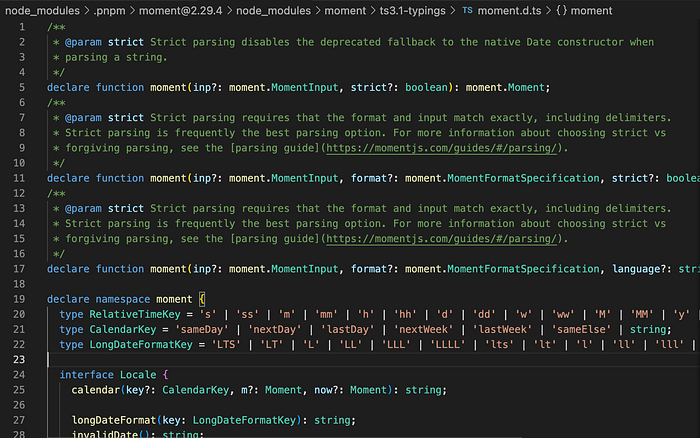
pnpm run buildWe expect to see multiple files in dist directory
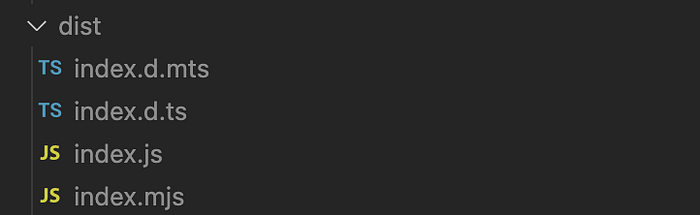
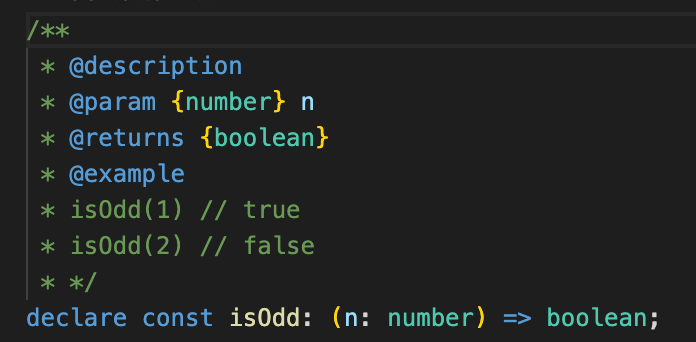
Those declaration files contain all the types with the Javadoc. When your users click on your functions, they will go to these declaration files 👍
Creating Changeset Semantic Versioning
Whenever we change something in the code. It is either a patch, minor or major change. Each time we make a change, we need to add a changeset file to our updated code and describe what was the change.
To start with changeset we first initialize and create the first changeset file
pnpm install -D @changesets/cli && npx changeset init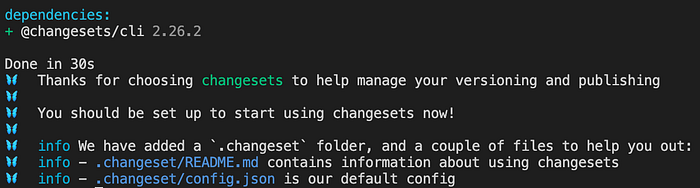
This one creates a .changeset directory that will store our changeset settings.
You need to update .changeset/config.json to allow public access (obviously if it is a public library), and you must specify the base branch for your library (later changeset will use this branch to create pull requests but more about that later).
My changeset config looks like this
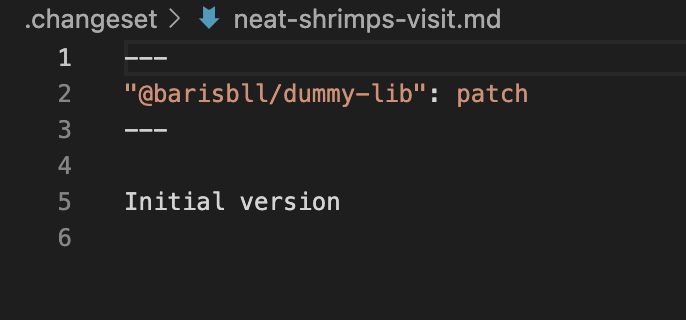
Time to add an initial changeset
npx changesetThis will prompt you to pick the correct update type. If you don't know what semantic versioning is, you can take a look here.
It creates a new file in the .changeset directory. Later on, when we create the GitHub action for deployment pipelines, changeset action will take a look at those files, and based on the content either it will create a pull request with the version change or directly push changes to npm.
Building Library Deployment Pipelines
We shouldn't manually push our library each time there is a change in our base branch.
We need something automated, and GitHub actions is the perfect tool for this. Likewise, we want our contributors to be able to take an issue, solve the problem, and after they send their pull request, automatically create a new release of the library.
We will have 2 workflow files, main and release.
main will handle what happens when somebody makes a pull request (running the tests, running the lints, building the typescript etc).
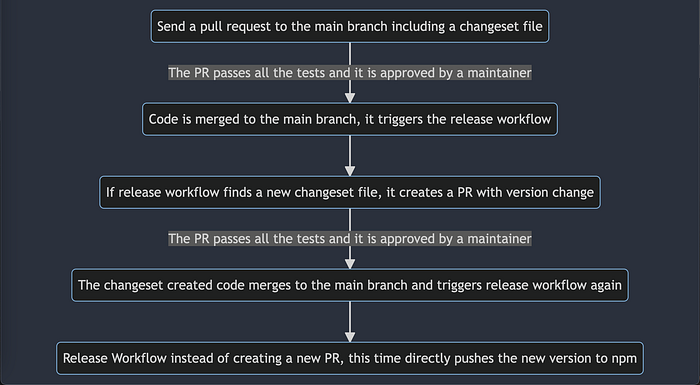
release will be triggered each time there is a push in our main branch and based on the change it will either
- Create a new pull request for changing the version of our library, or
- It will directly push the new version of our library to npm.
Here is a flow chart, that simplifies all the process of deploying the new version of our library.
Alright, enough theory, show me the code.
We will start with the main workflow file
.github/workflows/main.yml
In this workflow, we can do the basic checks for a pull request.
What matters more is the release workflow. If it finds a changeset file, then it will create a pull request to our base branch (for us main).
If it doesn't find a changeset file, but a changed version in package.json (when changeset creates a PR it also changes the version in package.json), then it will push the new version to npm and update the CHANGELOG.md
You can see that as the last step of our Release job we are triggering changesets/action@v1, and we specify a pnpm run release in the publish option
But we didn't create this script yet. Time to write a release script to package.json
When changeset executes changeset publish command, it uses npm publish <package-spec> command behind the scenes.
It also includes the publish options we specified in .changeset/config
Alright, Baris everything looks fine, but what are those npm token, GitHub token etc.
Those tokens, my friend, will be covered in the next section.
Creating an Npm Token And Allowing All The Necessary Permissions
Npm isn't stupid, you can't just go and publish the next version of reactjs. It has protection based on the necessary permissions.
Npm accepts tokens, either 2FA tokens or the classical tokens.
If you would tell me that you will publish your library manually. I would definitely suggest you to use 2FA token.
But a GitHub action cannot read the token in your authenticator app. Therefore, we have to use classical tokens.
We need to log in to npm and create a new token.
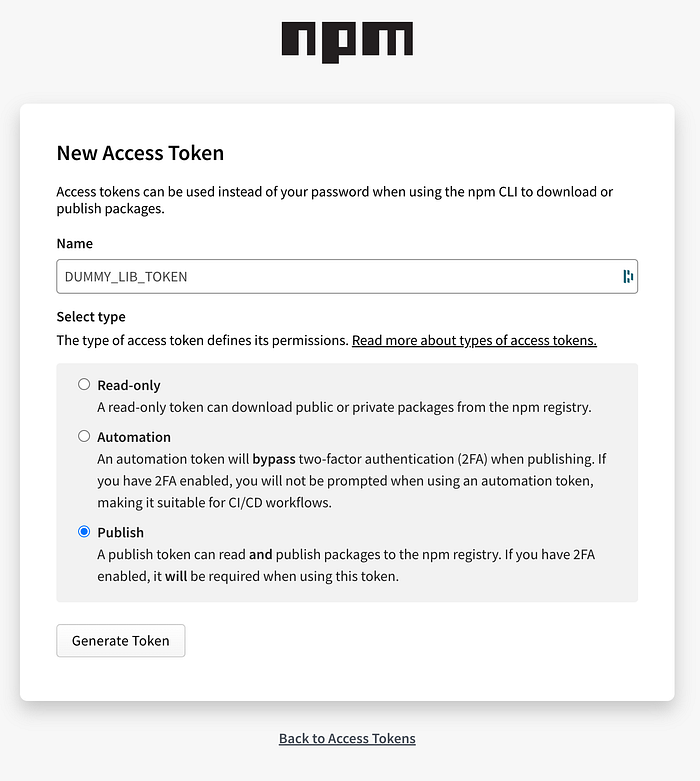
We need to choose the Publish option because changeset GitHub action will publish a new version using our token.
After creating the token, save it to somewhere safe.
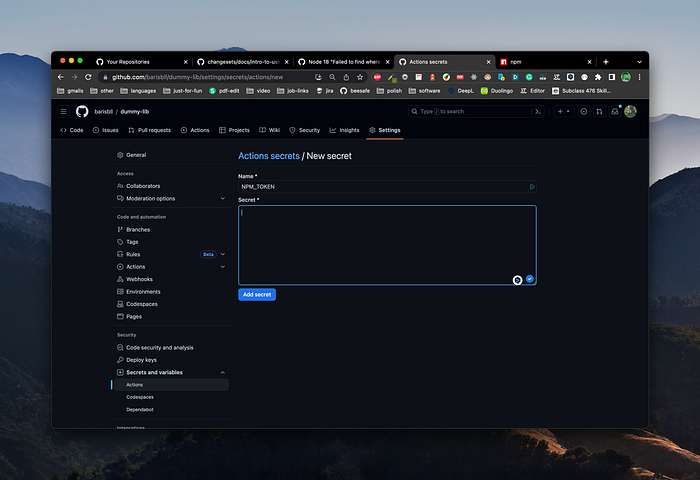
Now we have to go to settings of our repository and from there to GitHub action secrets
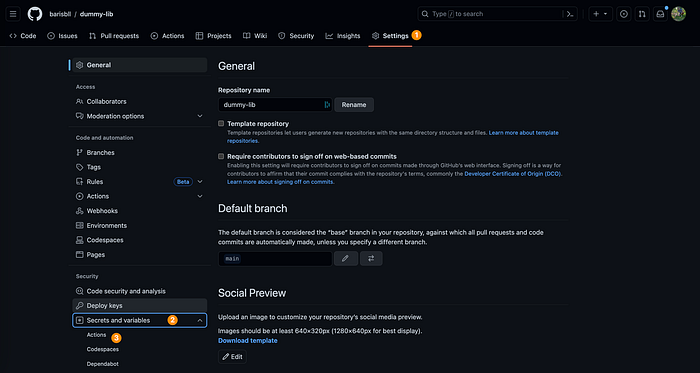
Now add the secret we just created with the given name
That's not all. We must also permit GitHub actions to be able to actually create a pull request for us. For that one, we have another option in the settings.
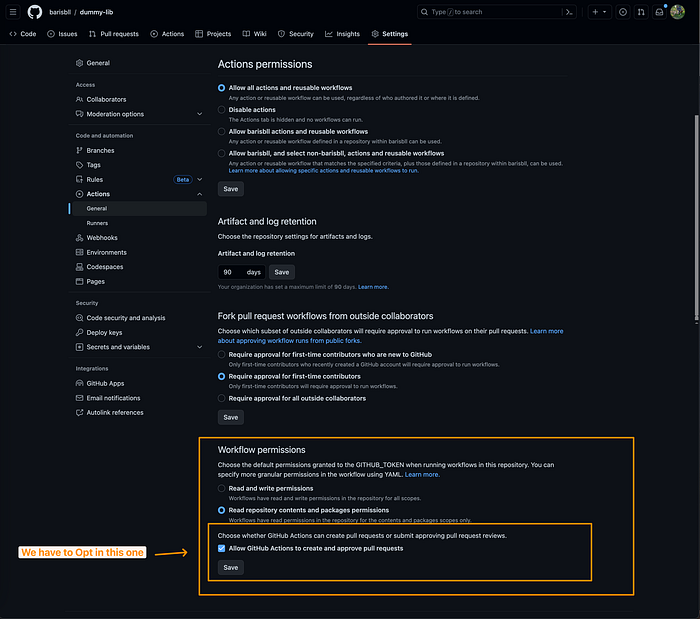
Alright, NPM_TOKEN env variable is set and ready. What about GITHUB_TOKEN?
We don't need to add this one to environment variables, it is already added by GitHub. But in order for GitHub to add it, we need to create one in our user settings. If you don't have a GitHub token. You can follow this guide to create one. Don't forget to give permissions for read-write in GitHub actions.
Important Note: If you have 2FA enabled in your npm you have to close that one 🫤, I know, that's not nice. But again, GitHub actions cannot check your authenticator app to pass the token.
Initial Publish to NPM
Before we test our beautiful automated pipeline, we have one more step to take. We need to create the npm package. And the only way to do it is actually publishing the library manually.
So let's do it
npm login

npm publish
If you are lucky, you will see your package on npm 😄.
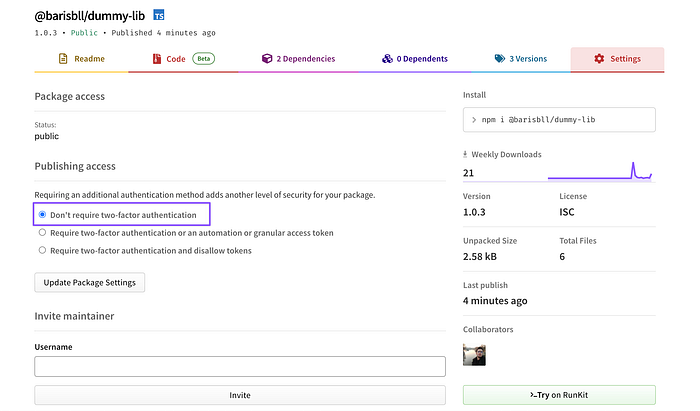
Beware that we need to go to the settings of this library and pick don't require two-factor authentication option
Now let's send the new version using the deployment pipeline.
Deployment Pipeline On Action
First, let's create a feature branch to create a PR with changeset
git checkout -b feature/testing-changesetmake some dummy changes and add changeset
npx changesetThen commit and push
git add .
git commit -m "feature/testing-changeset: test"
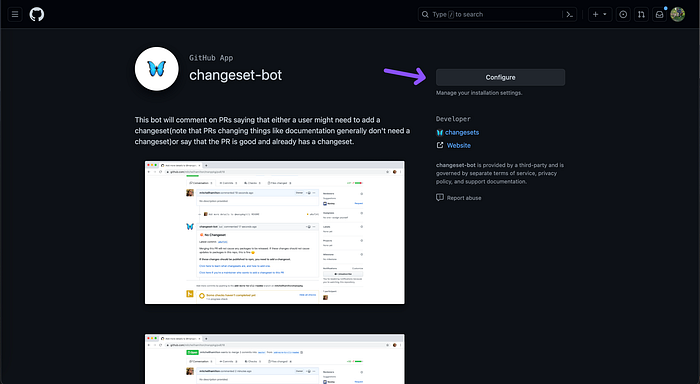
git push -u origin feature/testing-changesetBefore we actually make a PR, let's add the bot of the changeset so that it warns us if we forget to add a changeset file in our PRs.
Configuring changeset bot is effortless you just need to go to changeset-bot and click configure
Now we are ready, let's create a PR!

Changeset bot already observed our changeset file and reminds us what the changesets we added are.
Let's approve the PR it and see what happens.
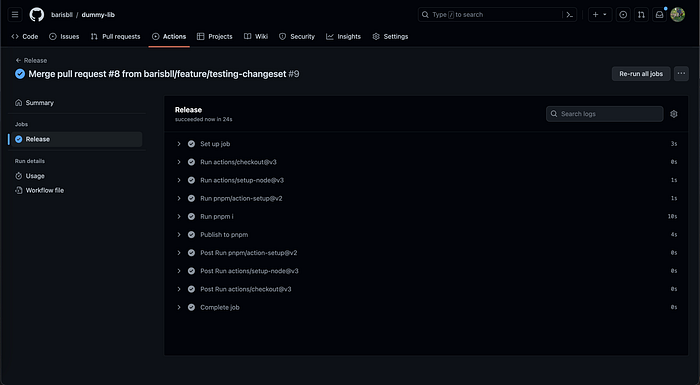
It executed the release workflow in GitHub actions.
After that, it created a new PR!

This PR was created by the changeset bot, let's take a look at what it tries to change
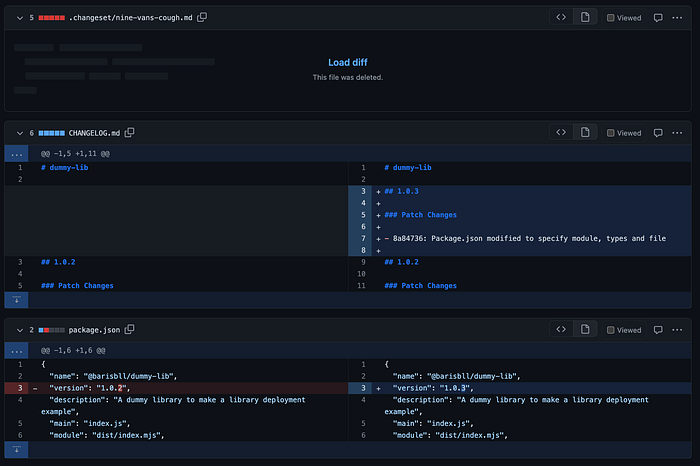
We see that it changed the package.json version and updated the Changelog with our commit hash and description. How cool is that!
When we approve this PR, we see that it triggers release workflow again and this time it publishes those changes to npm
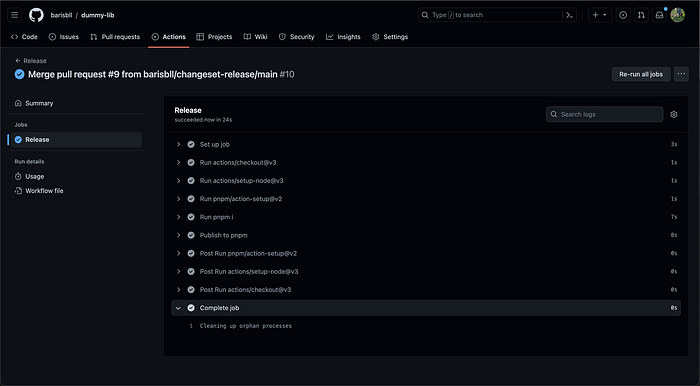

Amazing! Our workflow works and now we can update our library without any effort!
Thank You For Coming And See You on The Next One
Writing a typescript library to npm, definitely is a challenge. However, it is not rocket science, if I can do it, you can too!
So what are you waiting for! Just start writing your new killer library 😄
Shameless Self Promotion 😈
Hey, if this content was useful for you, please don't forget to like and comment. Let's keep in touch for more content like this. Please subscribe to Medium and other channels (especially Twitter 😄)
Twitter 🐦 Linkedin 📎 Github 👨🏻💻 Medium 📰 Dev.to 🤖
More content at PlainEnglish.io.
Sign up for our free weekly newsletter. Follow us on Twitter, LinkedIn, YouTube, and Discord.