

Ever wished you could draw a 2D level just by the click of your mouse, and auto-turn it into a terrain for your 2D little avatars to walk on it? That's actually fairly easy to do thanks to tilemaps!
By the end of this tutorial, you'll know how to import, setup and use tilemaps in Godot to quickly create sprite-based 2D levels, with both visuals and collisions.

As usual, don't forget that you can get the demo scene and all the assets from this demo on my Github 🚀 with all my other Godot tutorials.
The tutorial is also available as a video — text version is below:
And with that said, let's dive in and explore 2D tilesets and tilemaps in Godot!
How to import a 2D TileSet
First things first, let's quickly recap what a tileset and a tilemap are, and let's see where we can get some cool resources for our quick demo example.
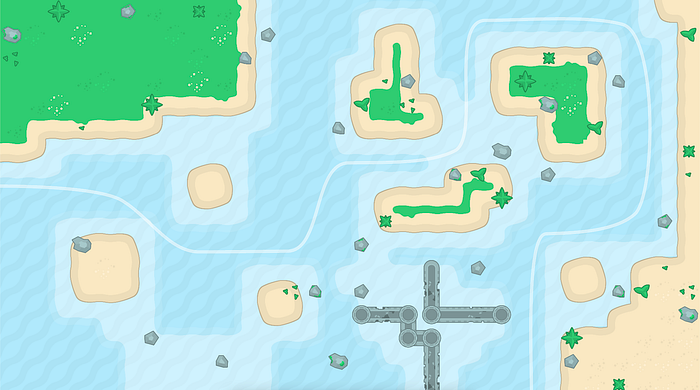
In a nutshell, a tilemap is a grid of tiles, meaning that it's a big set of little sprites that are neatly organised in contiguous cells and altogether form a 2D level (or sometimes pseudo-3D with isometric render).
Using a tilemap is usually way better than manually positioning sprites next to one another, because:
- it's way easier to edit (you can make a big area very quickly, you can replace sprites just by clicking over it, you can stack multiple layers to better organise your scene…)
- it's way more efficient
- because it's designed for groups of tiles, a tilemap can also handle collisions, occlusion or navigation for example
So, as we said, a tilemap is an actual level, with its particular shape and possibly repeated tiles.
But a tilemap always depends on a reference tileset, which contains each available tile once. This is the reference atlas that the tilemap will go and pick from, and what's great is that it centralises the data in one place, and you can then share this set of tiles with multiple tilemaps to create multiple consistent tilemaps that each correspond to a single level.
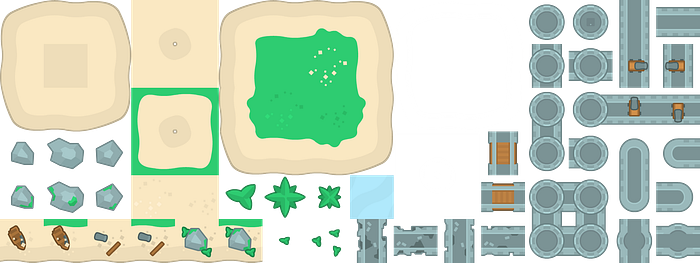
Now, from a game creator's standpoint, a tileset is usually one big image with numerous sprites stacked together as a grid.
You can of course make your own — if you're curious, I highly recommend you watch Adam C. Younis's channel who's great for 2D art and, in particular, contains several videos about tile sets:

But if you're like me and you can't make any decent art, you might also want to find some free resources on the net, at least to try a few things and get you started :)
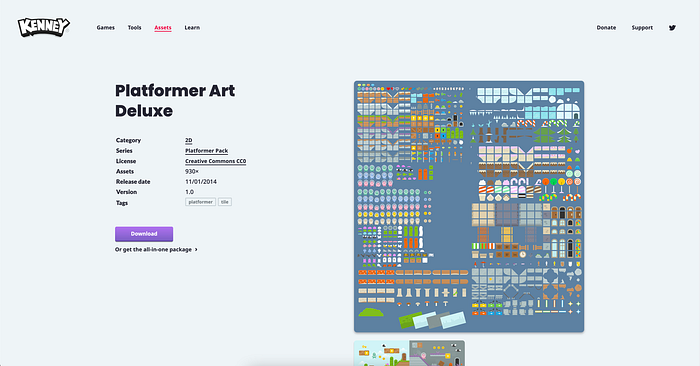
A famous ref here is the incredible Kenney library — this lib contains a wide variety of little packs, from audio files to 3D models, UI components or 2D tilemaps.
And everything is available under the CC0 license, so it's just amazing that he's sharing all of this with this for free!

Feel free to browse their website and see which one you like the most; here, I'll be using his Platformer Art pack which contains a lot of environment tiles, plus some neat characters with their own animations.
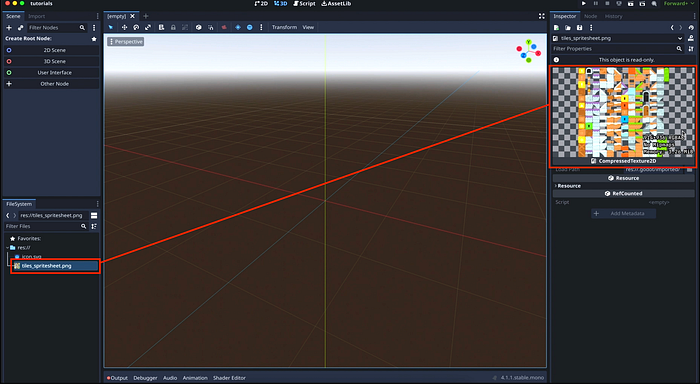
So ok, let's say you have a big tileset image with all your sprites organised as a grid, and you've dragged it in your Godot project to import it.
The next step is to setup a Godot TileSet object based on this image, to actually chop down the grid into little tiles…
Setting up a Godot TileSet resource
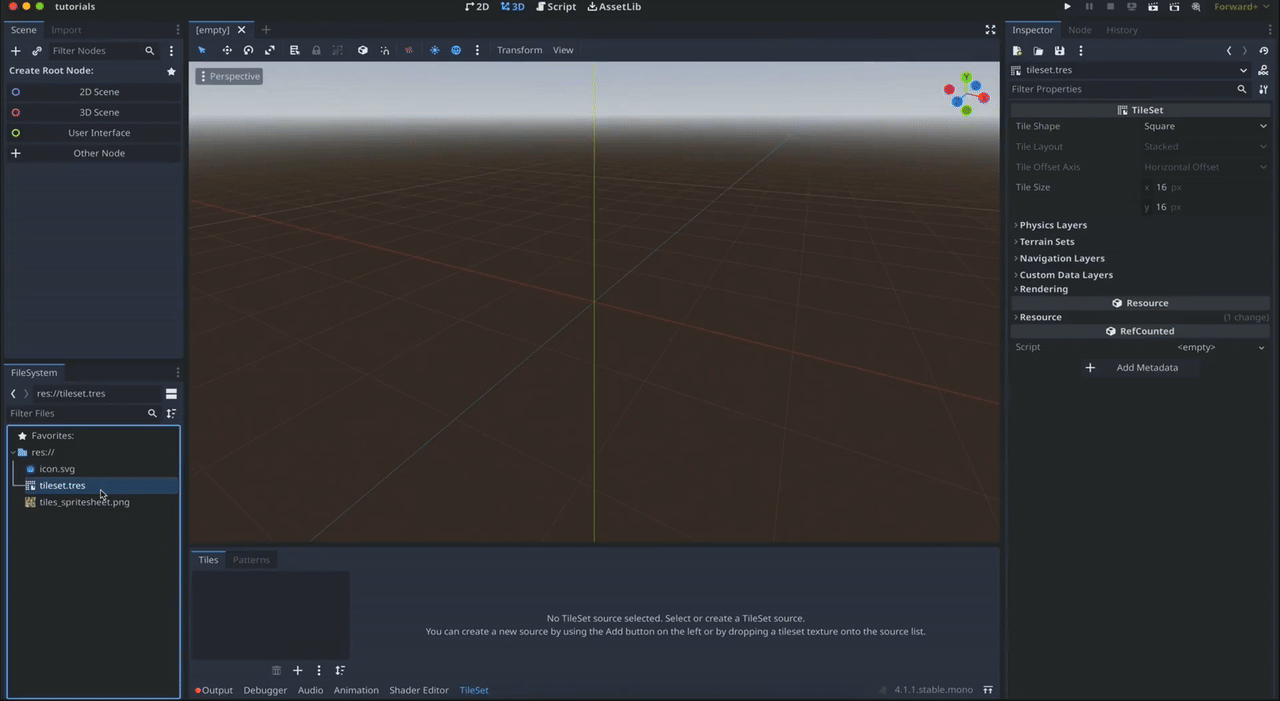
To create a new tileset object in Godot, we can right-click in the FileSystem dock and create a new Resource, of type TileSet. You'll notice that as soon as you've saved your TileSet resource, Godot opens a new panel at the bottom of the screen with tileset-specific controls.
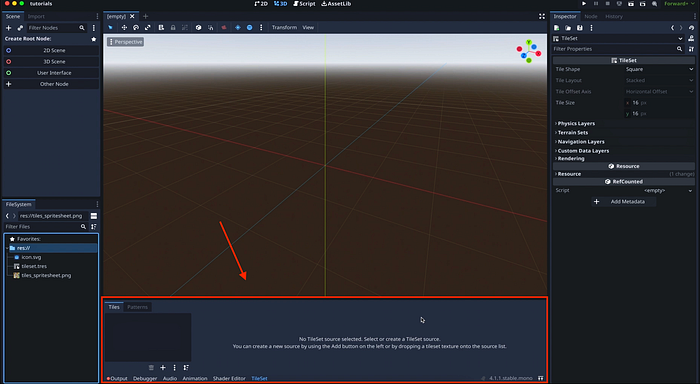
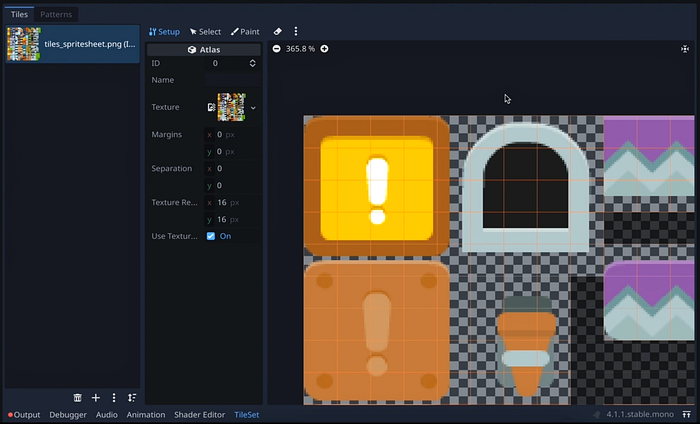
In particular, the left area is where you can add or drag your reference tile set image, so that Godot knows what to use as sprites. When you drag in the image, Godot will offer to auto-generate tiles, and you'll see that the right part is now filled with our tile set image, and a large grid of little cells.
These cells are the sprites of our tileset, that Godot auto-generated based on the default setup options we can see in the middle of the panel, in the Setup section.

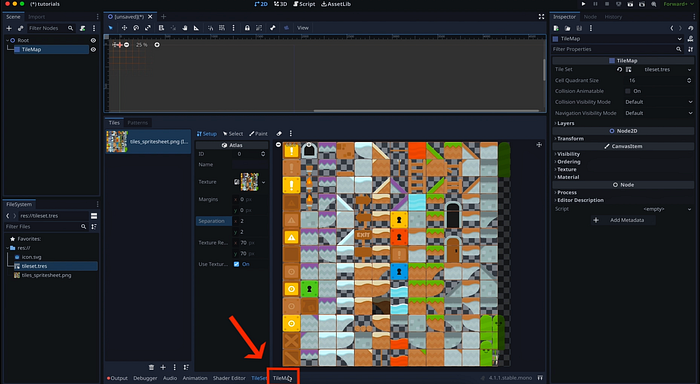
Now the issue is that, if we zoom in, we see that for now those tile cells don't really match our image. For example, the block in the top-left corner is subdivided in 5 cells, instead of being just a single cell.
That's because depending on your reference image, you might need to adapt the size, the padding and/or the margin of the tiles in your TileSet resource so that they properly match the visuals. Otherwise, you'll basically end up with an unusable set of incomplete tiles that need to be reconstructed manually — and you'll lose all the benefits of a tilemap! ;)
Now, to be honest, finding the size of the cells, their padding and all can be a bit of a guess game. Sometimes, you'll also have the tiles isolated in your reference pack and, in that case, you can directly check the expected size of each tile. But you might still need to test a few things until you've probably tweaked your TileSet settings to match the image.
In the specific case of Kenney's Platformer Art tileset image, the tiles are 70px, and they're separated by 2px in both the X and the Y directions.
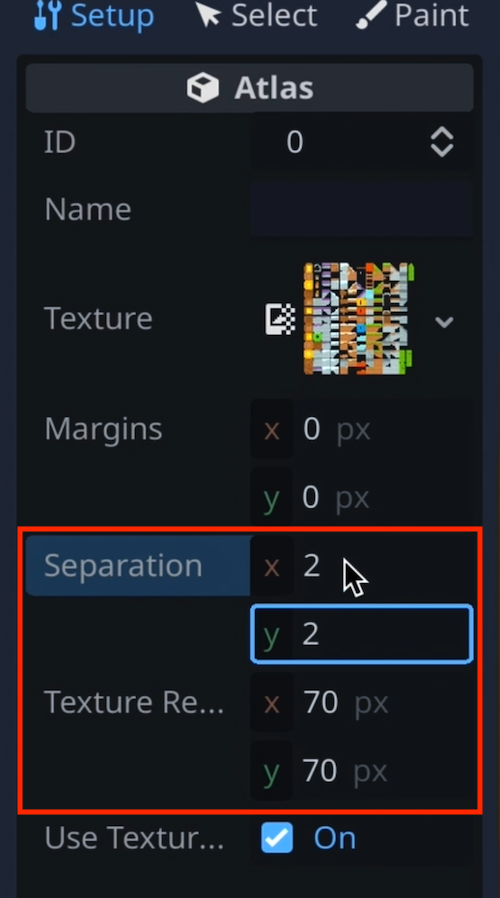
If you have to change the size of the tiles like here, don't forget to also change those values in the TileSet resource itself, otherwise you'll get some inconsistencies when you try to use this tileset in a tilemap:
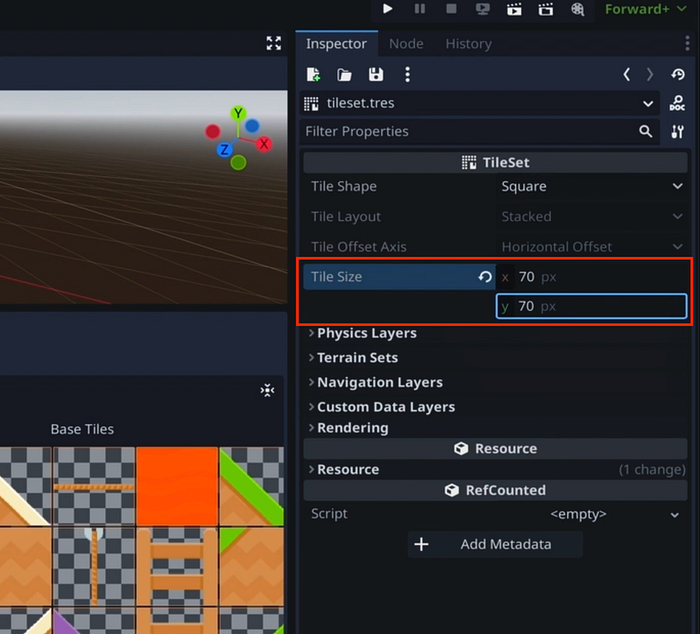
But anyway — you see that now, with those updated settings, the grid cells indeed match the sprites and we're ready to actually use this tile set to make a particular tilemap, and create our first 2D level!
Creating a TileMap
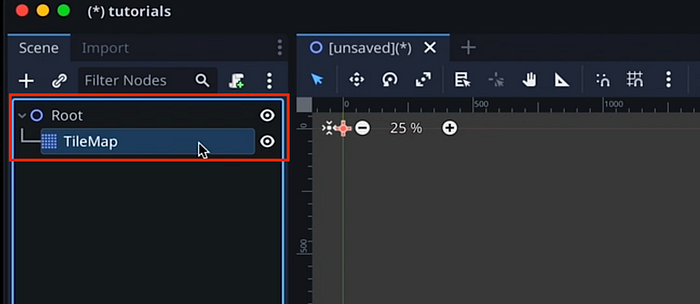
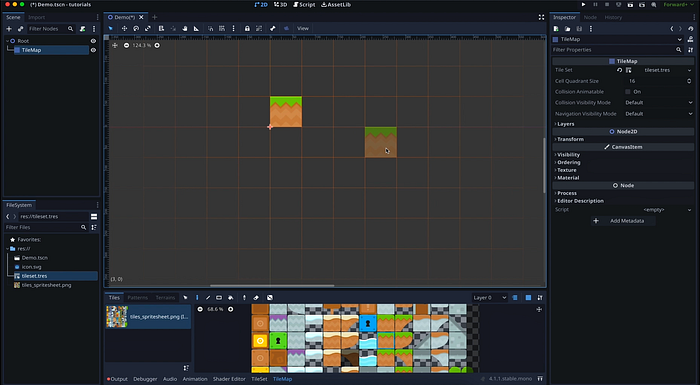
With our tileset ready, it is now time to actually use it to paint a 2D level. This time, because it is scene-dependent, we're not going to create a global project resource — a TileMap is a 2D node that lives in a scene.
So let's create a new 2D scene and, inside, add a TileMap 2D node:
In order for our node to know what tileset to use, we'll simply drag our TileSet resource in its Tile Set field:
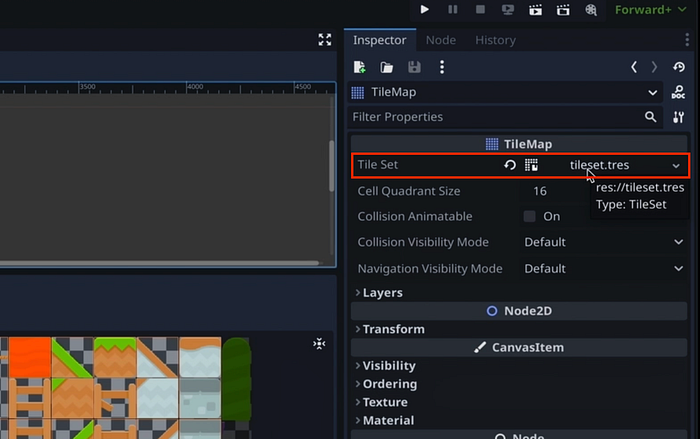
And you see that we now also have a new tab to the bottom panel for this specific tilemap, where Godot reinjected our pre-sliced tile set:
This is basically like a colour palette, except that it's a sprite palette: by using the edition tools at the top, and by clicking on the various cells inside our reference tile set, we'll be able to paint, remove and modify tiles directly in our 2D scene to build our level.
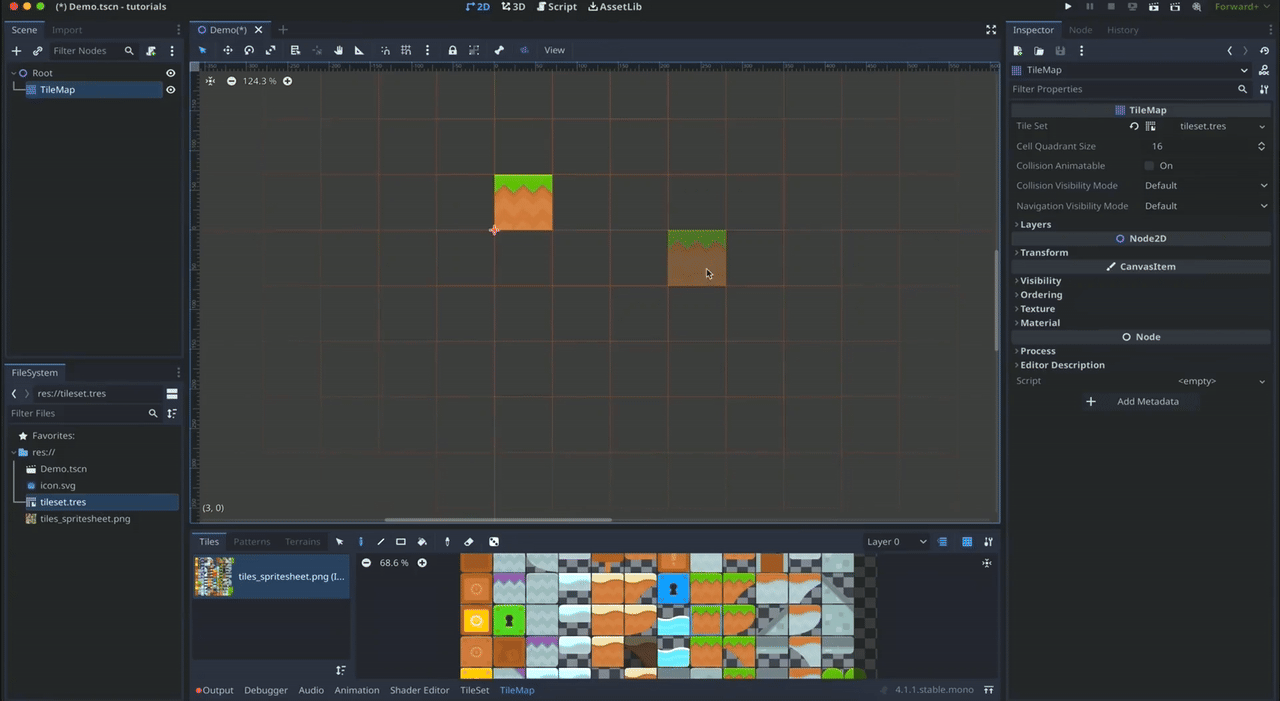
To do this, it's quite easy: let's just click on one of the grass tiles in the set, make sure we're using the paint tool over here, and move our mouse to the 2D scene above to start and paint our level… You see there is an orange grid to help us place our tiles, and we just have to left click to place our block.
Here are some quick tips and details on how to paint tilemaps in Godot:
- You can go and click on another tile in the set to quickly change the tile type.
- You can even use shift to select multiple tiles that are next to each other in the tile set, and directly place both those tiles next to each other in the tilemap!
- If at any point you want to replace some tile with another, simply pick your new tile and re-click on the old one to override it.
- The select tool allows you to select and move tiles that have already been placed.
- The line tool lets you quickly draw a whole straight or diagonal of the same tile.
- The rectangle tool does the same but for a square area.
- And finally the bucket fill tool is useful to quickly fill zones that are either contiguous, or just the remaining white spaces in the tilemaps.
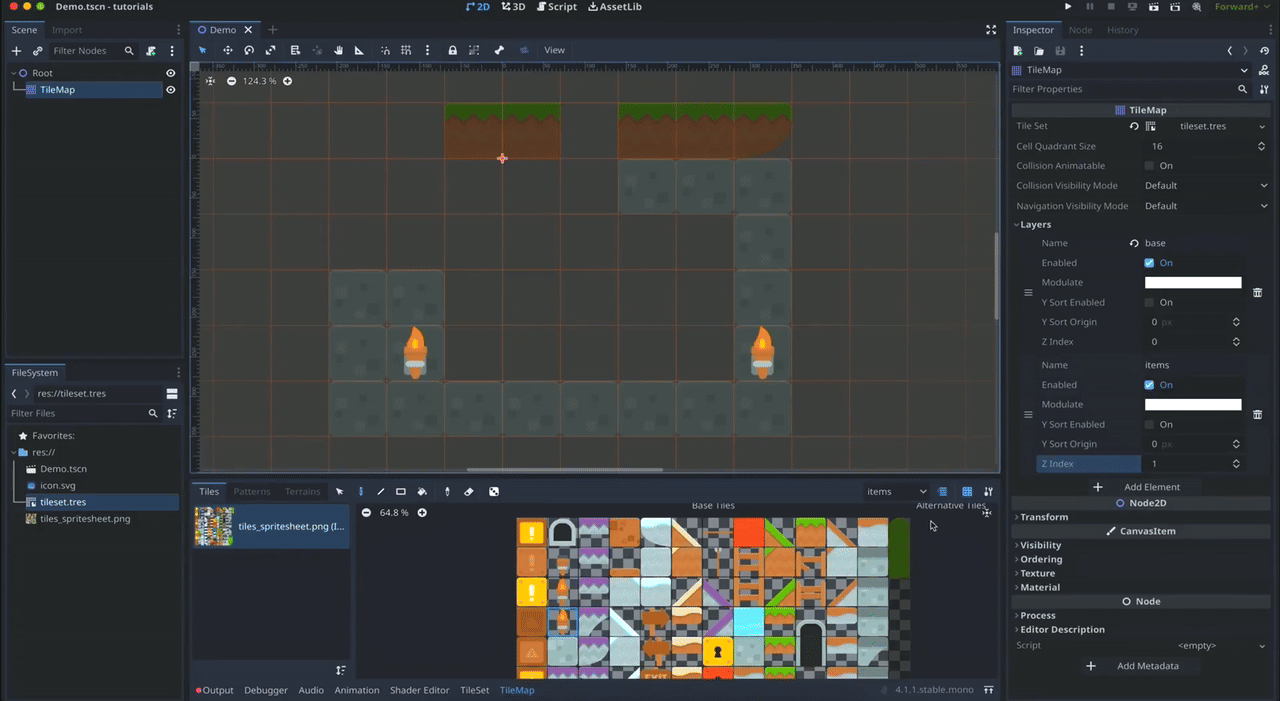
Also, by default, a tilemap has only one layer. But if you want to put some objects on different planes (either because you want them to visually overlap properly, or because they should have different behaviours for example), you can go to your TileMap node Inspector panel, open the Layers section and click the Add Element button.
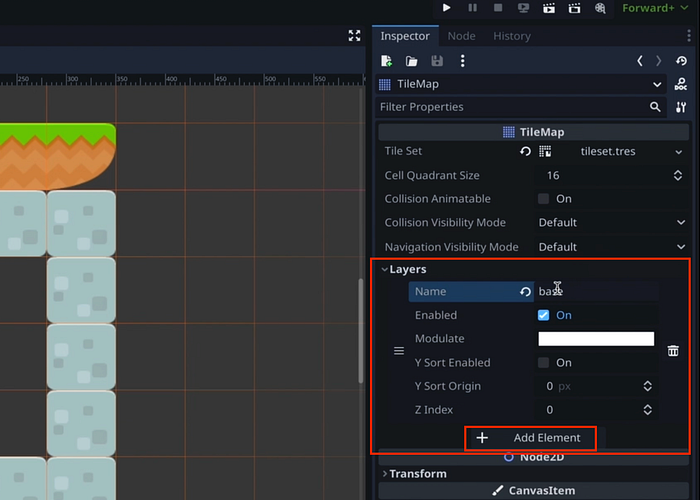
But if you have multiple layers, just be careful when you're painting to pick the right layer in the tilemap bottom panel, by using the dropdown — otherwise you might overwrite a tile instead of stacking them ;)
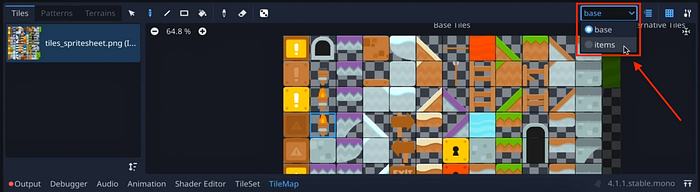
You can also show or hide a specific layer, and you can use the Modulate colour field to apply a global tint on the tiles of a specific layer:
Alright, all that's pretty cool and we now have a great tool for setting up our 2D levels :)
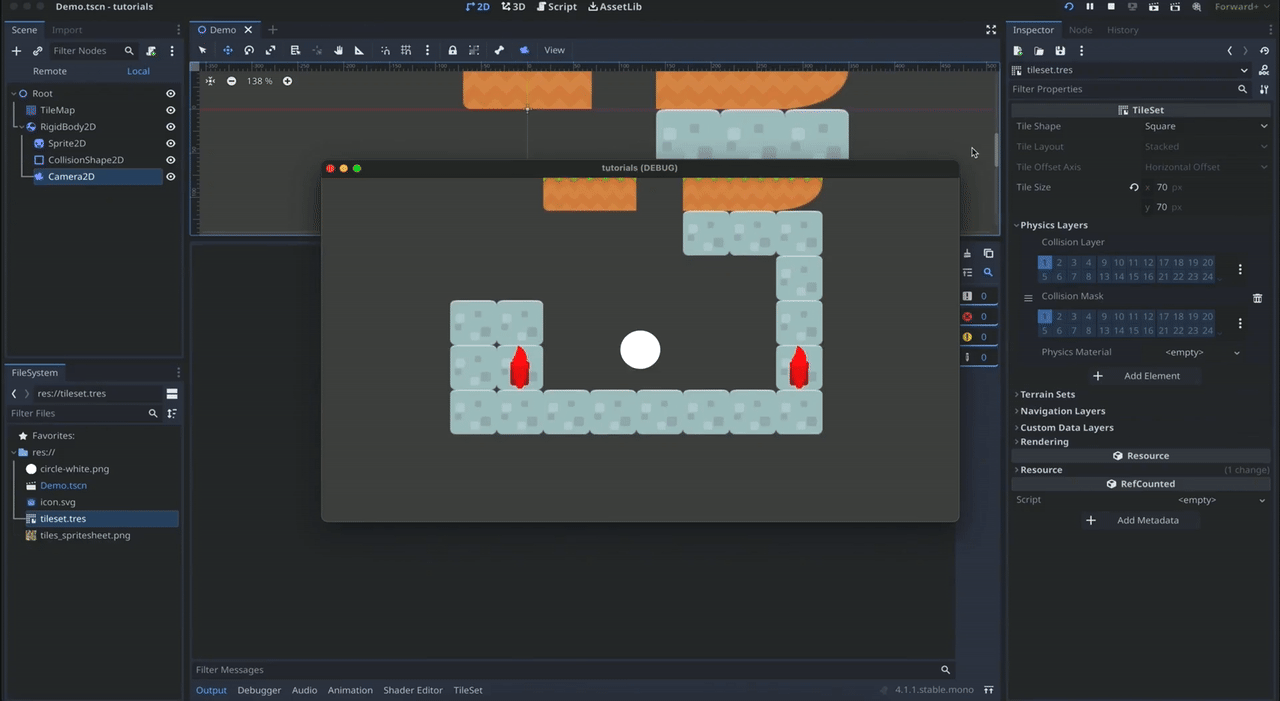
But there's a problem! If I take a 2D rigidbody and I place it just above my tilemap, as if it were a player subjected to gravity for example, then when I run my game you see that the object just goes right through the map.
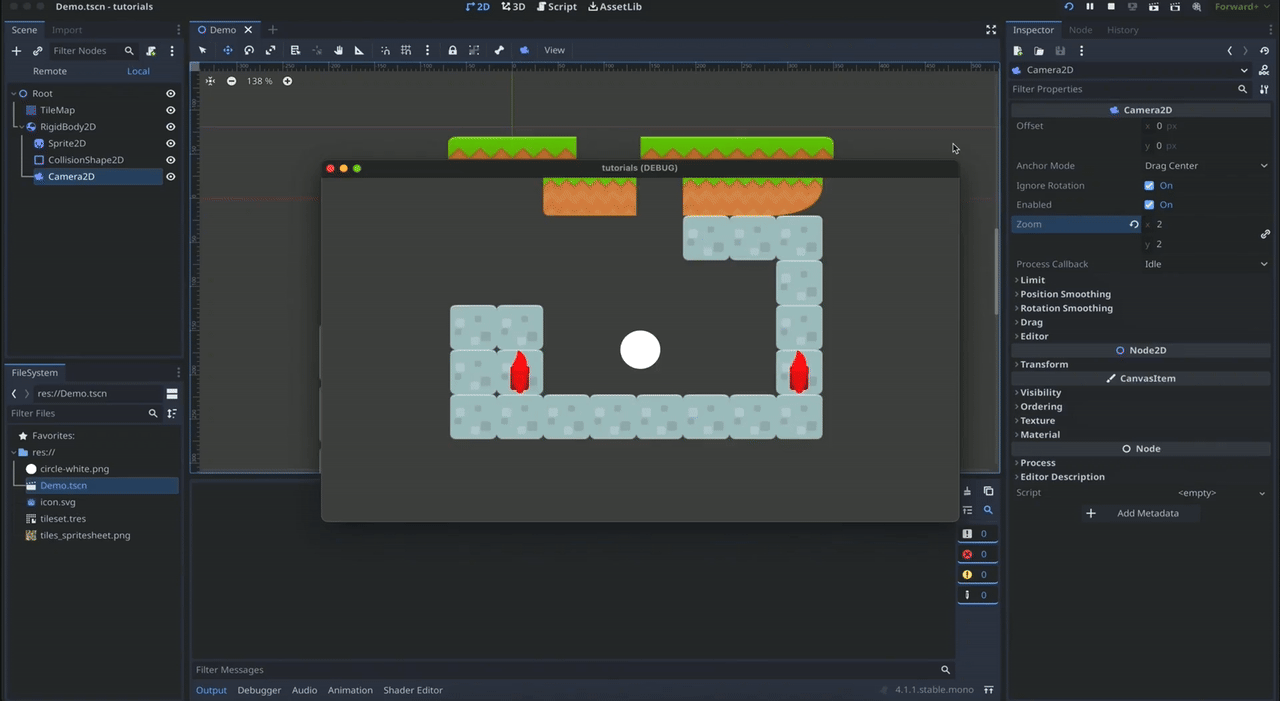
And that's because, for now, our tilemap doesn't have any collisions…
Adding some collisions
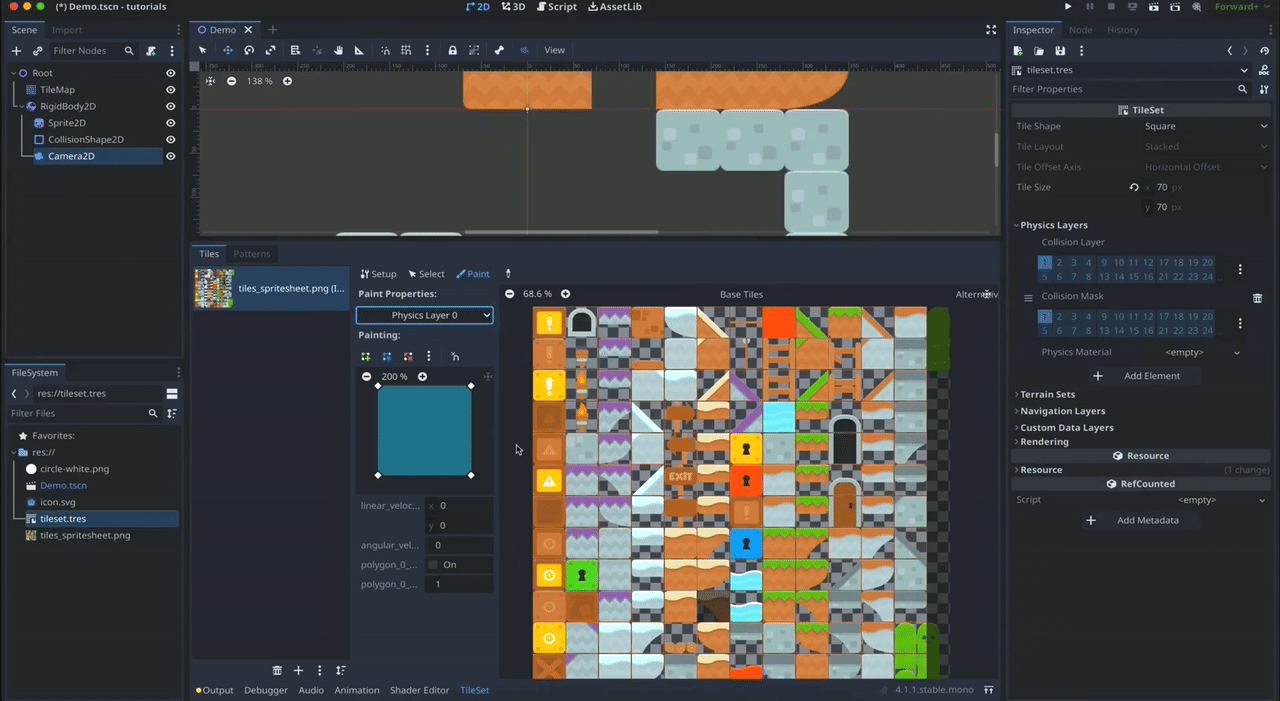
To add physics to our tiles, we actually need to modify our TileSet resource — because remember that this is the centralised reference that all tilemaps share, so this is where we define all the global data, such as tile collision.
If we double-click on our TileSet resource to show its Inspector, we see there's a Physics Layers section. Let's click on the Add Element button inside. You see this create a new layer with some specific physics collision and mask layers.

But to really apply this collision layer to our tileset, we need to tell it which tiles use collision, and what their exact collision shape is if need be. So let's go back to the tileset editor; then, let's switch to the Paint section and, in the dropdown, choose our new physics layer:
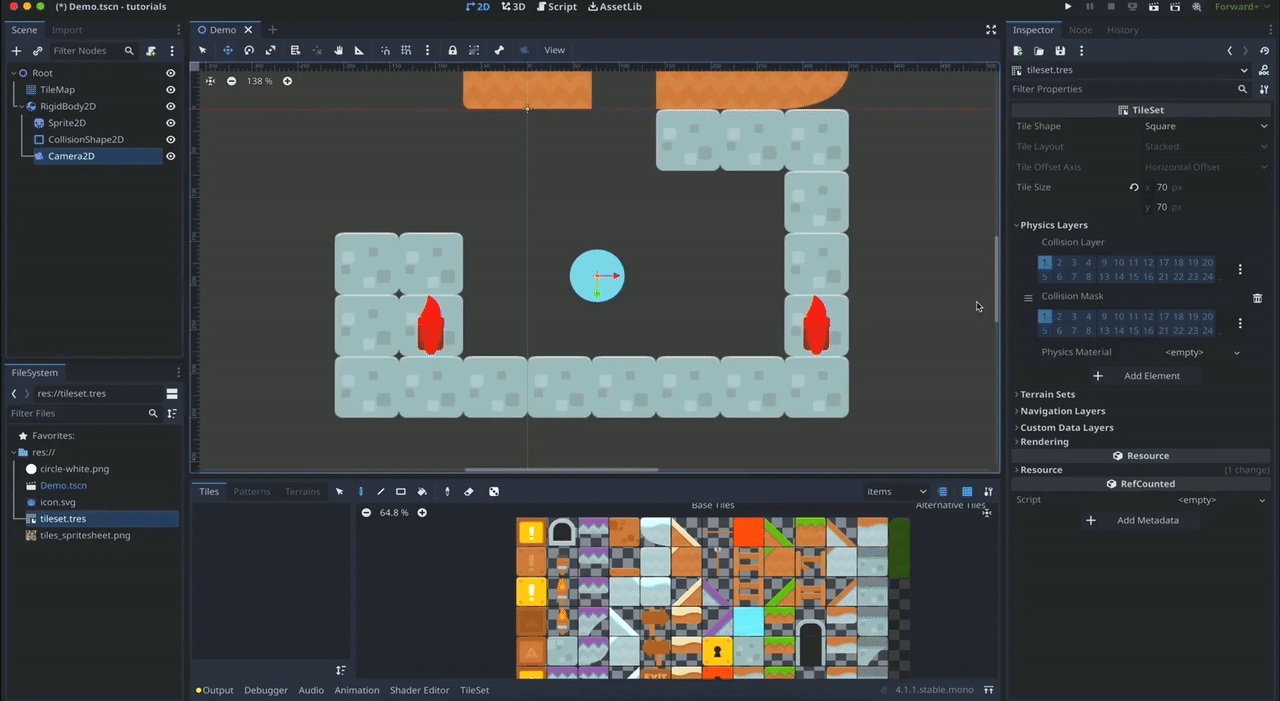
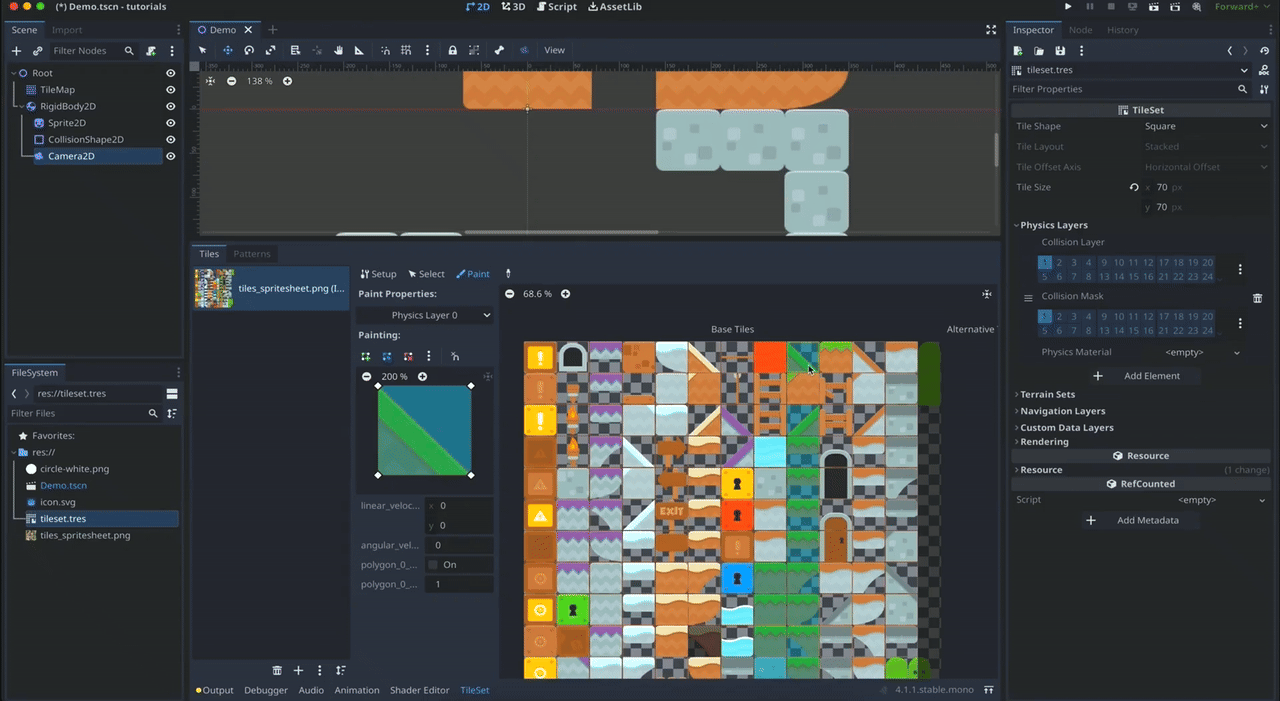
Now, we just need to click on our various tiles to set collisions on each one.
Note that if your tile is not a full square, the default collision shape won't match, so you'll need to readapt it a bit manually. To do this, just go to the small inspector on the left and, in the preview of the collider, add, move or delete points to match the tile's visual.
And that's it! You see that if we replay the game, the ball now falls and stops on the ground — so we've successfully made a basic 2D level :)
Of course, there is still more to learn about tilemaps, such as non-square tilesets, automatic navigation using terrains or pre-made patterns — so don't hesitate to drop a comment if you want me to make another tutorial on those additional features :)
Conclusion
But anyway, here you go: you now know the basics of importing, creating and using 2D tilemaps in Godot!
I hope you liked this tutorial and that it will help you create your own 2D levels. If you did, feel free to clap for the article and follow me to not miss the next ones — and of course, don't hesitate to drop a comment with ideas of Godot tricks that you'd like to learn!
As always, thanks a lot for reading, and take care :)
To read more of my content, and articles from many other great writers from Medium, consider becoming a member! Your membership fee directly supports the writers you read.