

Took me a while to figure this out. Nearly 2 months in fact. Started questioning my sanity for looking up the solution to this problem, but I finally did it! I was able to figure out how to do SSL Pinning for iOS with the Ionic framework.
I am writing this, just in case I need to get back into it myself, or if there are some unlucky souls very deep down the nook and crannies in the StackOverflow/Google hole looking for a solution to this problem. Here you are:
What is SSL Pinning?
If you want to know more about what is SSL Pinning, please have a readthrough of the article below.
What do you need to know (Pre-requisite)?
- Mobile application development with Ionic is essential here. If you don't know about Ionic, but is very interested in mobile app development or you are new to Ionic, you can check out the following page:
2. You need to know how to do HTTPS POST/GET requests. If you are unfamiliar with this and it is an alien concept to you, then this article is just simply not for you.
What do you need?
- An Ionic app ready to implement SSL pinning
- I've built this Ionic app with Capacitor, but I think the approach is exactly the same with Cordova because this is using a Cordova plugin
- SSL certificate for your server (Make sure you have an HTTPS server with an SSL certificate ready to go)
- Make sure you have this plugin (https://ionicframework.com/docs/native/http) installed on your Ionic app
- Xcode (well, because you know, iOS)
- An x509 formatted .cer file (More on this below)
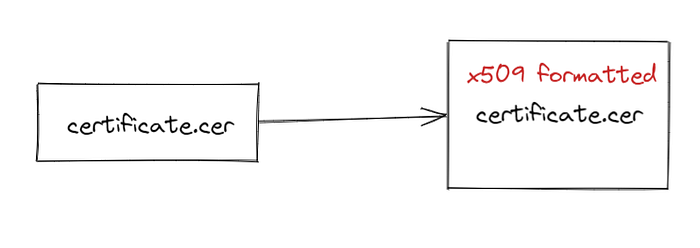
How do you generate an x509 formatted .cer file?
If you place your certificate.cer file inside the certificate and it works, then, fair to thee, all is well.
But sometimes, the certificate.cer file does not work and this is where it drives you crazy to look for a solution to this problem.
You already have the .cer file, then it should work right????
NO → this took me 2 months to figure out ok.
So how do you solve this problem and how do you proceed to ensure that the certificate.cer that you have received works.
The answer is to make sure that the certificate.cer file that you have received is formatted in x509.
How can you tell if you have an x509 formatted certificate.cer file? Run the following command:
openssl x509 -in certificate.cer -inform der -text -nooutMore often than not, a whole bunch of lines will be spewed out. It could be a good thing, BUT, if the result begins with something along the lines of 'Unable to load certificate…'
Then, you do not have an x509 formatted .cer file. IT IS IMPORTANT that you will need to run the following commands to generate an x509 formatted .cer file:
openssl x509 -in certificate.cer -outform PEM -out cert.pem
openssl x509 -outform der -in cert.pem -out certificate.cer
Run the commands one after the other and you can test again with the previous openssl command to check whether your certificate.cer file is x509 formatted and works correctly.
If all is good, then you can move on.
How to do SSL Pinning in your Ionic App?
STEP ONE
Make sure you have activated SSL Pinning when your app first load. In my case, this was done at app.component.ts inside the constructor like so:
Of course, this goes without saying, you will need to install Cordova Advanced HTTP for Ionic Capacitor. The guide to install this plugin is available here:
STEP TWO
Run the following commands:
ionic build
npx cap add ios (run only once)
npx cap copy ios
npx cap sync ios
These commands will generate an ios folder that will contain your Ionic iOS app. Now all you need to do is place the certificate.cer file (the x509 formatted .cer file! Remember this!) into the following folder:
ios/App/App/www/certificates/I know some might argue that there is an easier way to do this, by placing the certificate file in the assets folder. I want to really make sure that the certificate is really in its place, so I usually put it in manually myself.
STEP THREE
Build your app with Xcode. You can try to run it on an emulator or just try it out on a device connected to your Mac.
After building your app, you should be able to check whether your SSL Pinning works. I've tried on an emulator and on a local iPhone, and the SSL works. That's it!
Conclusion
This is from my personal experience: I cannot stress enough that it took me a while to figure this problem up. By writing about it, this is more of a therapeutic exercise for me in addition to becoming a reminder of how I solved this problem, for myself, and for you too, in the future.
It's really a great feeling to be able to 'beat' a problem to a pulp. A fulfilling sense, similar, I believe to scoring a goal in the World Cup Final against Brazil. Such is the life of a mobile app developer.
Thank you and Selamat Mengaturcara!
More content at plainenglish.io. Sign up for our free weekly newsletter here.