
In some scenarios, you may need to upload files to cloud services. In this post, I will demonstrate how to integrate Outsystems with an AWS S3 bucket.
Use Case: A customer needs to upload files to an S3 bucket for easy access by teams in various locations, with minimal risk of data loss. The long-term goal is to archive the uploaded files with being able to versioning them.
What will be covered: - Creating an S3 bucket in AWS - Managing roles in IAM - Creating an API with the PUT method using API Gateway - Creating a REST API connection in Outsystems
Prerequisites: - Basic understanding of cloud services (knowledge of AWS is advantageous) - Familiarity with basic operations in Outsystems
This post will be detailed and long, so be prepared =)
Create S3 bucket in AWS
What is S3?
Amazon S3 (Simple Storage Service) is a scalable and secure cloud storage service designed to store and retrieve any amount of data from anywhere on the web. It offers high durability, availability, and performance, with features like data encryption, versioning, and lifecycle management. S3 is widely used for backup, archiving, data lakes, and content storage and delivery.
Implementation
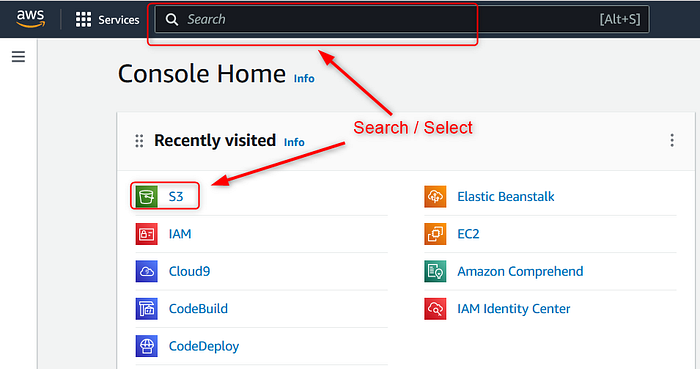
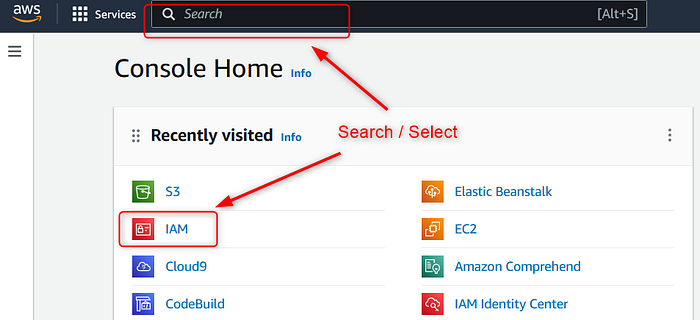
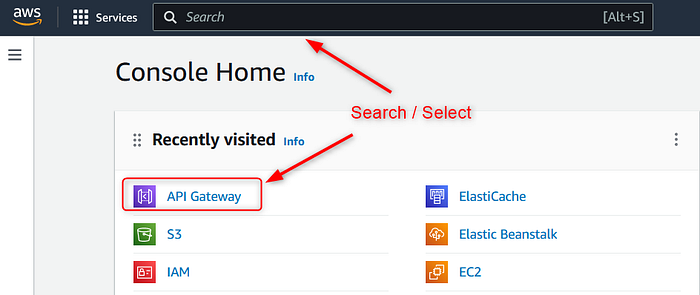
First login to your AWS account, after search or select S3 from the main screen.
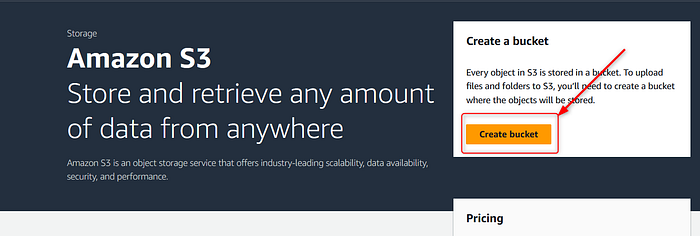
After click Create bucket from the top right of the screen.
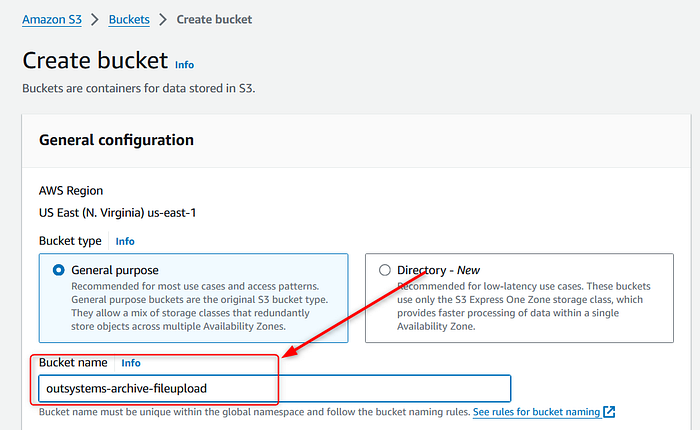
Fill bucket name, make sure you followed bucket naming rules.
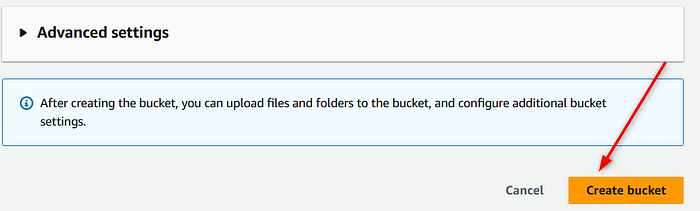
No need to add any more information, click Create bucket button.
We finished with S3 =)
Manage roles in IAM
What is IAM?
AWS Identity and Access Management (IAM) enables you to securely manage access to AWS services and resources. It allows you to create and manage AWS users and groups, and use permissions to grant or deny their access to AWS resources. IAM also supports multi-factor authentication and integration with external identity providers for enhanced security.
Implementation
This part includes 2 main steps, creating roles and attaching policy for the role.
From the main dashboard search or select IAM.
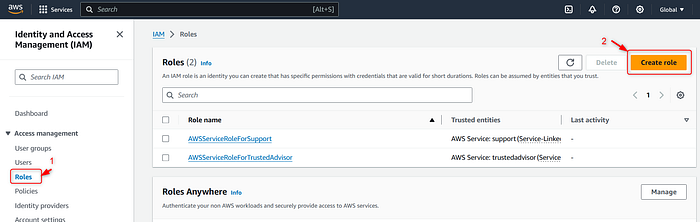
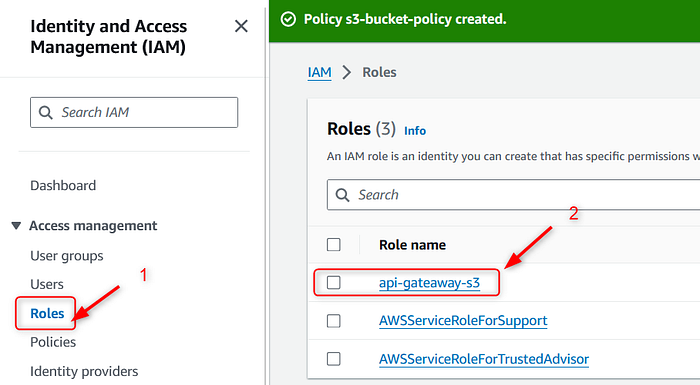
From the list on the left side of menu, select Roles, after click Create role.
From the opened window select AWS service, from "Service or use case" drop down menu select API Gateway, and click Next button.

On the opened screen, click Next button (no additional changes needed)

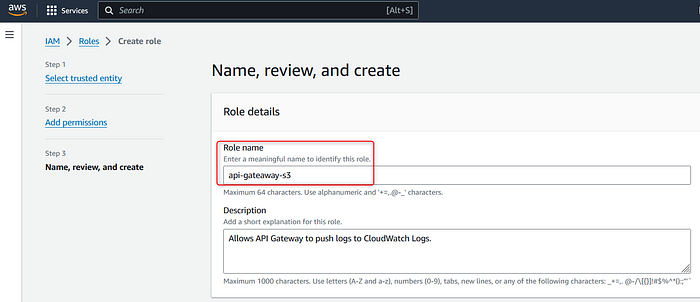
On the final screen, give a name for the role and click Create button.
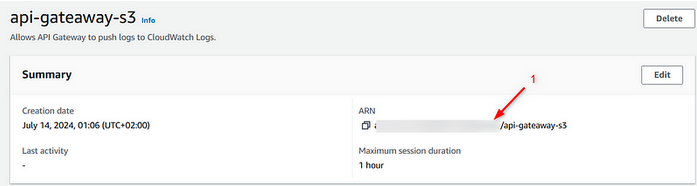
Before moving to the next step, copy ARN number, which will be used in the next step. Now, we finished creating a role.
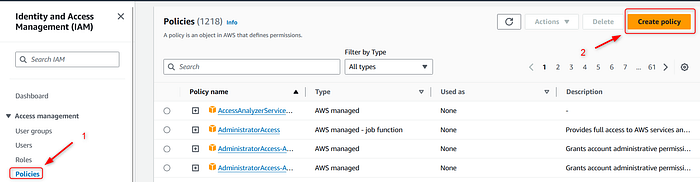
Now we will create a policy and attach it to the role. From the menu on the left, select Policies and click Create policy button.
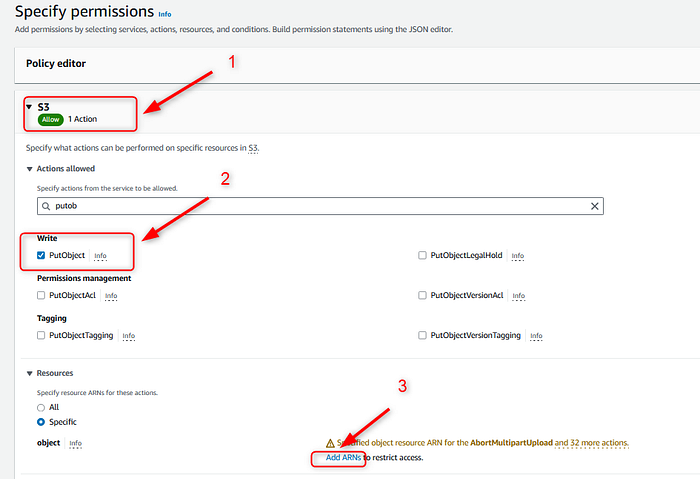
In the opened window select S3 from services drop down menu. From Actions allowed tab search and select PutObject (here you can add more actions, depends on your use case). Finally on the bottom of the screen click "Add ARNs".
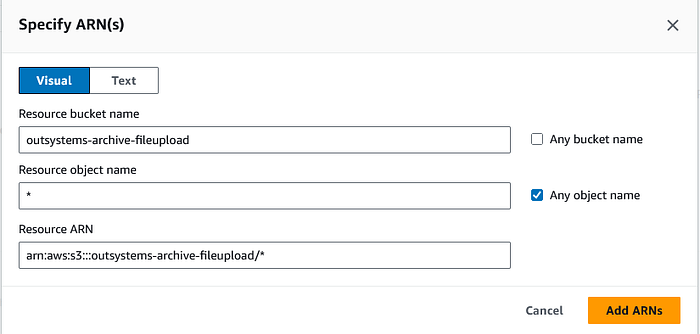
In the pop up menu write your bucket name which you created on the first stage, after write ARN copied text from earlier. Click Add ARNs.
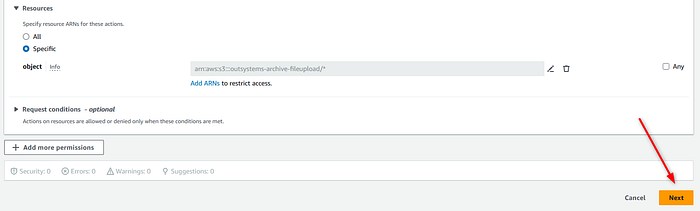
The pop up will be closed, and click Next button.
On the Review screen, add policy name and select Create policy button.

You will receive a success message of your creation the policy. Now we should connect the role and policy which you created together. From the left menu list select Roles and click your created role.
From Permissions policies select Attach policies.

From the search bar search and select created policy, and click Add permissions button.

We finished 2/3 of AWS related tasks, next will be final part of AWS changes =)
Create API with PUT method with using API Gateway
What is API Gateway?
AWS API Gateway is a managed service that allows developers to create, publish, maintain, monitor, and secure APIs at any scale. It acts as a front door for applications to access data, business logic, or functionality from your backend services, such as applications running on Amazon EC2, code running on AWS Lambda, or any web application. API Gateway handles all the tasks associated with accepting and processing up to hundreds of thousands of concurrent API calls, including traffic management, authorization and access control, monitoring, and API version management.
Implementation
From the main dashboard select or search API Gateway.
From the opened screen select Rest API block, and click Build button.

Select New API, give a name for the API and click Create API button.

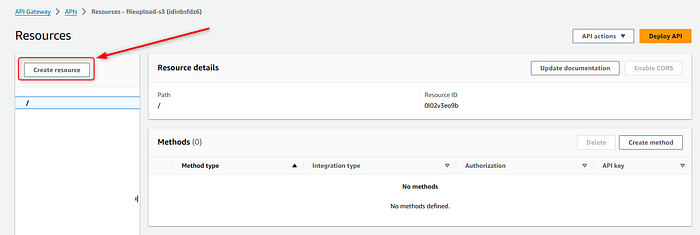
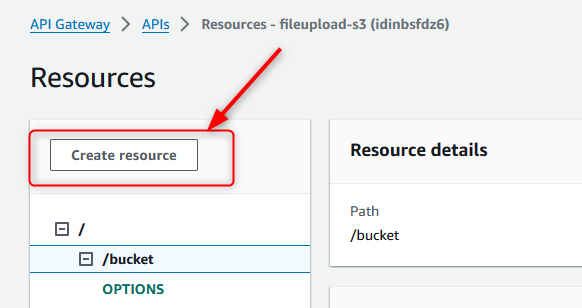
When API created, go to the Resources and click Create Resource button.
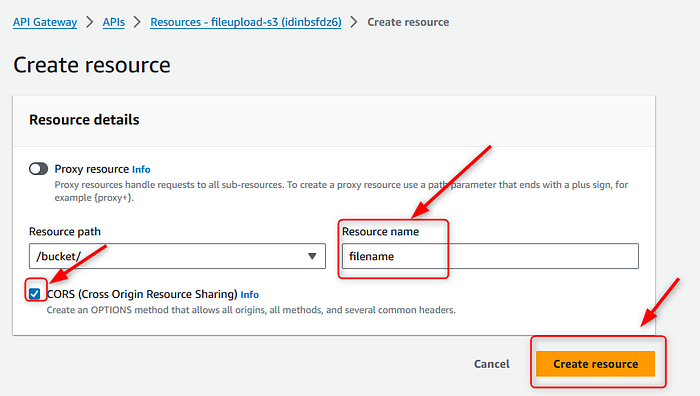
Give a name to the resource and select CORS checkbox. After click Create Resource button.
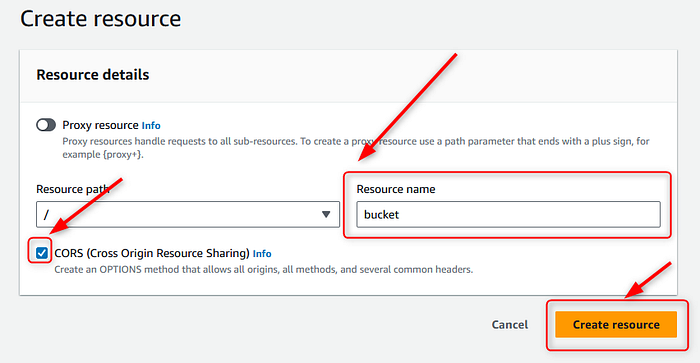
Now repeat the same process for the file which will be saved in the bucket.
Resource name is "filename", it will be dynamic name which will be saved in S3 bucket.
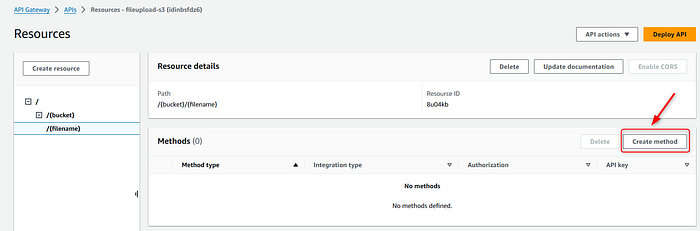
When your second resource is created, we will add a method for the API. Click Create method button.
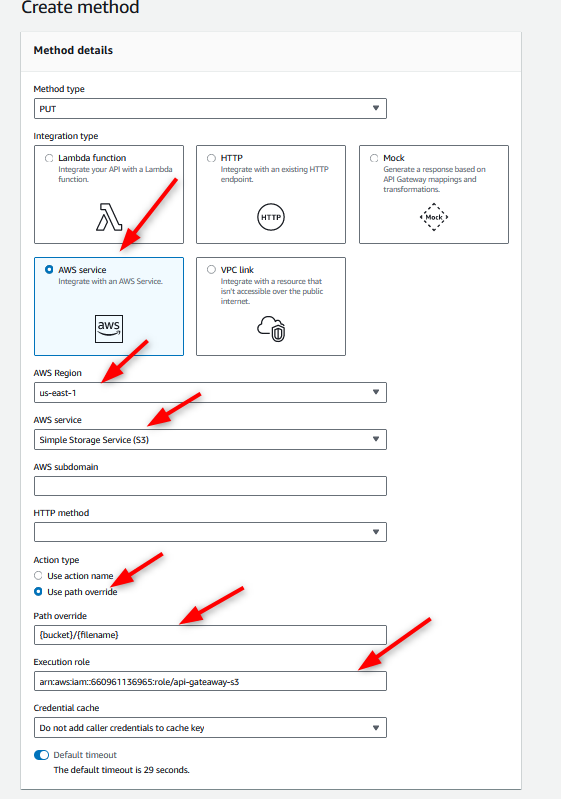
From the opened window select below given options. Make sure that for Execution role you copy pasted ARN text from the role.
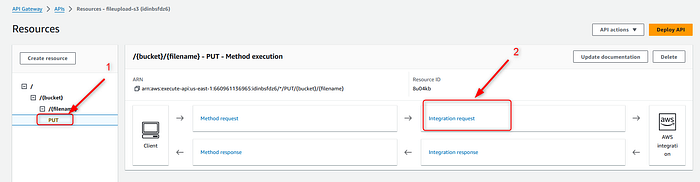
Now from created method, select Integration request.
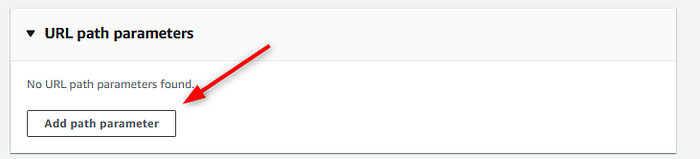
Here, we should add URL parameter which will be dynamic. So select Add path parameter.
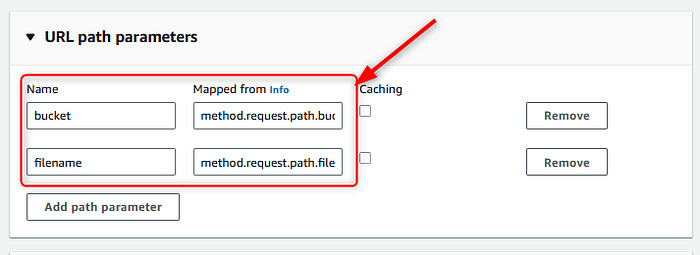
Write below given namings (if you used different naming, make sure you put them right). After that, click Update button.
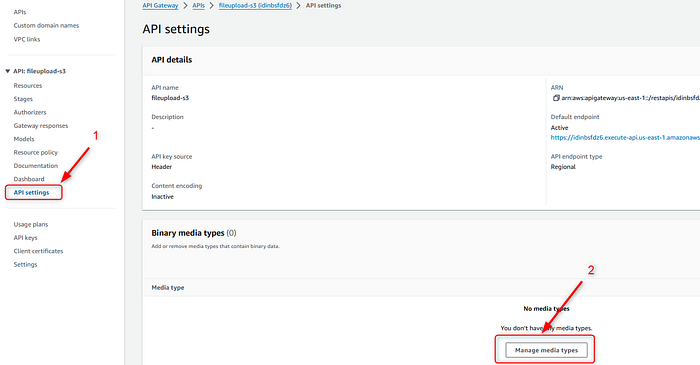
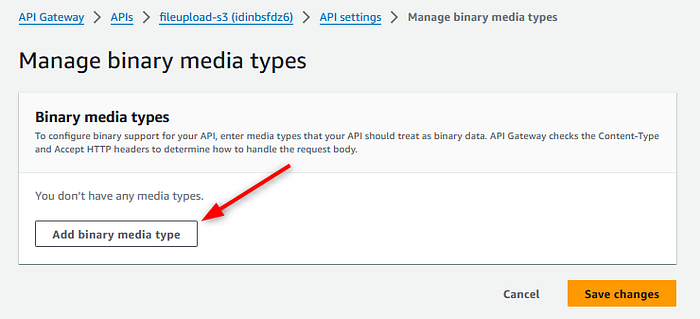
Because we will be using S3 bucket for file saving, we should make sure that our API will accept binary data type. So, go to the API settings tab from the left menu and select Manage media types button.
From opened window click Add binary media type button.
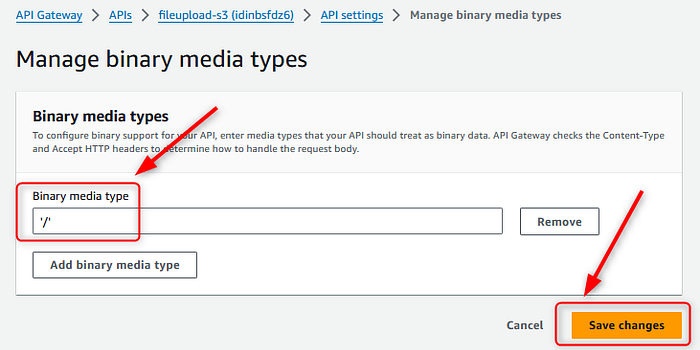
Here you can add one or a few media types, in my use case all types of the files should be uploaded, so I wrote below given condition. Make sure you selected Save changes button.
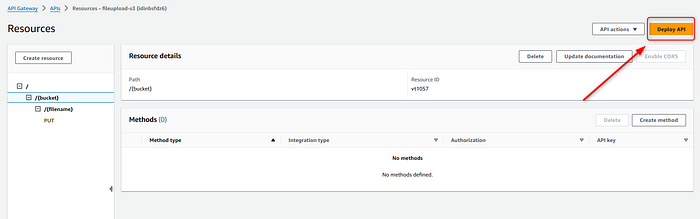
When system successfully implemented all of your changes, go to Resources tab, and click Deploy API.
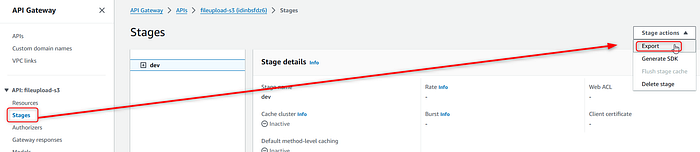
When API is deployed, go to the Stages tab. Here you can expand +dev storage and copy the URL of created method. What I usually do is, exporting them in Json format for being able to run a few tests in Postman. This step is up to you, just make sure you have your URL.
We finished AWS part of the use case. Now let's start working in Outsystems side of the use case.
Create a REST API connection in Outsystems
Outsystems part of the use case is pretty small =)
Go to the Logic tab, right click Rest icon and select REST API.
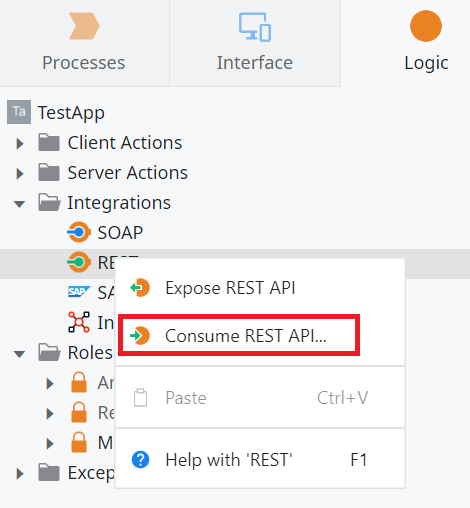
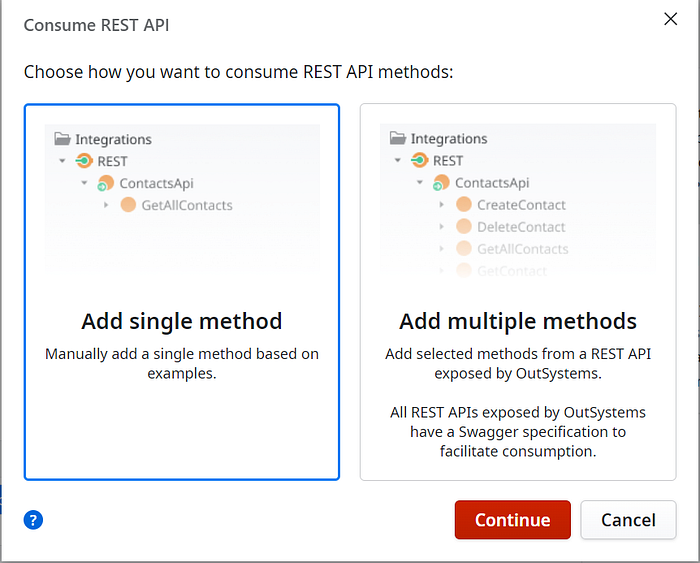
In the opened window select Add single method and click Continue button.
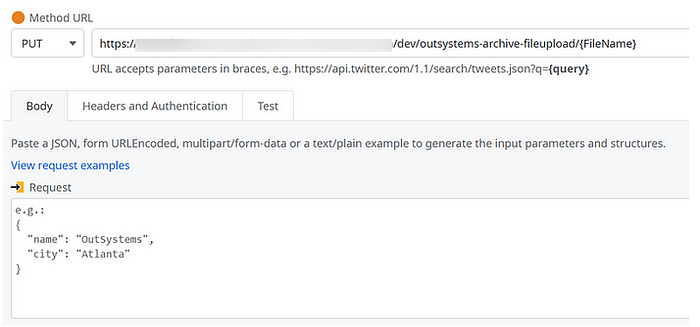
Select PUT method from the drop down, and past URL of API Gateway. As you can see I added scope to the FileName in the end. It will give you an opportunity to have dynamic named files in your bucket. Click Finish button. After that, you may see an error, but it is okay.
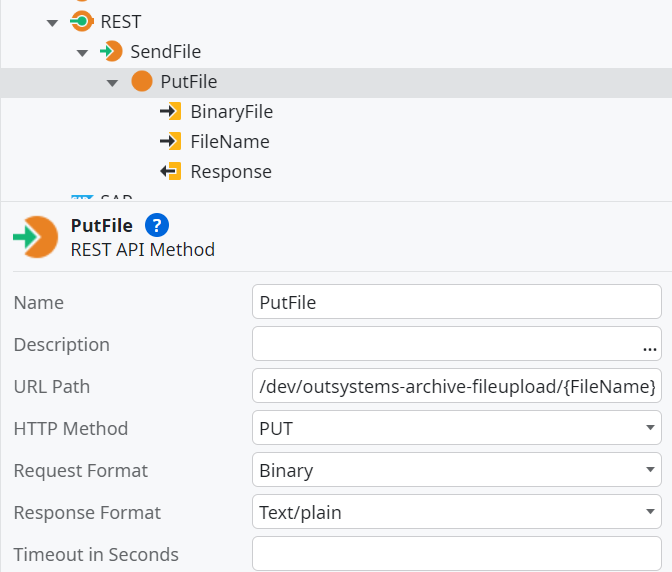
Select just created method, and for Request format change it to the Binary, and Response Format to the Text/plain. It will give an opportunity to send binary files through API. Make sure you have 2 inputs (Binary and Text data types) and one output variable for the response.
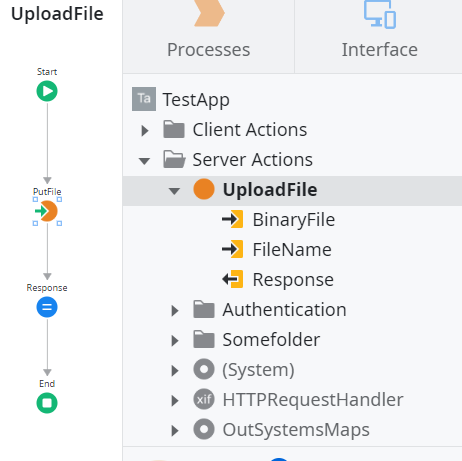
Now, let's create a Serve action with 2 inputs (Binary and Text data types) and one output variable for the response.
Now go to Interface tab, and add to your logic basic file upload widgets.
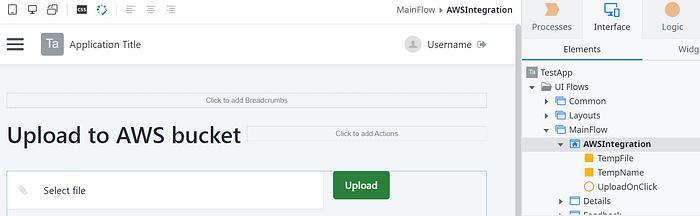
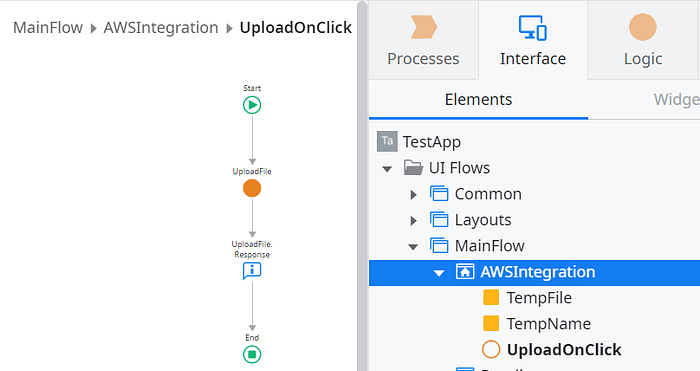
Double click Upload button, and drag and drop Server action which you created, make sure you added Message widget for showing results of uploading.
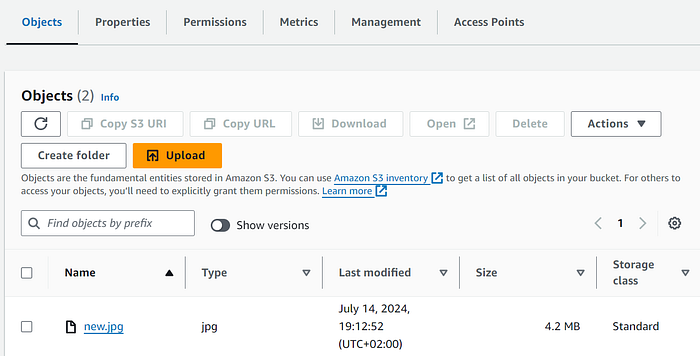
Publish it and test your request. Make sure you checked saved file in AWS S3 bucket as well.
Reminder: If you are testing the integration for learning purposes, make sure to clean up the S3 bucket, roles, and API Gateway connections after testing to avoid incurring additional costs.
That was all. I know it was long how-to post, and hope it was helpful in your developing journal.
Let me know about your solutions and use cases with AWS =).