

Obsidian is a powerful note-taking app that I use on a daily basis. In a previous article, I wrote about how to set up Obsidian for Productivity, specifically for scientific research:
Table of Contents
In this article, I will show you how to use Obsidian for Academic Writing. We will cover the following topics:
- Writing Notes from Papers — A. Connecting Zotero to Obsidian — B. Literature Notes Templates — C. Importing Highlights from Zotero
- Writing a Manuscript — A. Insert a Citation in Markdown — B. Copy MLA Citations to Text — C. LaTeX-like Figures and Section Referencing (NEW: Added Jan/2023)
- Exporting your Text (with citations) — A. Converting Links (Obsidian to Markdown notation) — B. Exporting to PDF, Word, LaTeX
- Creating Academic Documents (NEW: Added Dec/2022) — A. Academic PDF (.pdf) / LaTeX (.tex) Export with Plugin (NEW — Added Jun/2023) — B. PDF (.pdf) Export with CSS — C. Bibliography (.bib) Export with Pandoc — D. PDF (.pdf) Export with Custom Pandoc Template (LEGACY) — E. LaTeX (.tex) Export with Custom Pandoc Template (LEGACY)
Quick Links
These are some quick links and shortcuts in case you need fast access
- Zotero
- Zotero Plugins: – Zotfile – BetterBibtex – Mdnotes
- Obsidian Plugins: – Citations – Pandoc Reference List – Obsidian Enhancing Export – Obsidian Link Converter
- Pandoc - Pandoc-Crossref (for dynamic figure and section referencing)
- Obsidian Shortcuts: – Preferences: CMD + , – Command Palette: CMD + P
1. Writing Notes from Papers
Zotero is a great open-source reference manager commonly used in academia. Only a few people know that it can be used for highlighting papers and annotating ideas on the PDF document itself. With some tweaks, we can get Zotero to sync this information with Obsidian, so as to have a more convenient space to take notes.
1A. Connecting Zotero to Obsidian
To connect Zotero to Obsidian we need to export a .bib file which includes all the information about your papers. It's essentially a JSON-looking file that looks like this:
@article{castorina2021,
  title = {{{PDBench}}: Evaluating Computational Methods for Protein-Sequence Design},
  shorttitle = {{{PDBench}}},
  author = {Castorina, Leonardo V and Petrenas, Rokas and Subr, Kartic and Wood, Christopher W},
  year = {2023},
  month = jan,
  journal = {Bioinformatics},
  volume = {39},
  number = {1},
  pages = {btad027},
  issn = {1367-4811},
  doi = {10.1093/bioinformatics/btad027},
  url = {https://academic.oup.com/bioinformatics/article/doi/10.1093/bioinformatics/btad027/6986968},
  urldate = {2023-01-26},
  langid = {english},
}
To do this, install the plugins:
• Zotfile: http://zotfile.com/ • BetterBibtex: https://retorque.re/zotero-better-bibtex/ • Mdnotes: https://github.com/argenos/zotero-mdnotes/releases/tag/0.2.3
Zotero > Tools > Add-ons > Gear Icon > "Install Add-on from file" then Select the .xpi files and they will be installed.
Then, export your library as a .bib file by:
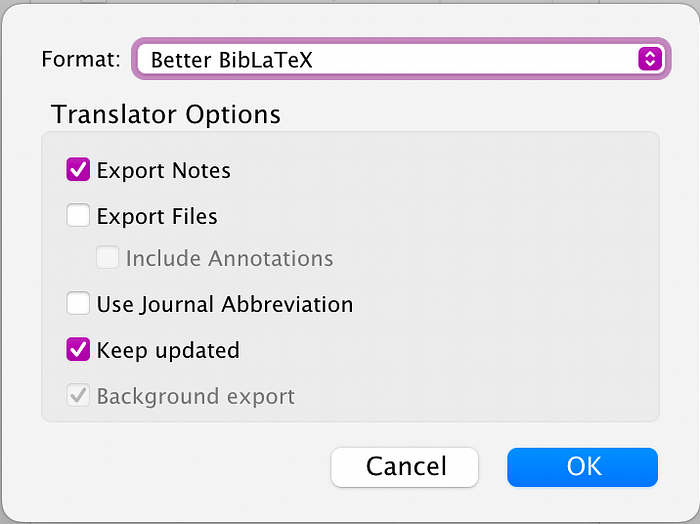
Right Click on the library > Export Library > Select "BetterBibLatex" and Keep Updated (see below)
Choose a path of your choice. It is a good idea to keep it in the cloud if you use multiple machines.
I would recommend you select your Zotero library to export and set it to automatically export "On Change". This way your library is always updated as soon as new papers are added to your library. I suggest you export it to a folder you sync with a cloud service. In this case, I am using iCloud, but you could use any other cloud service.
Another option I would recommend is "Export Notes". Essentially all your highlights and additional notes on papers will be converted to a field in the bibliography file which we can then access from Obsidian.
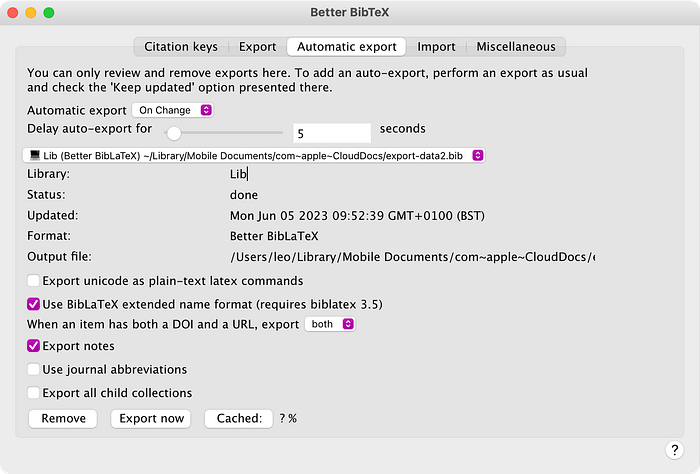
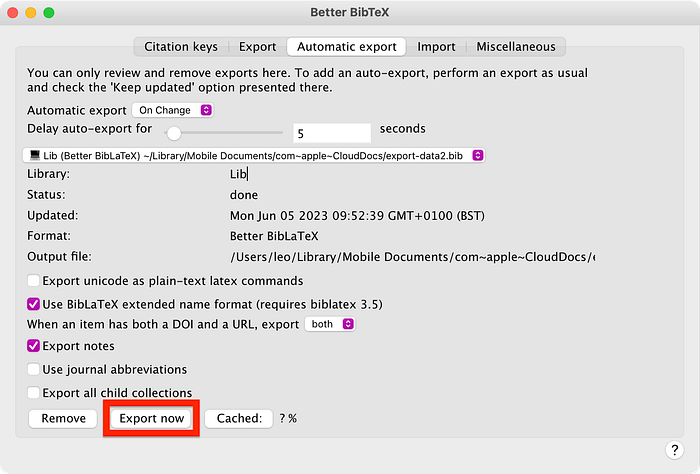
Check that you did everything correct, by going to the Better BibTex Preferences:
Zotero > Preferences (shortcut: CMD + ,) > Better BibTex > Open Better BibTex Preferences > Automatic Export
1B. Literature Notes Templates
Now onto Obsidian, we will need the Citations Plugin. To install simply go to:
Obsidian > Preferences > Community Plugins > Browse Then type "Citation" in the search bar and click on "Enable":
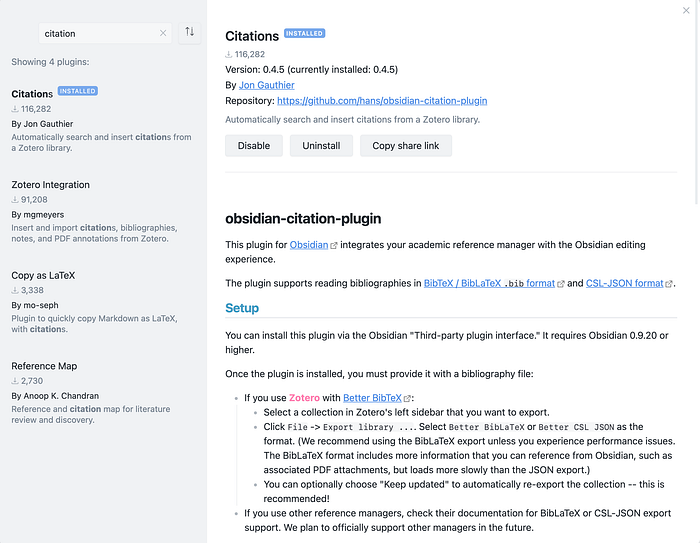
Once enabled, close the tab and go to the plugin page:
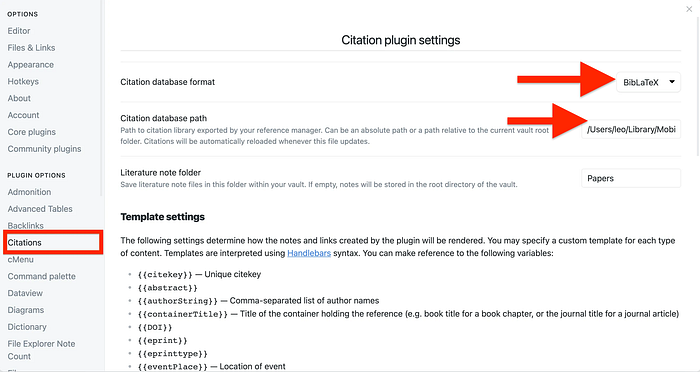
Set "Citation Database" format to "BibLaTeX" and for the "Citation database path" the path to your .bib file.
You can then scroll down to the template settings and customise how your literature notes will be created:
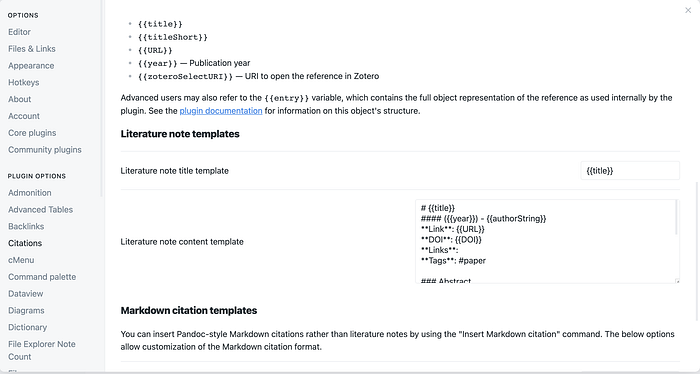
I use the following template:
# {{title}}
#### ({{year}}) - {{authorString}}
**Link**:: {{URL}}
**DOI**:: {{DOI}}
**Links**::
**Tags**:: #paper
**Cite Key**:: [@{{citekey}}]

### Abstract

```
{{abstract}}
```

### Notes
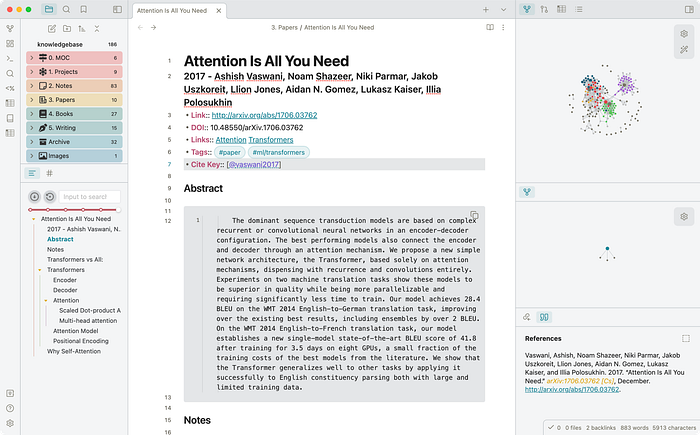
An example of a note generated with this template is shown below:
1C. Importing Highlights from Zotero
What you've seen so far is great, however, if you do most of your highlighting on Zotero PDF files, we can also export them as part of the notes section in the template.
This is especially useful if you highlight on Zotero using a tablet and use their sync utility to sync with your laptop. To do this we use the Mdnotes plugin.
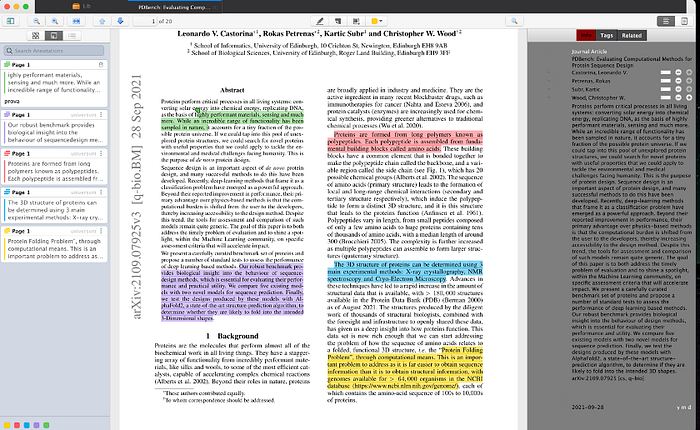
Start by opening a PDF file of a paper in Zotero, and highlight and annotate your document :
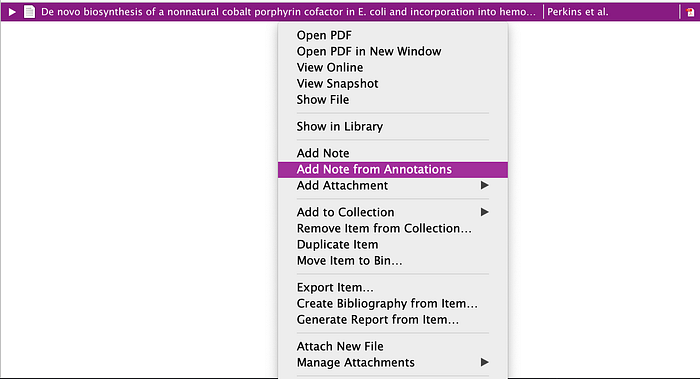
In Zotero then find the paper you have highlighted, right-click, and then select "Add Note from Annotations":
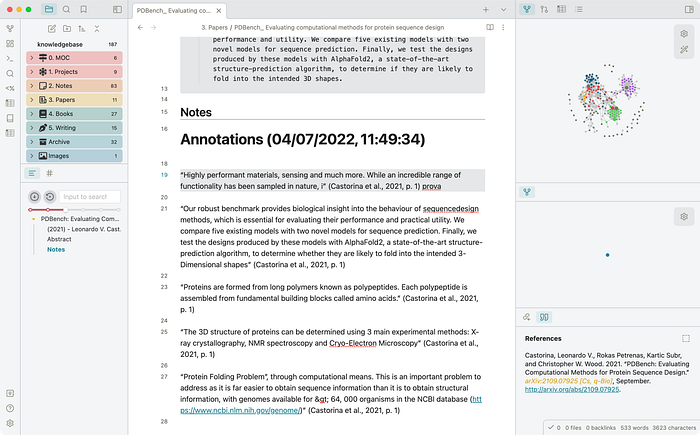
You will now see the annotations appearing as a note under the citation:

In Obsidian, open the command palette with:
CMD + P > "Citations: Refresh Citation Database"

This allows your new papers and annotations to be re-loaded in Obsidian from the bibliography file.
If you're having trouble with the annotations appearing empty, I would suggest exporting the bibliography file again from the preferences menu in Zotero and clicking "Export Now":
2. Writing a Manuscript
Overleaf and Latex are pretty well-established tools for writing papers. Here, I want to make the case for Obsidian for writing papers. For instance, you can convert your documents from markdown (Obsidian document format) to Word, LaTeX, or PDF, with live citations.
I find this especially useful at the early stages of writing when all my literature notes and ideas are in Obsidian, and the shape of the manuscript will change a lot. This is also great if you are making a poster in Inkscape, Sketch, or PowerPoint, as you can export your poster content to a Word document (including the citations).
If you want to proceed you'll need to install Pandoc. In my experience, installing Pandoc with Brew is much easier if you are on macOS.
2A. Insert a citation in Markdown
If you have installed the Citations plugin in Obsidian, inserting a citation is as simple as:
CMD + P > Citations: Insert Markdown Citations
You'll see a menu like the one below:
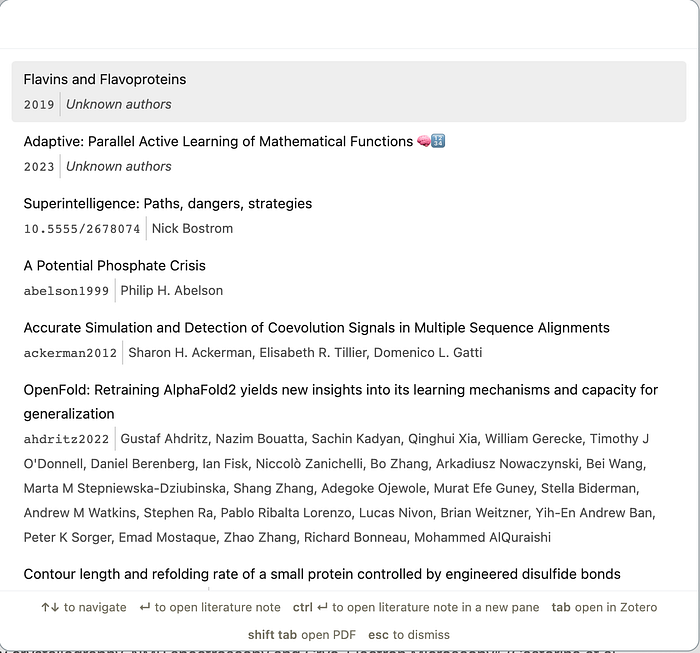
In this menu you can search through your bibliography file. You can then add citations to a document. You can customise the way they look from the Citations plugin preferences.
2B. Copy MLA citations to text
If you create a literature note with the Citations plugin or you include a markdown citation in a document, you can use the Pandoc Reference List plugin to display active citations for the document:
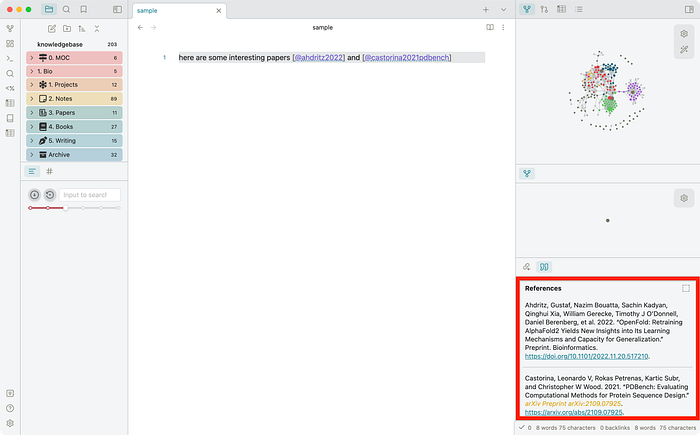
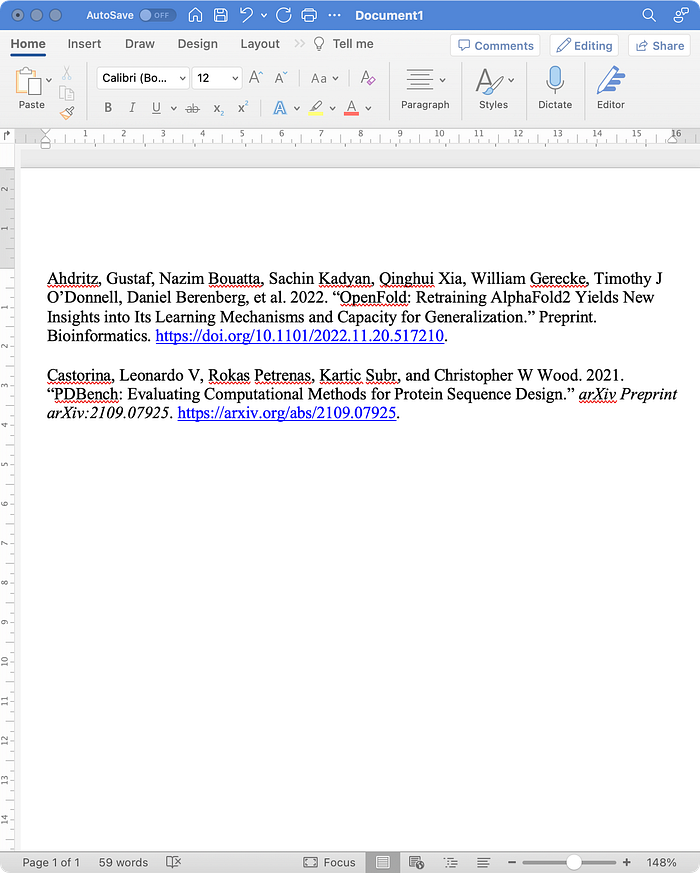
This can then easily be copied (with formatting) into Word:
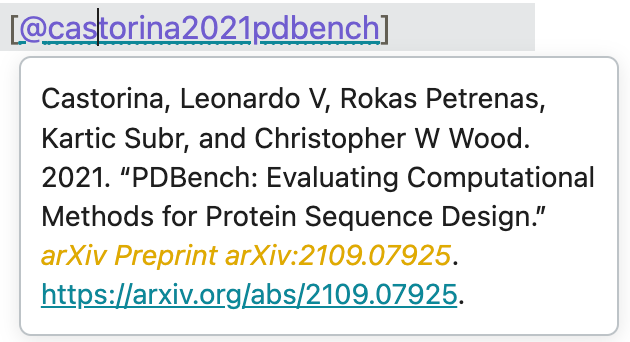
Your in-text citations will also be rendered when you hover on them:
You can install the plugin from Obsidian preference pane as explained earlier. I set up the plugin as such:
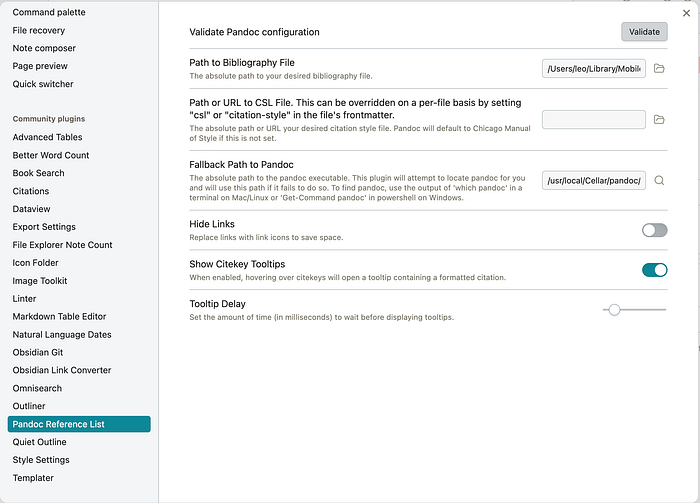
Make sure the path to the Bibliography file and pandoc are correct. If you are unsure about the pandoc path, open the terminal and type :
>>> which pandoc
/usr/local/bin/pandoc
2c. LaTeX-like Figures and Section Referencing [NEW]
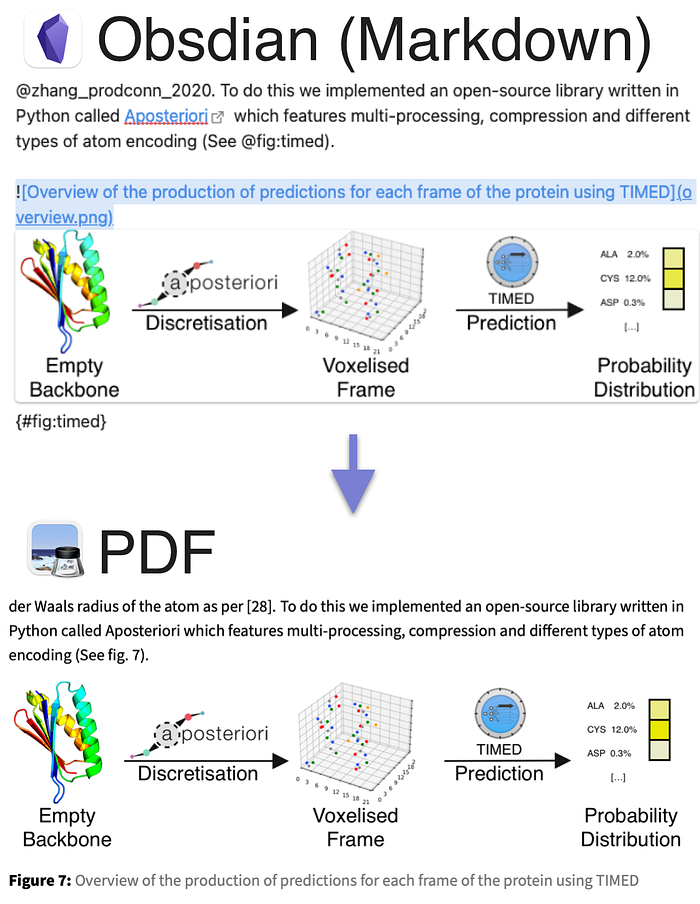
If you have worked with LaTeX before, you will know about how easy it is to reference figure numbers, even if you were to insert new figures down the line. Something similar can be achieved with Markdown and Obsidian using Pandoc-Crossref (https://github.com/lierdakil/pandoc-crossref).
The easiest way is to install using Homebrew on MacOS, (though it can similarly be installed in Linux and Windows):
brew install pandoc-crossrefKeep in mind that this works only if you also installed pandoc with brew.
Now, all you need is to write {#fig:your_fig_name} next to your figures as such:
{#fig:your_fig_name}And in-text, reference the figure with: @fig:your_fig_name
Same thing can be done with sections:
# Your Section {#sec:your_section}3. Exporting Your Text
Exporting your notes will require:
- Pandoc (mentioned in Section 2)
- Pandoc-Crossref (for dynamic figure/section references)
- Obsidian Link Converter
- Obsidian Enhancing Export
As mentioned in the previous section, you can install the Obsidian Plugins from the community plugins under the preference panel.
3A. Converting Links (Obsidian to Markdown notation)
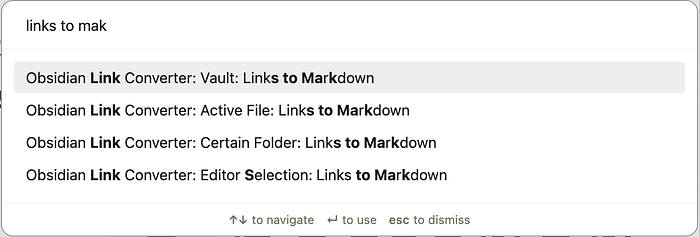
First, we will use the Obsidian Link Converter to convert all links to markdown. This is necessary due to compatibility issues with Pandoc. To do this:
CMD + P > click the option to convert links in your vault to markdown.
This command converts image links from this format:
![Screenshot 2022-07-04 at 13.05.14.png]to this:

Make sure you add the following Extra Arguments:
- resource-path which is where you keep the images or bibliography file used in your document. Personally, I keep all my Obsidian images in a folder called "Images," which makes it easier. You can also have resource paths as long as you specify them. Example:
--resource-path ~/Library/Mobile\ Documents/iCloud\~md\~obsidian/Documents/knowledgebase/Images/This leads the resource path to be in the Images folder inside Obsidian (in iCloud)
- bibliography which is where you specify your bibliography file if you want your citations to be rendered. Example:
--bibliography="export-data.bib"- pdf-engine is the path to pdflatex. To find it, simply type "which pdflatex" in your terminal. Example:
--pdf-engine=/Library/TeX/texbin/pdflatex- filter if you have used latex-like references to images, you will need to add the pandoc-crossref as a filter BEFORE citeproc
--filter pandoc-crossref- number-section ensures that each section is numbered accordingly
--number-sections- citeproc tells pandoc to render the citations. We just add it as a flag like this:
--citeproc- reference_title controls the name of the references section:
-M reference-section-title=ReferencesExamples of the full Extra Arguments configs (for PDF, Word and LaTeX):
--resource-path ~/Library/Mobile\ Documents/com~apple~CloudDocs/
--resource-path ~/Library/Mobile\ Documents/iCloud\~md\~obsidian/Documents/knowledgebase/Images/
--csl https://raw.githubusercontent.com/csthiago/zotero-citation-styles/master/ieee.csl
--bibliography="export-data.bib"
--pdf-engine=/Library/TeX/texbin/pdflatex
--filter pandoc-crossref
--number-sections
--citeproc
-M reference-section-title=References
Once you are done, you will see that the document will contain all your images and citations. If you exported to latex, all the citations will be rendered from your .bib file.
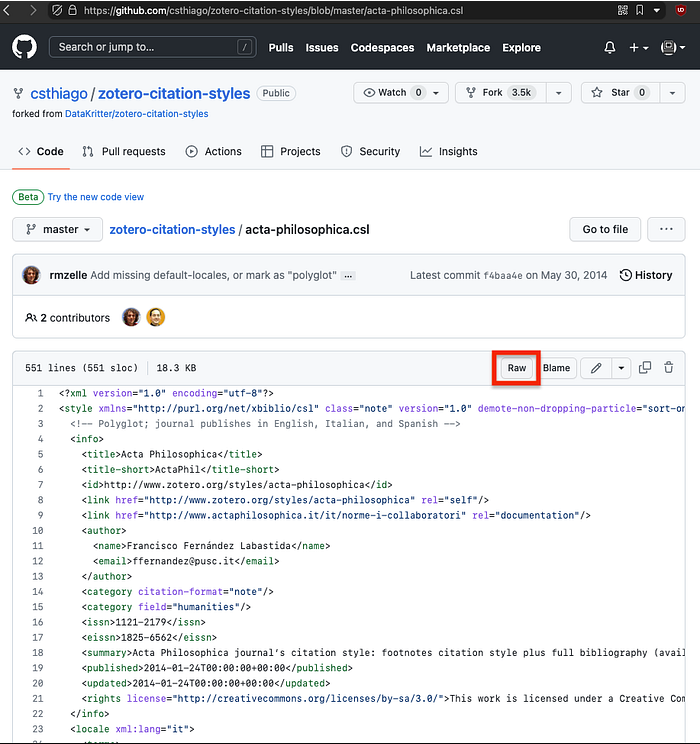
Note that you can pass a .csl file for citation styles. You can either use a file or a URL as above. You can find other styles in the repository: https://github.com/csthiago/zotero-citation-styles
Once you found the style you are interested in, click on it, then click on "Raw" and copy the URL:
4. Creating Academic Documents [NEW]
Section 3 showed you how you can produce a document. Here we will look into styling these into professionally-looking academic documents. There are two ways to do this:
4A. Academic PDF (.pdf) / LaTeX (.tex) Export with Plugin
The advantage of using this solution over CSS is that figures and references are rendered in full, much like latex. I developed a feature of the Obsidian Enhancing Export plugin which allows the selection of academic templates from a dropdown menu (see .gif).
If you followed the steps in Section 3b, simply run:
CMD + P > "Obsidian Enhancing Export: Export To…" > Set Type as "PDF"
From the dropdown select your template of choice and that should be it. At the time of writing there are two templates available: Dissertation and NeurIPS (academic). Refer to this repository for more information on how to use each one of them: https://github.com/universvm/obsidian-pandoc-templates
4B. PDF (.pdf) Export with CSS

This involves adding a custom .css file to Obsidian. Simply go to this website:
https://raw.githubusercontent.com/NicklasVraa/Obsidian-academic-export/main/academic-pdf-export.css
And save the file.
Now go to Obsidian > Preferences > Appearance > CSS Snippets
Click on the Folder icon and drag your academic-pdf-export.css file to it. Your preferences should now look like this:
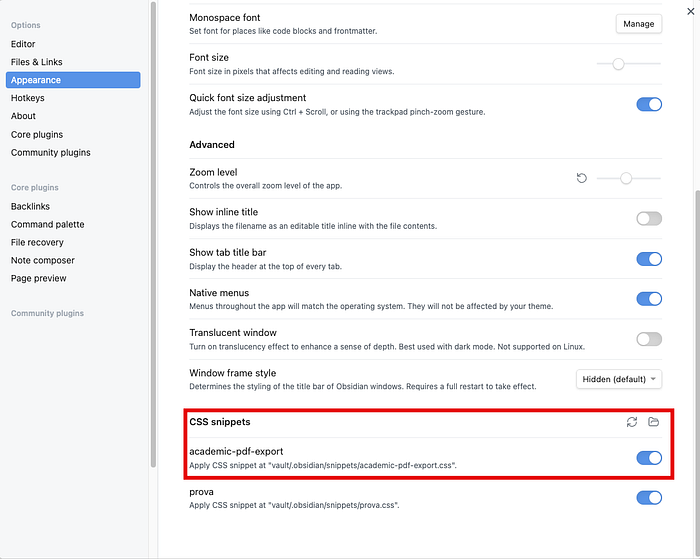
Now, open a note and use the command pallette (CMD/CTRL + P) to select "Export to PDF". Your output should now be nicely formatted.
4C. Bibliography (.bib) Export with Pandoc
If using the methods above you may wonder how to export a .bib file containing uniquely the citations used in your document and filter out any entries that are not referenced in the document.
As before we go into the Export Setting preferences. In "Choose Template" select "Extra Arguments":
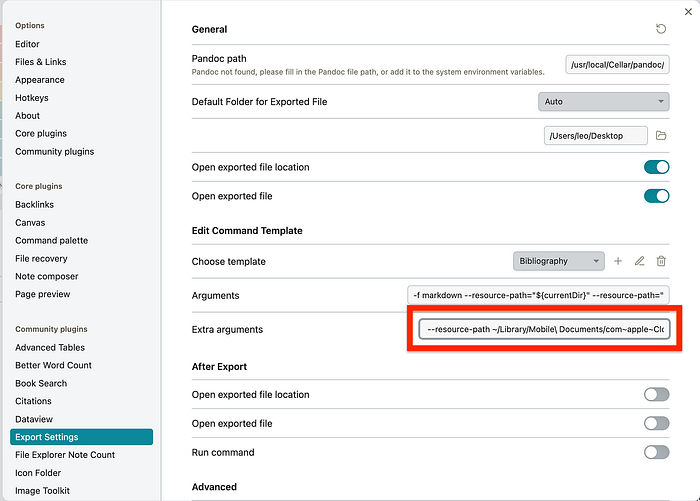
For the command, paste the following and adapt as for the previous section:
--to=biblatex
--resource-path ~/Library/Mobile\ Documents/com~apple~CloudDocs/
--bibliography="export-data.bib"
- The — to=biblatex flag selects the output file extension to ".bib"
- You can reuse the same — resource-path and — bibliography as before.
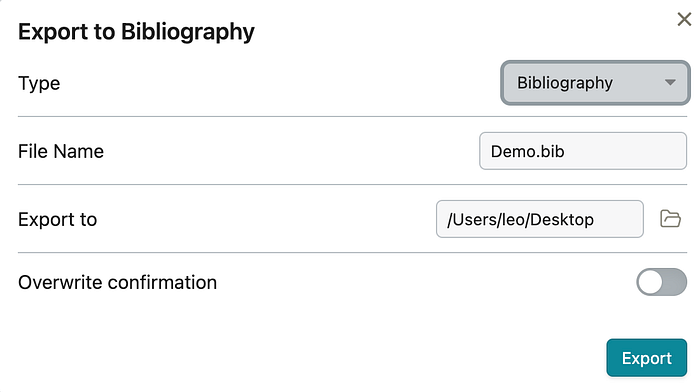
And there you have it! It should now export to a .bib file in your selected output path. As before:
CMD + P > "Obsidian Enhancing Export: Export To…" > Set Type as "Bibliography"
4D. PDF (.pdf) Export with Custom Pandoc Template (LEGACY)
If you followed the guide above and have Pandoc setup, using a custom template is also relatively simple. We essentially just need to add the custom template to Pandoc.
First download the file pandoc template file from here: https://gist.github.com/universvm/5eaa79f8c65a42c5914b449fc4a53069
Then, open a terminal and type:
pandoc --version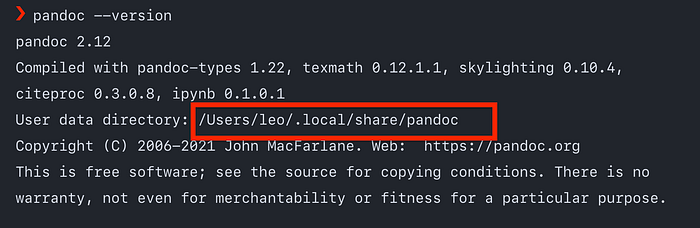
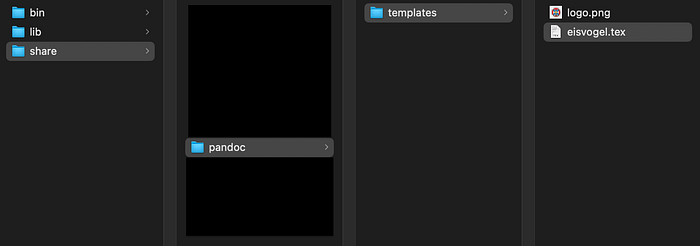
You will find your user data directory path. Open that path, and if it does not exist create a folder called "pandoc" in there.
Now, create another folder called "templates" and place the eisvogel.tex file in there. Your folder should look like this:
Back to Obsidian, go to Preferences > Export Settings and under Choose Setting create a new one called "Academic PDF":
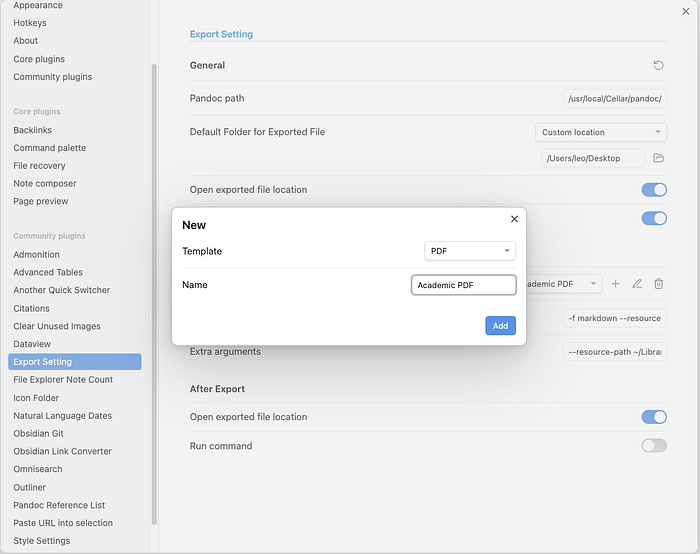
In the extra arguments we want to select the template like this:
--number-sections
--resource-path ~/Library/Mobile\ Documents/com~apple~CloudDocs/
--resource-path ~/Library/Mobile\ Documents/iCloud\~md\~obsidian/Documents/knowledgebase/Images/
--filter pandoc-crossref
--citeproc
--bibliography="export-data.bib"
--pdf-engine=/Library/TeX/texbin/pdflatex
--template eisvogel.tex
-M reference-section-title=References
--csl https://raw.githubusercontent.com/csthiago/zotero-citation-styles/master/ieee.csl
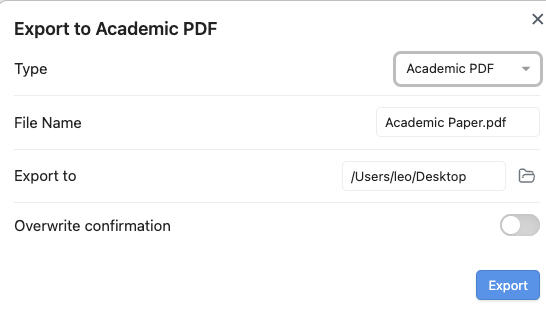
--metadata link-citationsNow, open a note, open the command palette and click on Obsidian Enhancing Export: Export To…. select Academic PDF and click on Export.
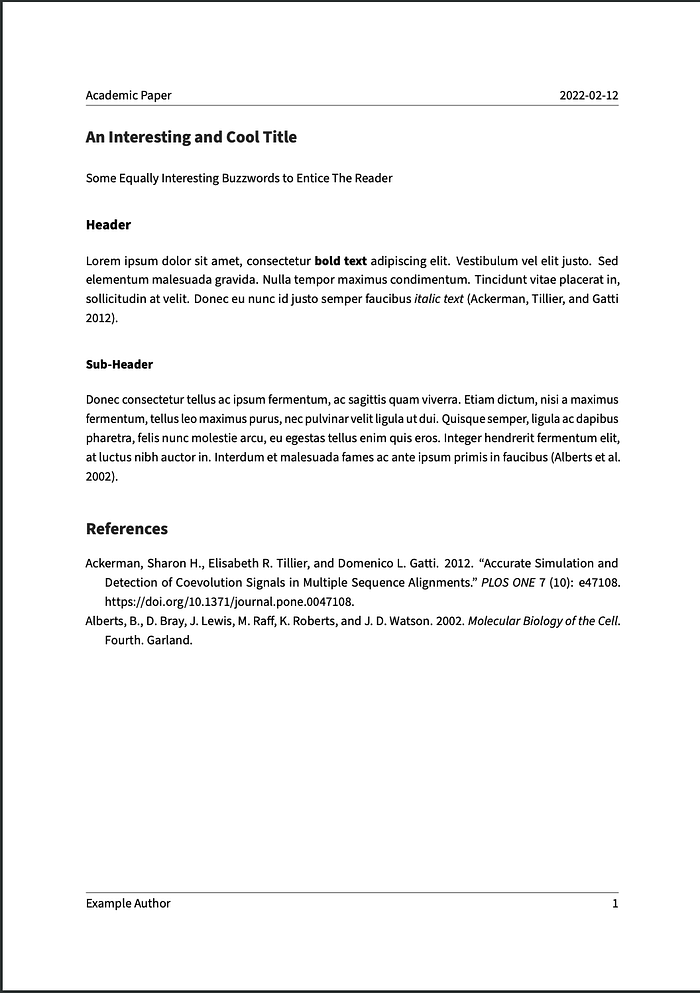
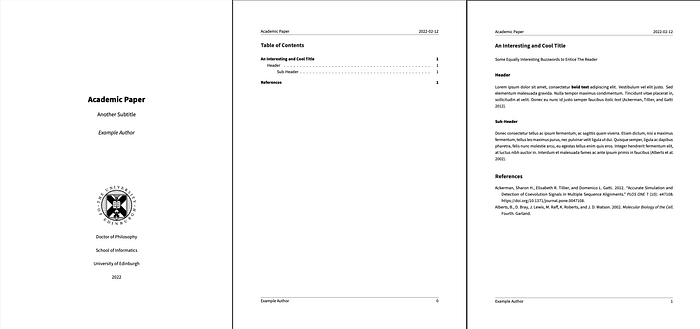
To produce the document in the screenshot I added the following before my note (YAML):
---
title: "Thesis Title"
subtitle: "Another Subtitle"
titlepage: True
toc: true
toc-own-page: True
author: [Example Author]
date: "2022-02-12"
keywords: [Markdown, Example]
titlepage-text-color: "000000"
titlepage-rule-color: "FFFFFF"
titlepage-rule-height: 0
toc-title: Table of Contents
caption-justification: justified
titlepage-logo: /Users/your_name/Documents/logo.pdf
abstract: Lorem ipsum dolor sit amet, consectetur adipiscing elit. Donec eu accumsan nisl. Phasellus suscipit varius arcu nec congue. Ut non pharetra dui. Phasellus gravida lectus eget maximus tincidunt. Nam ut ex vel enim elementum malesuada. Proin sit amet iaculis velit, non feugiat nulla. In facilisis tempor posuere. Nunc id dui eget lacus accumsan finibus. Ut id ex condimentum, egestas leo quis, tincidunt neque. Proin tincidunt, odio a sagittis rutrum, erat mi volutpat lorem, non iaculis odio sem in dui.
acknowledgements: Donec nec sapien porttitor, pharetra odio ac, suscipit nulla. Nulla mattis purus a facilisis vestibulum. Curabitur orci lorem, convallis ut odio quis, bibendum malesuada ligula. Pellentesque ultrices velit et hendrerit vulputate. Duis lobortis quis dui et condimentum. Aenean elementum id ex sit amet placerat. Vivamus a rhoncus dui, id volutpat nibh. Ut suscipit et augue eget imperdiet. Phasellus mattis vitae lectus nec pulvinar. Nulla pulvinar risus finibus tortor aliquam lacinia. Curabitur sagittis id turpis non varius.
text1: Doctor of Philosophy
text2: School of Informatics
text3: University of Edinburgh
text4: 2022
---
There are a lot more configs you can use. The full list is available here: https://github.com/Wandmalfarbe/pandoc-latex-template
The version you installed is a slightly modified version of the above to allow for an Abstract, Acknowledgement and general styling.
4E. LaTeX (.tex) Export with Custom Pandoc Template [LEGACY]
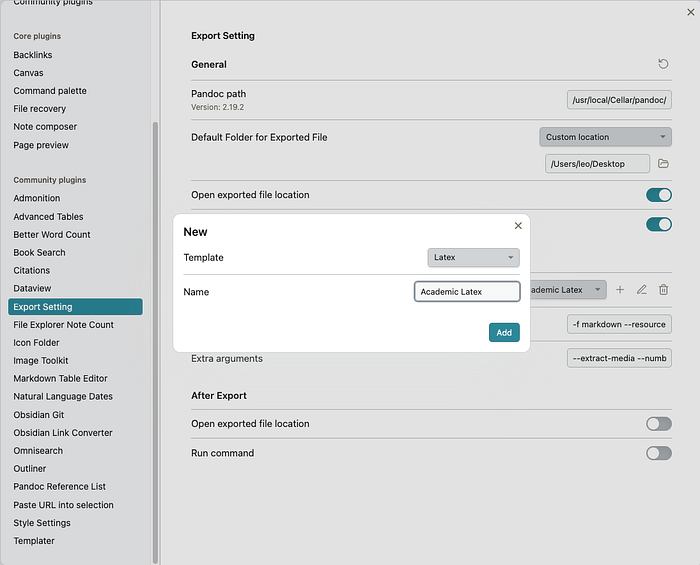
Should you want to export to a .tex file so that you can upload to Overleaf you can simply create a new export option but selecting "Latex" as Template:
And in the extra arguments use:
--resource-path ~/Library/Mobile\ Documents/com~apple~CloudDocs/
--resource-path ~/Library/Mobile\ Documents/iCloud\~md\~obsidian/Documents/knowledgebase/Images/
--bibliography="export-data.bib"
--template eisvogel.tex
--extract-media ~/Desktop/images
--natbib
Note that:
- The extract-media flag will output all the figures contained in the LaTeX document in the ~/Desktop/images path. This way you can upload only the relevant images rather than your entire Obsidian folder.
- The natbib flag will ensure that natbib is used for citations with the correct \cite{} command.
Conclusion
In this article, I showed my entire workflow for writing academically using Obsidian while syncing everything with iCloud.
The workflow is meant to help you deal with installing and setting up plugins and is the result of hours of work and research through forum posts.
First, we saw how to connect Zotero, a popular reference manager, to Obsidian and sync literature notes and highlights into notes files.
Then, I explained how I use markdown citations to help me build a draft for a manuscript. The citations can then be rendered using pandoc and exported to text, which is helpful if you're creating a poster with InkScape or PowerPoint.
Finally, we set up the Obsidian Enhancing Export plugin with Pandoc to generate Latex, Word, and PDF documents to then import to Overleaf or send to other authors as a draft.
Cherry on top is a short tutorial on how to create academically-looking (and visually pleasing) documents with CSS and pandoc templates.
I hope you enjoyed the article and if you are having any problems feel free to comment! I do not accept donations, so please donate to your local charity 😀
Further Readings:
If you are interested in my work, I wrote about productivity apps and Obsidian:
Edit: This article won the Student-Pick Prize of the Obsidian October 2022 Contest!