

At last, the highly anticipated update for SwiftUI ScrollView with paging has arrived, opening up numerous exciting possibilities for exploration.
With so much content already available on this topic, you might wonder what makes my approach unique. Here's the answer:
In a sea of SwiftUI ScrollView tutorials, I'm taking a different route. I'll be exploring how to synchronize two scroll views using the
.scrollPosition(id:)modifier.
Get Started
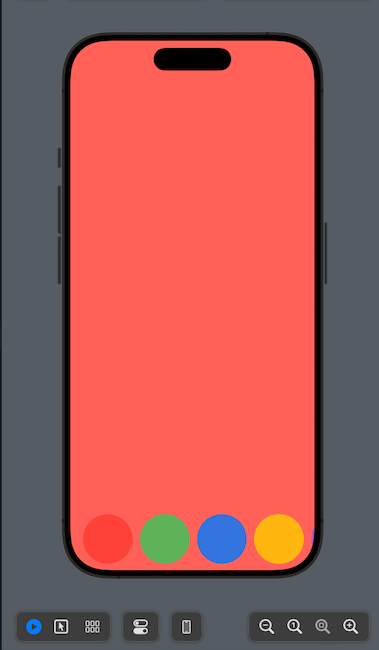
Let's create HCardsScrollView.swift, our first scroll view, with random color sets. You can replace these colors with images of your choice. We'll use iOS 17's paging property to render our horizontal scroll view.
import SwiftUI

struct HCardsScrollView: View {

    let colorSets: [Color] = [
        .red, .green, .blue,
        .yellow, .purple, .pink,
        .accentColor, .black, .brown,
        .cyan, .indigo, .teal,
        .orange, .mint
    ]

    var body: some View {
        GeometryReader { reader in
            ScrollView(.horizontal, showsIndicators: false) {
                LazyHStack(spacing: 0) {
                    ForEach(colorSets.indices, id: \.self) { index in
                        let color = colorSets[index].opacity(0.8)
                        Rectangle()
                            .foregroundStyle(color)
                            .frame(width: reader.size.width, height: reader.size.height)
                            .tag(index)
                    }
                }
                .scrollTargetLayout()
            }
            .scrollTargetBehavior(.paging)
            .edgesIgnoringSafeArea(.all)
        }
    }
}

#Preview {
    HCardsScrollView()
}
Copy the snippet of code above and paste it into your Xcode SwiftUI file. This will enable you to scroll from left to right.
Let's create our FastScrollerView
Now, we will create a fast scroller to easily navigate between different pages.
// MARK: - Fast Scroll container
.overlay (alignment: .bottom) {
  HStack {
    FastScrollView(colors: colorSets)
        .frame(height: 96)
        .safeAreaPadding(.horizontal, 16)
  }
}
We'll now create FastScrollView.swift SwiftUI view and pass our set of colors to it to maintain consistent colors for all cards.
struct FastScrollView: View {

    var colors: [Color]

    var body: some View {
        ScrollView(.horizontal, showsIndicators: false) {
            LazyHStack {
                ForEach(colors.indices, id: \.self) { index in
                    let color = colors[index].opacity(0.8)
                    Circle()
                        .foregroundStyle(color)
                        .frame(width: 80, height: 80)
                        .padding(.bottom, 4)
                        .padding(.leading, 4)

                }
            }
        }
    }
}
#Preview
Sure! I understand. For the sake of this tutorial, I'll keep it simple. However, I'll also add some animations to make it look good.
Okay. Let's move forward with our main task: implementing a selectedColor to indicate which color or page is currently selected in our main scrollView. We'll modify our Main HCardsScrollView.swift to include a selected color index.
@State private var selectedColor: Int? = 0
Add the following variable to track the selected page index while scrolling. We'll use scrollPosition(id:) to get the updated scrolled index or page, as per Apple's official documentation.
scrollPosition(id:anchor:)
Associates a binding to be updated when a scroll view within this view scrolls.
In simpler way we can say
Imagine you have a really long list of toys, and you want to quickly jump to a specific toy without scrolling through the entire list.
The
scrollPosition(id:anchor:)in SwiftUI is like telling a magical toy box to show you a specific toy (identified by its name) right at the top, so you can see it right away without having to search for it.
The scrollPosition(id:anchor:) method in SwiftUI accepts an optional variable because if you want to scroll to the top of a scroll view, you can pass nil as the id parameter, and SwiftUI will scroll to the top of the scroll view without focusing on a specific view.
By making the id parameter optional, SwiftUI gives you the flexibility to either scroll to a specific view or to a general position within the scroll view.
Let's get back to coding. In our HCardsScrollView.swift class, let's declare this property for the scrollview. Here's the complete updated code:
import SwiftUI

struct HCardsScrollView: View {

    let colorSets: [Color] = [
        .red, .green, .blue,
        .yellow, .purple, .pink,
        .accentColor, .black, .brown,
        .cyan, .indigo, .teal,
        .orange, .mint
    ]

    @State private var selectedColor: Int? = 0


    var body: some View {
        GeometryReader { reader in
            ScrollView(.horizontal, showsIndicators: false) {
                LazyHStack(spacing: 0) {
                    ForEach(colorSets.indices, id: \.self) { index in
                        let color = colorSets[index].opacity(0.8)
                        Rectangle()
                            .foregroundStyle(color)
                            .frame(width: reader.size.width, height: reader.size.height)
                            .tag(index)

                    }
                }
                .scrollTargetLayout()
            }
            .scrollTargetBehavior(.paging)
            .scrollPosition(id: $selectedColor)
        }
        .edgesIgnoringSafeArea(.all)
        .overlay (alignment: .bottom) {
            FastScrollView(colors: colorSets, selectedColor: $selectedColor)
                .frame(height: 96)
                .safeAreaPadding(.horizontal, 16)
        }
    }
}

#Preview {
    HCardsScrollView()
}
Now, we need to pass this selectedColor to our FastScrollView.swift so that whenever the user selects a color in FastScrollView, the main scrollview will scroll to that color.
@Binding var selectedColor: Int?
Let's define the selectedColor property in FastScrollView.swift and use this property with an onTapGesture. We will also change the selected circle's border color with respect to selectedColor using .stroke(lineWidth: selectedColor == index ? 8 : 0). Here is the updated code for your reference.
struct FastScrollView: View {

    var colors: [Color]

    @Binding var selectedColor: Int?

    var body: some View {
        ScrollView(.horizontal, showsIndicators: false) {
            LazyHStack {
                ForEach(colors.indices, id: \.self) { index in
                    let color = colors[index].opacity(0.8)
                    Circle()
                        .foregroundStyle(color)
                        .frame(width: 80, height: 80)
                        .background(
                            Circle()
                                .stroke(lineWidth: selectedColor == index ? 8 : 0)
                                .foregroundStyle(Material.bar)
                        )
                        .padding(.bottom, 4)
                        .padding(.leading, 4)
                        .tag(index)
                        .onTapGesture {
                            withAnimation(.spring) {
                                self.selectedColor = index
                            }
                        }
                }
            }
            .scrollTargetLayout()
        }
    }
}
Till this point, when we tap on any circle in the FastScrollView, our main scroll view's color also changes to the respective color. However, there is one issue: if our fast circle colors are not in the visible area and we select one, it gets selected but doesn't come to the center.
See the screenshot below.

To resolve above issue we can use ScrollViewReader. It has scrollTo method which will scroll to particular color. Here is the update code.
struct FastScrollView: View {

    var colors: [Color]
    @Binding var selectedColor: Int?


    var body: some View {
        ZStack {
            ScrollViewReader { reader in
                ScrollView(.horizontal, showsIndicators: false) {
                    LazyHStack {
                        ForEach(colors.indices, id: \.self) { index in
                            let color = colors[index].opacity(0.8)
                            Circle()
                                .foregroundStyle(color)
                                .frame(width: 80, height: 80)
                                .background(
                                    Circle()
                                        .stroke(lineWidth: selectedColor == index ? 8 : 0)
                                        .foregroundStyle(Material.bar)
                                )
                                .padding(.bottom, 4)
                                .padding(.leading, 4)
                                .tag(index)
                                .onTapGesture {
                                    withAnimation(.spring) {
                                        self.selectedColor = index
                                        reader.scrollTo(index, anchor: .center)
                                    }
                                }
                        }
                    }
                    .scrollTargetLayout()
                }
                .scrollTargetBehavior(.viewAligned)
            }
        }
    }
}
Now, selecting a color from the FastScrollView will scroll that color to the center of the screen. However, when scrolling the Main scrollView, the FastScrollView does not follow suit and center accordingly, indicating a one-way synchronization issue. Let's examine this problem in the preview.

Now, we want both scroll views to be in sync. Since we already have the selectedColor property in our main scrollView, we just need to listen for page change events in our child FastScrollView. This way, we can call the scrollTo method of the ScrollViewReader to keep them synchronized.
 .onChange(of: selectedColor, { oldValue, newValue in
      withAnimation(.spring) {
        reader.scrollTo(selectedColor ?? 0, anchor: .center)
      }
})
You can explore complete code below.
Thanks for reading!
I'm always working on creative content for my exclusive supporters. In the video below, I've showcased vertical scrolling with synchronization. It's a cool way to showcase my work. Check it out!
If you're interested in exclusive creative work, consider supporting me on my Patreon page.
Here's the link: @iamvishal16_Patreon