
In the previous two articles, I showed how to deploy Kafka, Kafka Producers, Kafka Connect, and connectors that sink data from Kafka topics. We looked at the basics of running connectors in Kafka Connect. All of this was preparation for the next step — deploying a setup with Minio and Nessie, and sinking Kafka topics into Iceberg tables using the Iceberg Sink Connector.
For now, our setup includes the following containers:
- Kafka;
- Schema Registry;
- Kafka UI;
- Producers;
- Kafka Connect.
Today, we're going to add a few more containers:
- Minio;
- Nessie Catalog;
- Postgres;
- Jupyter.
Iceberg Sink Connector
First, we need to build the Iceberg Sink Connector. This connector is part of the Apache Iceberg project, but currently, you have to build it yourself because the Apache Iceberg project doesn't provide a ready-to-use distribution of this connector.
It's easy to do — just clone the Apache Iceberg repository and build the Gradle project:
git clone https://github.com/apache/iceberg.git
cd iceberg
./gradlew -x test -x integrationTest clean build
You'll find a zip archive under: ./kafka-connect/kafka-connect-runtime/build/distributions.
Unzip this archive and copy the resulting directory into the custom-plugins directory in your Kafka Connect container (the one we set up in the previous article).
Additionally, because we're going to use the Nessie catalog for working with Iceberg tables, we need to provide Nessie dependencies for the connector:
- org.projectnessie.nessie:nessie-model
- org.projectnessie.nessie:nessie-client
- org.apache.iceberg:iceberg-nessie
Download these JARs and put them inside lib directory of Iceberg Sink Connector that you've just unzipped.
Jupyter Dockerfile
To work with Iceberg tables, we need Jupyter with Spark included. So, I created a Docker image containing both Jupyter and Spark.
Here's the Dockerfile:
FROM ubuntu:22.04

ARG SPARK_VERSION=3.5.6 \
 SPARK_MAJOR_VERSION=3.5 \
 HADOOP_VERSION=3 \
 PYTHON_VERSION=3.10 \
 SCALA_VERSION=2.12 \
 ICEBERG_VERSION=1.9.2 \
 SPARK_DIST=spark-${SPARK_VERSION}-bin-hadoop${HADOOP_VERSION}

RUN apt-get update && \
 apt-get -y install openjdk-11-jdk-headless \
 wget \
 python${PYTHON_VERSION} \
 python3-pip && \
 apt-get clean

RUN wget https://downloads.apache.org/spark/spark-${SPARK_VERSION}/${SPARK_DIST}.tgz && \
 tar -xzf ${SPARK_DIST}.tgz && \
 mv ${SPARK_DIST} /opt/spark && \
 rm ${SPARK_DIST}.tgz

ENV SPARK_HOME=/opt/spark
ENV PATH=$SPARK_HOME/bin:$PATH

RUN wget -nv -P ${SPARK_HOME}/jars \
  https://repo1.maven.org/maven2/org/apache/iceberg/iceberg-spark-runtime-${SPARK_MAJOR_VERSION}_2.12/${ICEBERG_VERSION}/iceberg-spark-runtime-${SPARK_MAJOR_VERSION}_2.12-${ICEBERG_VERSION}.jar \
  https://repo1.maven.org/maven2/org/projectnessie/nessie-integrations/nessie-spark-extensions-${SPARK_MAJOR_VERSION}_2.12/0.104.3/nessie-spark-extensions-${SPARK_MAJOR_VERSION}_2.12-0.104.3.jar \
  https://repo1.maven.org/maven2/org/apache/iceberg/iceberg-aws-bundle/${ICEBERG_VERSION}/iceberg-aws-bundle-${ICEBERG_VERSION}.jar

RUN pip3 install --upgrade pip

RUN pip install --no-cache-dir \
 jupyterlab \
 pyspark==${SPARK_VERSION} \
 pandas \
 sparksql-magic

WORKDIR /workspace

EXPOSE 8888
EXPOSE 4040

ENTRYPOINT ["jupyter", "lab", "--ip=0.0.0.0", "--no-browser", "--allow-root", "--NotebookApp.token=''", "--NotebookApp.password=''"]
This image provides a minimal setup with the necessary libraries: Python, Jupyter Lab, Spark, and, importantly, three dependencies for working with Iceberg and Nessie Catalog in Spark applications:
- org.apache.iceberg:iceberg-spark-runtime-3.5_2.12:1.9.2
- org.projectnessie.nessie-integrations:nessie-spark-extensions-3.5_2.12:0.104.3
- org.apache.iceberg:iceberg-aws-bundle:1.9.2
I don't provide any specific Spark configs here because this is just a learning project and I'm going to set up the Iceberg catalog directly in the Jupyter notebook. For experimenting, it's better this way, since I can change configs on the fly directly from the Jupyter notebook.
If you want to build a more universal image, it's worth adding support for environment variables (similar to what I did for Kafka Connect in the previous article). And if you're preparing an image for a corporate environment, the usual approach is to create a spark-defaults.conf file with your specific catalog settings and copy it into the /opt/spark/conf directory in your Dockerfile.
Build the image with:
docker build -t mdwh/jupyter:latest ./jupyterDocker Compose
With all images prepared, we're ready to change a Docker Compose file.
services:
  ...
  minio:
    image: minio/minio:latest
    container_name: minio
    hostname: minio
    ports:
      - "9001:9001"
      - "9000:9000"
    command: ["server", "--console-address", ":9001", "/data"]
    volumes:
      - ./volumes/data/minio/data:/data
    environment:
      MINIO_ROOT_USER: minioadmin
      MINIO_ROOT_PASSWORD: minioadmin
    networks:
      - mdwh-network
  nessie:
    image: ghcr.io/projectnessie/nessie:latest
    container_name: nessie
    hostname: nessie
    ports:
      - "19120:19120"
    depends_on:
      nessie-postgres:
        condition: service_healthy
    environment:
      NESSIE_VERSION_STORE_TYPE: JDBC2
      NESSIE_VERSION_STORE_PERSIST_JDBC_DATASOURCE: postgresql
      QUARKUS_DATASOURCE_POSTGRESQL_JDBC_URL: jdbc:postgresql://nessie-postgres:5432/nessie
      QUARKUS_DATASOURCE_POSTGRESQL_USERNAME: postgres
      QUARKUS_DATASOURCE_POSTGRESQL_PASSWORD: postgres
      QUARKUS_HTTP_PORT: 19120
      QUARKUS_LOG_LEVEL: DEBUG
    networks:
      - mdwh-network
  nessie-postgres:
    image: postgres
    container_name: nessie-postgres
    ports:
      - "5432:5432"
    environment:
      POSTGRES_DB: nessie
      POSTGRES_USER: postgres
      POSTGRES_PASSWORD: postgres
    healthcheck:
      test: ["CMD-SHELL", "pg_isready -U postgres -d nessie"]
      interval: 10s
      timeout: 5s
      retries: 10
    volumes:
      - ./volumes/data/nessie-postgres/data:/var/lib/postgresql/data
    networks:
      - mdwh-network
  jupyter:
    image: mdwh/jupyter:latest
    container_name: jupyter
    ports:
      - "4040:4040"
      - "8888:8888"
    volumes:
      - ./volumes/files/jupyter/workspace:/workspace
    networks:
      - mdwh-network
The important thing here is to change the default nessie.version.store.type, which is set to IN-MEMORY. This store type won't persist data between Docker restarts, and we'd lose information about our tables. So, we'll switch it to JDBC2, which allows us to use an RDBMS as storage for the Nessie catalog. Let's use Postgres for this purpose, and add a nessie-postgres service to our Docker Compose file.
Don't forget to add jupyter service that uses our custom Jupyter image built in the previous step.
Jupyter Notebook
Now that all containers are running, we can finally test our setup. Let's start by creating our first notebook and initializing a Spark session:
from pyspark.sql import SparkSession

spark = (
    SparkSession.builder
    .master("local[*]")
    .config(
        "spark.sql.extensions",
        "org.apache.iceberg.spark.extensions.IcebergSparkSessionExtensions,"
        "org.projectnessie.spark.extensions.NessieSparkSessionExtensions"
    )

    .config("spark.sql.catalog.lakehouse", "org.apache.iceberg.spark.SparkCatalog")

    .config("spark.sql.catalog.lakehouse.catalog-impl", "org.apache.iceberg.nessie.NessieCatalog")
    .config("spark.sql.catalog.lakehouse.uri", "http://nessie:19120/api/v1")
    .config("spark.sql.catalog.lakehouse.io-impl", "org.apache.iceberg.aws.s3.S3FileIO")
    .config("spark.sql.catalog.lakehouse.warehouse", "s3a://lakehouse/")
    .config("spark.sql.catalog.lakehouse.ref", "main")

    .config("spark.sql.catalog.lakehouse.s3.endpoint", "http://minio:9000")
    .config("spark.sql.catalog.lakehouse.s3.path-style-access", "true")

    .config("spark.sql.catalog.lakehouse.client.region", "us-east-1")
    .config("spark.sql.catalog.lakehouse.s3.access-key-id", "minioadmin")
    .config("spark.sql.catalog.lakehouse.s3.secret-access-key", "minioadmin")

    .config("spark.sql.defaultCatalog", "lakehouse")

    .config("spark.ui.showConsoleProgress", False)

    .appName("spark-jupyter")
    .getOrCreate()
)

%load_ext sparksql_magic
We're creating a Spark session and wiring it up with Iceberg, Nessie, and Minio. Let's break down the important configs:
spark.sql.extensions– This adds support for Iceberg and Nessie SQL extensions in Spark, so we can run SQL commands likeCREATE TABLEorCALLdirectly against Iceberg tables.spark.sql.catalog.lakehouse– Defines a new catalog namedlakehouse. We'll use this name when writing SQL queries (e.g.,SELECT * FROM lakehouse.db.table).spark.sql.catalog.lakehouse.catalog-impl– Tells Spark that this catalog will use the NessieCatalog implementation. That means our tables and metadata will be version-controlled by Nessie.spark.sql.catalog.lakehouse.uri– The endpoint of our Nessie service inside Docker.spark.sql.catalog.lakehouse.io-impl– Specifies S3FileIO, which means table data will be stored in S3-compatible storage (Minio in our case).spark.sql.catalog.lakehouse.warehouse– Defines the warehouse location (s3a://lakehouse/), i.e., the bucket where Iceberg tables live.spark.sql.catalog.lakehouse.ref– The Nessie branch to use, defaulting here tomain.spark.sql.catalog.lakehouse.s3.endpointandspark.sql.catalog.lakehouse.s3.path-style-access– Tell Spark how to talk to Minio (S3-compatible service), including path-style addressing.spark.sql.catalog.lakehouse.client.region— region setting for the AWS client. Since we're using Minio, the actual region doesn't matter — but the AWS libraries require this property to be present, so we just set it tous-east-1as a placeholder.s3.access-key-id,s3.secret-access-key– Authentication for S3/Minio access.spark.sql.defaultCatalog– Makeslakehousethe default catalog so we don't have to type it in every SQL statement (e.g.,SELECT * FROM db.table).
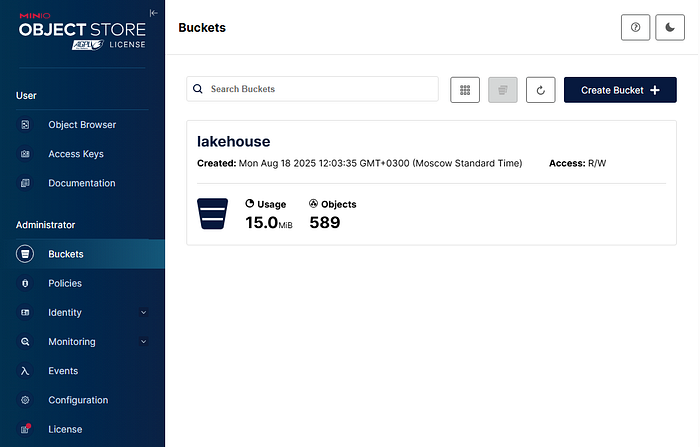
Before we start creating tables in Iceberg, we need to make sure the bucket lakehouse exists in Minio. This is the warehouse location for all our Iceberg tables.
With the bucket in place, we can start interacting with Iceberg through Spark SQL in our Jupyter notebook. First, let's create a namespace to organize our tables:
%%sparksql
CREATE NAMESPACE test;
Next, we create our first table within this namespace. Iceberg manages the table's metadata and files under the lakehouse bucket we just created:
%%sparksql
CREATE TABLE test.test_table (
    key INT,
    value STRING
)
USING iceberg;
Now, let's insert some sample data into our table:
%%sparksql
INSERT INTO test.test_table VALUES
    (1, 'one'),
    (2, 'two'),
    (3, 'three'),
    (4, 'four'),
    (5, 'five');
Finally, we can query the table to verify that our data has been successfully inserted:
%%sparksql
SELECT * FROM test.test_table;
Iceberg Sink Connector Configs
Now that we have our Minio, Nessie, and Kafka setup ready, we can sink Kafka topics into Iceberg tables using the Iceberg Sink Connector. Below is an example configuration for a topic named sensors:
{
  "name": "sensors-sink",
  "connector.class": "org.apache.iceberg.connect.IcebergSinkConnector",

 "topics": "sensors",

 "iceberg.tables": "bronze.kafka.sensors",
 "iceberg.tables.auto-create-enabled": true,
 "iceberg.tables.evolve-schema-enabled": true,
 "iceberg.table.bronze.kafka.sensors.id-columns": "id,measurements_timestamp",
 "iceberg.table.bronze.kafka.sensors.partition-by": "day(measurements_timestamp)",

 "iceberg.catalog.catalog-impl": "org.apache.iceberg.nessie.NessieCatalog",
 "iceberg.catalog.uri": "http://nessie:19120/api/v2",
 "iceberg.catalog.ref": "main",
 "iceberg.catalog.warehouse": "s3a://lakehouse/",
 "iceberg.catalog.io-impl": "org.apache.iceberg.aws.s3.S3FileIO",
 "iceberg.catalog.s3.endpoint": "http://minio:9000",
  "iceberg.catalog.s3.path-style-access": "true",

 "iceberg.catalog.client.region": "us-east-1",
 "iceberg.catalog.s3.access-key-id": "minioadmin",
  "iceberg.catalog.s3.secret-access-key": "minioadmin",

 "key.converter": "org.apache.kafka.connect.storage.StringConverter",
 "value.converter": "io.confluent.connect.avro.AvroConverter",
 "value.converter.schema.registry.url": "http://schema-registry:8081",

 "tasks.max": "1"
}
Key points about this configuration:
Topics: We are sinking the sensors topic.
Table name: bronze.kafka.sensors – note the use of the Nessie catalog namespace bronze.kafka.
Auto-create and schema evolution: Enabled so the connector will automatically create the table if it doesn't exist and evolve the schema if the incoming records introduce new fields.
ID columns & partitioning: We specify primary columns for uniqueness (id, measurements_timestamp) and partition the table by day of measurements_timestamp.
Catalog configuration:
catalog-implpoints to the Nessie catalog implementation.uriandrefconfigure the Nessie server and branch.warehousepoints to the S3 bucket (Minio in our case).io-impl,endpoint,path-style-access,access-key-id, andsecret-access-keyconfigure the S3 file system.client.regionis required by AWS libraries but in our Minio setup it's a dummy value (us-east-1).
Converters:
StringConverterfor keys.AvroConverterfor values, with Schema Registry URL.
Deploying the Connector
We can apply this configuration using a PUT request to the Kafka Connect REST API:
curl -s -X PUT -H "Content-Type: application/json" -d @./configs/kafka-connect/sensors-sink.json localhost:8083/connectors/sensors-sink/config | jq
If everything is correct, the response confirms the connector configuration and shows the tasks created:
{
  "name": "sensors-sink",
  "config": {
    "name": "sensors-sink",
    "connector.class": "org.apache.iceberg.connect.IcebergSinkConnector",
    "topics": "sensors",
    "iceberg.tables": "bronze.kafka.sensors",
    "iceberg.tables.auto-create-enabled": "true",
    "iceberg.tables.evolve-schema-enabled": "true",
    "iceberg.table.bronze.kafka.sensors.id-columns": "id,measurements_timestamp",
    "iceberg.table.bronze.kafka.sensors.partition-by": "day(measurements_timestamp)",
    "iceberg.catalog.catalog-impl": "org.apache.iceberg.nessie.NessieCatalog",
    "iceberg.catalog.uri": "http://nessie:19120/api/v2",
    "iceberg.catalog.ref": "main",
    "iceberg.catalog.warehouse": "s3a://lakehouse/",
    "iceberg.catalog.io-impl": "org.apache.iceberg.aws.s3.S3FileIO",
    "iceberg.catalog.s3.endpoint": "http://minio:9000",
    "iceberg.catalog.s3.path-style-access": "true",
    "iceberg.catalog.client.region": "us-east-1",
    "iceberg.catalog.s3.access-key-id": "minioadmin",
    "iceberg.catalog.s3.secret-access-key": "minioadmin",
    "key.converter": "org.apache.kafka.connect.storage.StringConverter",
    "value.converter": "io.confluent.connect.avro.AvroConverter",
    "value.converter.schema.registry.url": "http://schema-registry:8081",
    "tasks.max": "1"
  },
  "tasks": [
    {
      "connector": "sensors-sink",
      "task": 0
    }
  ],
  "type": "sink"
}
You can check the connector status to make sure it's running:
curl -s localhost:8083/connectors/sensors-sink/status | jqExpected output:
{
  "name": "sensors-sink",
  "connector": {
    "state": "RUNNING",
    "worker_id": "172.18.0.8:8083"
  },
  "tasks": [
    {
      "id": 0,
      "state": "RUNNING",
      "worker_id": "172.18.0.8:8083"
    }
  ],
  "type": "sink"
}
Now Kafka Connect is actively sinking records from the sensors topic into the Iceberg table in our Nessie-managed catalog on Minio.
Querying the Iceberg Table
Once our Iceberg Sink Connector is running, we can query the table bronze.kafka.sensors using Spark SQL or the PySpark API.
Using Spark SQL Magic
%%sparksql
SELECT * FROM bronze.kafka.sensors;
This will display all records that were sunk from the Kafka topic.
Using PySpark API
# Count total rows
print(
    spark
        .table("bronze.kafka.sensors")
        .count()
)

# Print schema
spark.table("bronze.kafka.sensors").printSchema()
Example schema output:
root
 |-- id: string (nullable = false)
 |-- measurements_timestamp: timestamp (nullable = false)
 |-- measurements: array (nullable = false)
 |    |-- element: struct (containsNull = false)
 |    |    |-- name: string (nullable = false)
 |    |    |-- value: double (nullable = false)
Inspect Table Definition
To see the detailed Iceberg table metadata:
%%sparksql
SHOW CREATE TABLE bronze.kafka.sensors;
Sample output:
CREATE TABLE lakehouse.bronze.kafka.sensors (
    id STRING NOT NULL,
    measurements_timestamp TIMESTAMP NOT NULL,
    measurements ARRAY<STRUCT<name: STRING, value: DOUBLE>> NOT NULL
) USING iceberg
PARTITIONED BY (days(measurements_timestamp))
LOCATION 's3a://lakehouse/bronze.kafka/sensors_dc6763a9-c7b7-4fa3-a4dd-8baa6af6a29f'
TBLPROPERTIES (
    'current-snapshot-id' = '6352033752291068805',
    'format' = 'iceberg/parquet',
    'format-version' = '2',
    'gc.enabled' = 'false',
    'nessie.commit.id' = 'd2fd08612cb6583bb6892435fa431c8c9ca275d5597adec8d50381197fae6e7c',
    'write.metadata.delete-after-commit.enabled' = 'false',
    'write.parquet.compression-codec' = 'zstd'
)
Notes:
- The table is partitioned by day of
measurements_timestampto optimize queries on time ranges. - Iceberg stores rich metadata, including snapshots, format, and Nessie commit IDs.
- The
LOCATIONpoints to the Minio bucket where the Iceberg table files are stored.
In this article, we completed the full pipeline of sinking Kafka data into Iceberg tables using Kafka Connect, Minio, and Nessie. We started by setting up our environment with Jupyter, Spark, and the necessary dependencies for Iceberg and Nessie. Then, we created an Iceberg Sink Connector to persist Kafka topic data into Iceberg tables stored in Minio. Finally, we queried the table from Jupyter, inspected its schema, and explored its metadata, demonstrating how Iceberg and Nessie provide schema evolution, snapshots, and partitioning out of the box.
This setup gives us a flexible, production-ready foundation for experimenting with data lakes, streaming pipelines, and table versioning. By running Spark directly in Jupyter, we can modify catalog and table configurations on the fly, making it ideal for learning and prototyping.