A story of hammering a nail with a screwdriver.
I recently found myself in a mildly inconvenient situation — one that was, as it often is, a mildly inconvenient situation of my own making. But before we get to that, let's set some context.
Just a month prior, my frustrations with a few Philips Hue lights (or more specifically, the terrible Android app experience owing to my lack of a Philips Hue Bridge), drove me to this amazing piece of software: Home Assistant — a config driven home automation platform that seemed to have a thriving community with a wide range of integrations. Before I knew it, I'd bought myself a ZigBee dongle and spun up a Home Assistant container on my Raspberry Pi and that was it… Yeah, you're right, that wasn't it. Three containers — Eclipse Mosquitto, Zigbee2MQTT, and Home Assistant itself. Oh, and NodeRed after to use with HA nodes, which I'm yet to move my automations onto. I think this post on r/homeassistant sums it up very well:
A sentiment I deeply identify with given the time spent on my .emacs (I'd link it, but trust me, you're better off not seeing it).
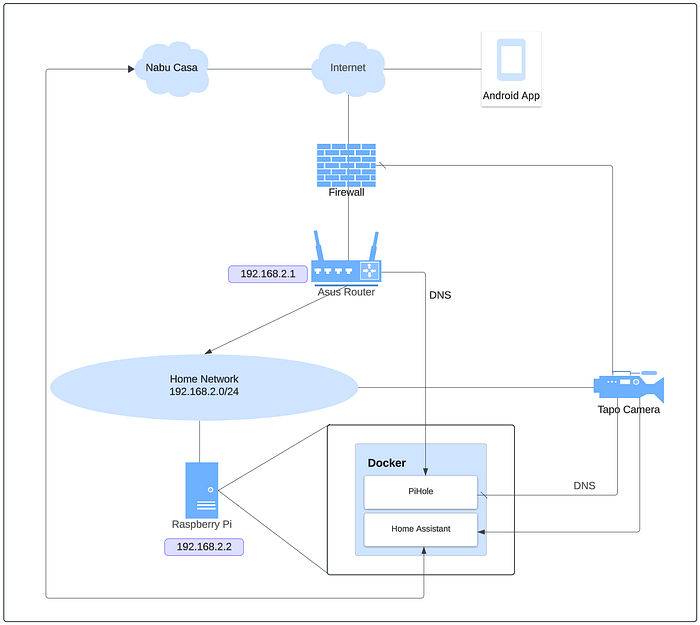
I also decided early on that I would pay for Nabu Casa, not only to support the good folks that make Home Assistant possible, but also to have my instance accessible remotely! What follows are some purchases: a bunch of sensors, a Sensibo Sky for my aircon, and most importantly, the thing that's soon to become relevant to an aforementioned mildly inconvenient situation — a Tapo camera. The camera setup was quite rushed, since it arrived only a few days before I set off on a 3 week long overseas holiday. I set it up with the app and then used the Tapo: Cameras Control integration in HA through HACS (Home Assistant Community Store). A task which I definitely did not have to do twice because I didn't read the note on how to add cameras with newer firmware. As mentioned, I blocked the relevant domains on my PiHole as well as setup firewall rules on my Asus router to completely block internet access to/from my camera.
Whew, that was a lot of context! Cue problem:
A couple of days into my holiday, I check up on camera recordings (the HA integration has an option to sync recordings) and to my surprise, my camera has done a phenomenal job of capturing every single instance of my lights turning on and off. I ponder on this for a bit and conjure up a hypothesis: I had forgotten to setup the detection zone for my camera, after the reset (the one that I definitely didn't do as I mentioned previously). The only way to set this up is the app, since there's no way to set detection zones from the HA integration, and not having access to my camera from the internet was going to make this quite the challenge. Now's a particularly great time to mention that I've been meaning to setup a VPN server on my home network, something that would have made this a non-issue and something that I'm deeply regretting not having done before leaving for my holiday.

My task was simple: I need to use Home Assistant, the only thing I have access to outside my home network, to somehow get inside my home network.
My first thought was to look for something that would let me SSH into the Home Assistant machine from my browser, and I find one instantly: SSH & Web Terminal. Just pressing a button to install a thing that fixes a large part of this problem, too good to be true, right? Yep, absolutely. For one, the "just pressing a button to install an add-on" is only true for Home Assistant Operating System and Home Assistant Supervised installations. If you're running a docker container like I am, you will have to perform the container deployment for the add-on yourself and probably configure access through a module like HASS Ingress. That wouldn't work considering I had no way to deploy the container.
Wouldn't this be a lot easier if I had some way to run commands remotely on my Raspberry Pi?
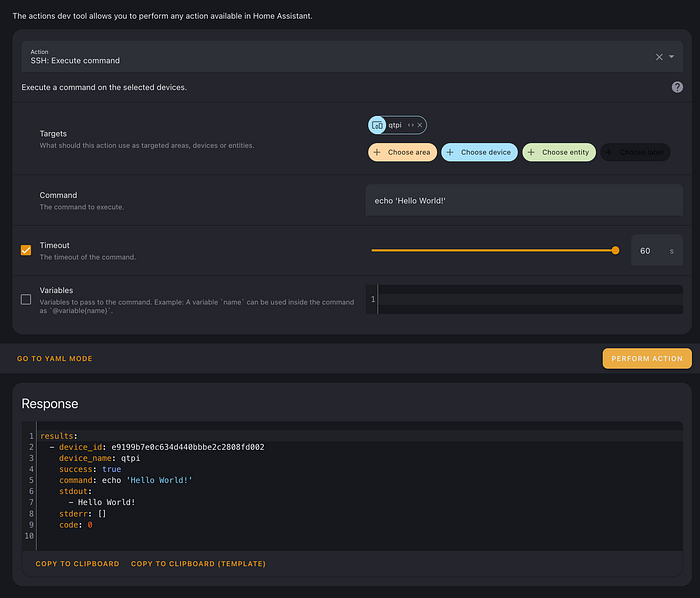
It would, yes. As luck would have it, my quest for browser based SSH has turned up results for the next best thing: SSH Integration. The integration lets you add a device (SSH target) and define commands to populate sensors and commands that can be triggered by buttons. The icing on what's starting to feel like an RCE (Remote Code Execution but not really) is the ssh.execute_command service/action, which can be very easily triggered from Developer Tools in HA. I go ahead and configure the Raspberry Pi with the integration and run a quick test.

Already a huge win. So, what next? Now that I have the ability of running one command at a time on my Raspberry Pi, I decided the easiest thing to do would be to use UPNP to setup a port forward from my router to the OpenSSH server on my Pi, the idea being, if I can manage to open up an interactive session, I'm no longer restricted to a single command, which will be necessary for where I'm going with this. I do just that by installing MiniUPNP and I eagerly try:
upnpc -e 'RPi SSH' -r 22 21122 TCPOnly to be disappointed by:
AddPortMapping(21122, 22, 192.168.2.2) failed with code 718 (ConflictInMappingEntry)Well, not that I knew it at the time, but apparently, I'd set it up so that my router would reject any UPNP port forwards for sensitive internal ports. A lot of searching for solutions in the dark later, I tried to port forward to port 21122 on the Raspberry Pi instead of 22, and it worked instantly!
While this wasn't as ideal, I could always just have sshd on my Pi listen on port 21122 instead of 22. In a moment of uncharacteristic insight, I decided that there might be something relying on sshd listening on port 22 and decided that I'd be better off running a second instance of sshd that would listen on 21122. Following this Ask Ubuntu question was a breeze, save for the lack of an interactive editor to edit config files, in conjunction with my ineptitude with stream editor - sed, but I managed.
The interactive shell access to my Raspberry Pi finally would allow me to setup something more permanent like the VPN server I mentioned previously, although I didn't want to run this on the Pi directly.
To setup a VPN server on my router I'd have to manage to access the Web UI.
There's a few solid options:
- SOCKS proxy using SSH — This should have been the ideal choice for tunneling into my home network and setting the SOCKS proxy in my browser to get to the router's WebUI.
- Use the web browser on my Pi over VNC — More work to setup the VNC server and add another UPNP port forwarding, but still a good choice.
- Terminal based browser — Yeah, this one's not as promising as the others and the likelihood of the Asus Merlin WebUI rendering in the terminal is pretty low.
Given my choices, I set myself up for great success using the best available option: the text based browser. I'm really good at this stuff, you can tell! I tried accessing the router's WebUI with elinks and when that didn't work out, I tried browsh, which works by running Firefox (headless) and rendering it on the terminal through an extension.

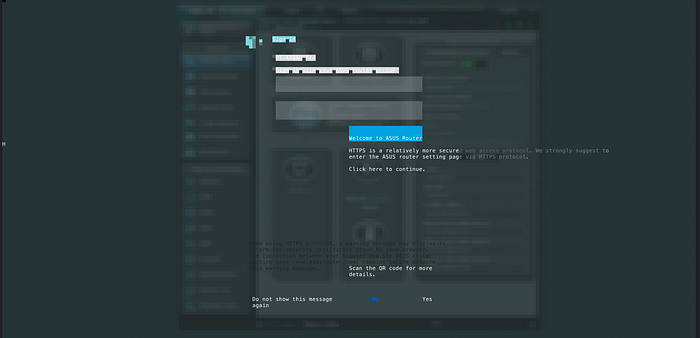
Very cool and it actually worked, but only for the login page and no further.
I was about to start debugging this when I realized that there's a very easy way out of this, another option:
4. SSH into my router: Yeah, I forgot that was an option.
I ssh into my Pi and use key forwarding through ssh-agent to get into my router. From there, it turns out, all I had to do was
nvram set misc_http_x=1
reboot
I stand on the precipice as I type in reboot, wondering if this leap will get me soaring through or falling straight down. If my router refuses to come back up, or if I accidentally messed something up, there probably wasn't going to be another shot at this. Well, considering the title of this article, I'll trust you can guess what happened after, but if not, my router came back online and the WebUI was finally accessible remotely!
Finally, I setup a VPN server on my router and added clients for my devices, ensuring that I could always remote into my LAN any time I want to in the future, and prevent another situation like this.
I have finally managed to claw my way into my local network using the SSH integration in my remotely accessible Home Assistant!
There's more to this about how the Tapo app did not actually work over the VPN due to it relying on a UDP broadcast for discovery. But all I did for that was to run a UDP broadcast relay between the VPN and local network interfaces on my router, and add temporary firewall rules that would allow traffic to and from the camera for this purpose. This finally allowed me to setup the detection zone for my camera.
I hope you found something interesting here, or at least were entertained by my foolishness.

