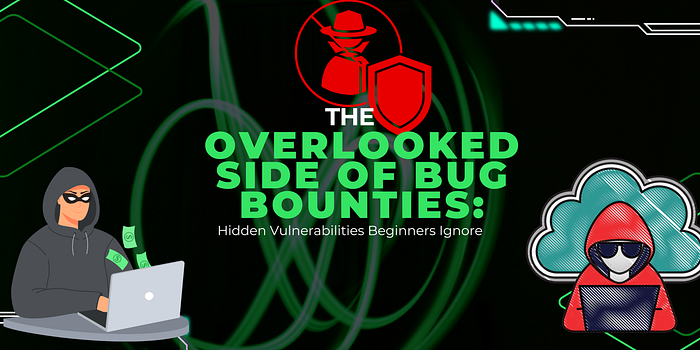

Bug bounty hunting is booming these days! Some hunters are raking in impressive earnings, while others struggle to earn anything at all. So, what's the difference between these two types of bug hunters?
In the world of bug bounties, experience is often the deciding factor. New hunters tend to focus on well-known vulnerabilities, like SQL injection (SQLi), cross-site scripting (XSS), and cross-site request forgery (CSRF) — the types of bugs that are heavily targeted and quickly found by others. On the other hand, seasoned hunters take a different approach. They look beyond the obvious, hunting for lesser-known issues and building complex chains of vulnerabilities. These hunters have learned to dive deeper, using advanced strategies to uncover these bugs — bugs that require a keen understanding of application behavior and often fly under the radar.
This difference in approach often leads experienced hunters to higher rewards. By combining patience with an eye for detail, they uncover vulnerabilities that new hunters might overlook, giving them an edge in the bug bounty game.
So today let's get to know some of the vulnerabilities which are less hunted by most of the bug bounty hunters.
Vulnerability 1: XSSI
What is XSSI (Cross-Site Script Inclusion)?
We've all heard of XSS (Cross-Site Scripting), where attackers inject malicious code into a website. But XSSI (Cross-Site Script Inclusion) is a lesser-known vulnerability that can let one website steal information from another. This could include private data like your login tokens, cookies, session IDs, or even personal information such as your email, address, and payment details.
To understand XSSI, we need to look at two main ideas: Same-Origin Policy (SOP) and Dynamic JavaScript.
Same-Origin Policy (SOP)
Imagine your browser as a house, with different websites living in separate rooms. SOP is like a lock on each door that prevents one room (or website) from seeing or taking things from another. SOP ensures websites can only access data if they're from the same "room" (or same origin). This is a safety measure that keeps websites from easily reading each other's data.
However, there's an important exception for <script> tags in HTML. Scripts are allowed to come from other rooms (websites) because sites need to load JavaScript from external sources to work correctly, like for ads, analytics, or third-party services.
Dynamic JavaScript
Some JavaScript files provide the same data to everyone, but dynamic JavaScript files change based on who's asking. Here's an example to make it easier:
Let's say there's a file called user-info.js on a website. When a logged-in user (like you) visits, this file may show your specific account details. But if a visitor isn't logged in, the file may display limited information or nothing at all. This difference based on user status makes it "dynamic."
How XSSI Attacks Happen
An XSSI attack can happen if sensitive information — like user details — is stored in a dynamic JavaScript file. Here's how an attacker might exploit this:
1. They trick the user's browser into loading this sensitive file from another website using a <script> tag.
2. Because <script> tags aren't restricted by SOP, the attacker's website could grab any information exposed in that JavaScript file.
In XSSI, files that load with scripts (like JavaScript files) are especially at risk because they don't have the same protection as other types of data. Attackers can try to use this trick on files like JSONP and JavaScript files because they don't follow the same SOP rules.
This means that even if the website is supposed to keep data private, XSSI could allow data leaks if the site isn't careful about what's exposed in its JavaScript files.
What is the Issue?
Imagine a web application that, as part of its operations, provides JSON responses containing sensitive information like authentication tokens. This token might allow access to specific data or a private channel within the application. Typically, these tokens are sent to the user after they're authenticated and are meant to be securely managed. However, if this JSON response isn't properly secured, it might be possible for an attacker to intercept or reuse it repeatedly, posing a serious security risk.
Here's a breakdown of the vulnerability and how an attacker might exploit it:
- The Unprotected JSON Response: When a user makes a request, the application responds with a JSON object containing an authentication token or other sensitive data. This response can be accessed if someone knows specific parameters, like a
channel_nameused in the request. - Reusable Token: The token provided within the JSON response is reusable. Even after logging out and back in, the same token might remain valid. This means that if an attacker gains access to the
channel_nameparameter once, they can repeatedly make requests to retrieve a fresh token without needing the user's credentials. - Cross-Site Scripting (XSS) and JSON Parsing: JSON responses like these are particularly vulnerable to attacks such as Cross-Site Scripting (XSS) and Cross-Site Script Inclusion (XSSI). Attackers can try to parse this JSON data using JavaScript functions like
JSON.parse()to extract sensitive information. By embedding scripts that make requests to the URL providing the JSON response, attackers might leverage browser vulnerabilities or insecure browser configurations to capture data.
How Does an Attack Work?
An attacker might use an HTML form with hidden fields containing known parameters to demonstrate how such an attack could occur. When the form is submitted, it sends a request to the target URL, prompting the application to respond with the JSON data containing the token.
Here's an example HTML form that an attacker could create:
<form action="https://example.com/pusher/auth" method="POST"> <input type="hidden" name="socket_id" value="1.266427"> <input type="hidden" name="channel_name" value="private-unique-channel-id"> <input type="submit"> </form>
When accessed, this form triggers a response from the server with the sensitive JSON data, allowing the attacker to parse the response and repeatedly access the application's resources as long as they have the channel name.
Vulnerability 2: SMTP Header Injection
Many features allow users to interact with each other through emails such as sending invites, notification emails, or some updates.
But what will happen if these features aren't secured?
This can lead to some serious vulnerabilities. One of the vulnerabilities that we are going to talk about is SMTP Header Injection.
In simple terms, this issue arises when user-provided input is not properly sanitized and is injected into email headers, allowing attackers to alter email content or even perform phishing attacks.
Let's break down how this works with a practical example.
What is SMTP Header Injection?
SMTP Header Injection is a vulnerability that occurs when an application allows users to insert special characters (like \r\n) in email headers. These characters tell the email system to start a new header, so an attacker could use them to add custom headers or manipulate the email's content. This is particularly dangerous because attackers can change the email's subject, type, or even the message body, making it look like a legitimate email from a trusted source.
A Practical Example
Let's say we have a web application for an event management platform, where users can create events and invite guests. The application sends invitation emails on behalf of the event organizer, using a basic email template with details such as the event name, time, and location.
- Normal Invite Process:
- User A, the event organizer, creates an event called "Tech Summit 2024" and invites User B to attend.
- The application sends an invite email to User B from
invites@eventplatform.com, with the subject line: "You're Invited to Tech Summit 2024" and a message body that includes event details.
2. User-Controlled Input:
- Here, "Tech Summit 2024" is a user-provided input (event name) that is displayed in the email subject and possibly in the body of the email.
- The attacker can exploit this by altering the event name to inject new email headers.
3. Exploiting the Vulnerability:
- Suppose User A changes the event name to:
Tech Summit\r\nContent-Type: text/html; charset=UTF-8\r\nContent-Transfer-Encoding: base64\r\n\r\nPGgxPkhleSBHdWVzdCwgd2VsY29tZSB0byB0aGUgVGVjaCBTdW1taXQhPC9oMT4=
- Now, when the invite is sent to User B, the email subject is modified to "Tech Summit," and the email body becomes HTML, displaying the message: "Hey Guest, welcome to the Tech Summit!" This is because
PGgxPkh...is Base64-encoded text for<h1>Hey Guest, welcome to the Tech Summit!</h1>.
By injecting these characters, the attacker manipulates the email structure, making it look completely different and potentially misleading.
How an Attacker Could Use This for Phishing
SMTP Header Injection isn't just about changing email content; it can also be leveraged for phishing. Here's how:
- An attacker could exploit this vulnerability to send emails that look exactly like legitimate invitations from the event platform.
- These emails could contain malicious links or instructions to trick recipients into providing sensitive information.
- Since the email appears to come from a trusted source, users may be more likely to fall for the phishing attempt.
How to test
Certain email template fields may not be accessible through the app's UI, so tools like Burp Suite can help with testing:
- Intercept Requests: Capture requests in Burp Suite to inspect parameters sent to the server when an email invite or similar email is triggered.
- Manipulate Parameters: Change the parameters and observe if the email content reflects these changes.
- Look for Reflected Parameters: If the email's subject or body changes based on your input, it may indicate a vulnerability.
Impact of SMTP Header Injection
The impact of this vulnerability can be severe:
- Phishing Campaigns: Attackers could use this flaw to send malicious emails that appear legitimate to a large number of recipients.
- Reputational Damage: Phishing emails could harm users' trust in the application.
- Increased Account Compromise: Phishing emails might lead to users unwittingly compromising their accounts.
Vulnerability 3: Account Lockout Policy Misconfiguration and How It Enables Denial of Access Attacks
There is a security feature in a website's login systems that is an account lockout policy, so what it does is prevent brute force attacks by locking the account after multiple failed login attempts for a certain time.
But what if this security feature becomes a vulnerability?
If Account Lockout policy is not implemented properly, this will lead to a serious vulnerability that will allow attackers to lock users out of their accounts indefinitely and even if the support for that website unlocks the account the attacker will then do that again which will lead to permanent account lockout.
So let's discuss what account lockout policy misconfiguration is, how attackers can exploit it, and best practices to avoid this issue.
What is Account Lockout Policy Misconfiguration?
Account lockout policies are typically implemented to limit the number of failed login attempts within a certain timeframe. For instance, after a user enters an incorrect password 20 or 30 times in a row, the account is temporarily locked.
However, the way this policy is configured is crucial to ensuring it protects against brute-force attacks without making legitimate users vulnerable to lockouts caused by attackers. One common misconfiguration occurs when the lockout policy considers only the username and ignores other factors like the IP address.
Example of Account Lockout Policy Misconfiguration
Let's say you have a website with a login function and an account lockout policy that activates after 50 failed login attempts. Here's how the misconfiguration might play out:
- Normal Lockout Behavior:
- A user enters their password incorrectly 50 times. The account locks, preventing further login attempts for a specific period (e.g., 15 minutes).
- After the lockout period, the user can attempt to log in again.
2. Misconfiguration:
- The lockout is triggered based solely on the username. Changing the IP address, browser, or device does not reset the lockout.
- This means that once an account reaches the failed attempt limit, it remains locked regardless of the network or location from which login attempts are made.
3. How an Attacker Exploits This:
- An attacker could repeatedly attempt to log in to the victim's account, intentionally triggering the lockout policy each time.
- Even if the site's support team unlocks the account, the attacker can initiate another brute-force session to lock the account again almost instantly.
- This effectively denies the legitimate user access to their account, as each time they try to log in, the account is already locked.
Example:
Let's break down how an attacker could exploit a misconfigured lockout feature.
- Account Lock Trigger:
- Imagine a website with a login function that temporarily locks accounts after 10 failed login attempts. This should protect users by stopping attackers from guessing passwords endlessly.
2. How the Attack Works:
- The attacker targets a user's account (e.g., the username "victim_user") and repeatedly enters incorrect passwords until the account gets locked.
- Since the website's lockout policy only considers the username and not the IP address, changing the IP (e.g., by using a mobile hotspot or VPN) doesn't reset the lock.
3. Automated Attack Script:
- The attacker can automate this process using a simple Python script (example below) that repeatedly sends login requests with wrong passwords, causing the account to stay locked continuously.
- Even if customer support unlocks the account, the attacker can quickly re-trigger the lock, keeping the victim locked out.
Python Script to Lock an Account (Example)
Here's a simplified Python script to illustrate how an attacker might automate this attack:
import requests
import time
def lock_account(username):
    url = "https://example.com/login"  # Replace with the website URL
    data = {
        "username": username,
        "password": "wrong_password"  # Intentionally incorrect password
    }

    for _ in range(15):  # Repeated attempts to trigger lockout
        response = requests.post(url, data=data)
        print("Attempted login with incorrect password.")
        time.sleep(1)  # Slight delay between requests    print(f"Account {username} should be locked now.")username = "victim_user"
lock_account(username)
In this script:
- The
lock_accountfunction sends repeated login requests with an incorrect password. - After enough attempts, the account will lock due to the failed logins.
Simplified Explanation of Account Lock Attack with Example
What is an Account Lock Attack?
An account lock attack takes advantage of weak account lockout policies. In many login systems, after a certain number of incorrect login attempts, the account is temporarily locked to prevent brute-force attacks. But if this feature is not implemented correctly, attackers can abuse it to keep a legitimate user locked out indefinitely.
Example of Account Lock Attack
Let's break down how an attacker could exploit a misconfigured lockout feature.
- Account Lock Trigger:
- Imagine a website with a login function that temporarily locks accounts after 10 failed login attempts. This should protect users by stopping attackers from guessing passwords endlessly.
2. How the Attack Works:
- The attacker targets a user's account (e.g., the username "victim_user") and repeatedly enters incorrect passwords until the account gets locked.
- Since the website's lockout policy only considers the username and not the IP address, changing the IP (e.g., by using a mobile hotspot or VPN) doesn't reset the lock.
3. Automated Attack Script:
- The attacker can automate this process using a simple Python script (example below) that repeatedly sends login requests with wrong passwords, causing the account to stay locked continuously.
- Even if customer support unlocks the account, the attacker can quickly re-trigger the lock, keeping the victim locked out.
Python Script to Lock an Account (Example)
Here's a simplified Python script to illustrate how an attacker might automate this attack:
import requests
import time
def lock_account(username):
    url = "https://example.com/login"  # Replace with the website URL
    data = {
        "username": username,
        "password": "wrong_password"  # Intentionally incorrect password
    }

    for _ in range(15):  # Repeated attempts to trigger lockout
        response = requests.post(url, data=data)
        print("Attempted login with incorrect password.")
        time.sleep(1)  # Slight delay between requests    print(f"Account {username} should be locked now.")username = "victim_user"
lock_account(username)
In this script:
- The
lock_accountfunction sends repeated login requests with an incorrect password. - After enough attempts, the account will lock due to the failed logins.
Impact of This Attack
- User Lockout: The legitimate user (victim) will be unable to log in to their account because each time they try, the account is already locked by the attack.
- Continuous Disruption: Even if the support team unlocks the account, the attacker can quickly lock it again, creating a persistent denial of access.
- Frustration and Support Overload: Users will likely reach out for help, putting strain on customer support without a real solution if the lockout mechanism isn't improved.
Vulnerability 4: Cross-User Defacement
What is HTTP Response Splitting?
HTTP Response Splitting occurs when a server allows an attacker to send multiple HTTP responses for a single HTTP request. This happens if the server does not properly validate certain characters in the input, like carriage return (CR) and line feed (LF) characters, which are encoded as %0d and %0a. These characters tell the server to start a new line, which is how HTTP headers and responses are separated.
How Does This Work?
Here's how an attacker could exploit this vulnerability:
- Input Manipulation: The attacker finds an input field or URL parameter that the server includes in the HTTP headers of the response. By injecting special characters (like
%0d%0a, which represent a new line), they can insert new lines within the response headers. - Injecting Malicious Headers: Using these injected new lines, the attacker can add custom headers or even start an entirely new HTTP response. This could include malicious content or links to harmful sites.
- Delivering Malicious Content: When a victim clicks on this crafted link, the server responds with two separate responses. The first response is what the server normally sends, while the second response contains the attacker's injected content, which could include phishing pages, fake login forms, or malware.
Example:
Imagine a web page where users can report content. When a user submits a report, the web page sends back a response to confirm that the report was received. To help identify the reported content, this page includes a URL parameter called content_id that the server is supposed to validate as a simple number.
How the Vulnerability Occurs
In this scenario, let's say the website's server doesn't strictly validate the content_id parameter. While it expects a number, it doesn't check to ensure that users can't enter other, unexpected values, such as special characters or encoded data.
Here's where an attacker can take advantage of the situation. Instead of a simple number, they insert a specially crafted value in the content_id parameter that contains:
- Encoded characters: These characters represent newline symbols in HTTP headers.
- Additional headers: Instructions that the server unintentionally reads as part of the response.
For example, the attacker might input something like content_id=%0d%0aSet-Cookie:test. The %0d%0a represents a newline in URL encoding. When the server processes this parameter, it inserts a new line in the HTTP response, and the extra text is interpreted as a new header (in this case, Set-Cookie:test).
What the Server Sends Back
Because of the inserted newline and the additional "header," the server ends up creating two separate HTTP responses:
- Response 1: The server confirms the report and sends the regular response headers.
- Response 2: The server interprets the injected "Set-Cookie" header, unknowingly setting a cookie for the user.
This is how the attacker is able to manipulate the response sent to the user.