In this blog we will be setting up our home lab — a web server. But why? As pentesters, it is important to know the Fundamentals of the technology that power websites. Have you ever read a writeup and wonder how they just know where the credentials are? or the config files? Have you wonder why when you gain a foothold through a web app, it's very likely at the directory /var/www/html? This is why we want to set up a web server and administrate it.
This will help us get familiar with where stuff locates and if there are misconfigurations, if it isn't a CTF, it will help us to suggesting remediations for the client, which is more important. At the end of the day if we can't secure the server, the point of a pentest is less valuable.
I will be using the LAMP stack (Linux, Apache, MariaDB/MySQL and PHP). Debian as a base (although any linux will work). Apache as the server, MariaDB as backend database and PHP as the connection language.
Installing All required technologies
Debian
Tbh if you are here, you most likely wouldn't need my write up on installing a distro. So I will skip it, I am using VMware, so you just need to download Debian and install it like kali. But if you need help, just youtube 'installing Debian linux'.
Apache
sudo apt upgrade && install apache2 -y //standard apt command with yes flag
MariaDB
MariaDB is actually the same as MySQL. Since Oracle bought MySQL, someone wrote MariaDB and open source it, so that's what I like.
sudo apt install mariadb-server mariadb-client
PHP
sudo apt install php
PHP integration for MariaDB and Apache
sudo apt install libapache2-mod-php && php-mysql
— — — — — — — — —
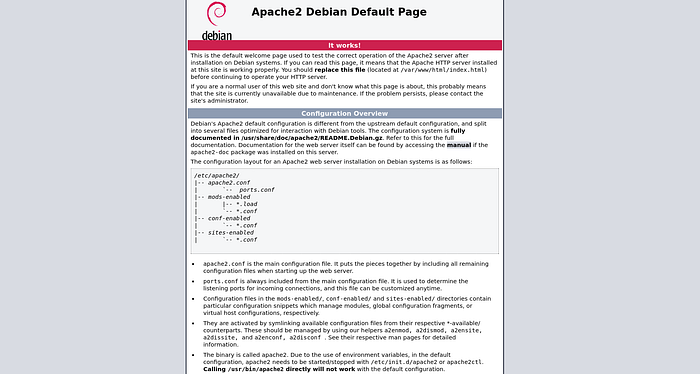
After installing the above, run systemctl status apache2 to check if server is up, if not then run systemctl start apache2. If everything runs well, you should now see the default Apache page when browsing localhost or 127.0.0.1 aka the loopback address. So congratulations, you got a web server up.
Now is a good time to talk about the directories at a high level. If you read the localhost page, you will see the root directory is /var/www. /var stands for variable or variation, meaning the files inside is expected to change frequently. For every new web page or update to a page, you will update in the /var/www/<hostname>/<newpage>. We have not set up vhost yet, so currently we only have 1 folder called html. This can be changed later when we set up vhost. Lets write a very simple new webpage.
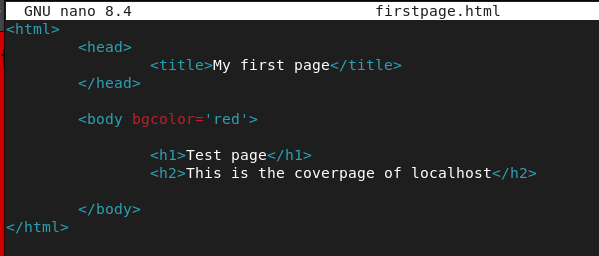
Nano firstpage.html and write the following:
now if you type localhost/firstpage.html on the browser, you should see it.

etc = Edit To Config
So as expected the config for apache is in the /etc/apache2/apache2.conf file.
Cheatsheet:
/etc/apache2/apache2.conf — main config file
/etc/apache2/ports.conf — layer 4 port settings
/etc/apache2/sites-available — site config files
/etc/apache2/sites-enabled — running websites
/var/www/html/* — where html/css/js files are kept
/var/log/apache2/error.log — error logs
/var/log/apache2/access.log — the access log
vhost
Now lets host multiple websites on the same server.
- mkdir /var/www/vhost.com/public_html //the root of your vhost html files
- mv /etc/apache2/sites-available
Inside this dir, you will see 2 files, 000-default.conf and default-ssl.conf. Always copy them, they are templates.
3. cp 000-default.conf vhost.com.conf //this will be the conf of our vhost site
4. nano vhost.com.conf
5. Add the following 2 lines:
- ServerName vhost.com
- DocumentRoot /var/www/vhost.com/public_html
6. nano /var/www/vhost.com/public_html/index.html // and add the following code into this new file

7. systemctl reload apache2 && systemctl restart apache2
8. nano /etc/hosts
9. add the line 飗.0.0.7 vhost.com' //rmb to do this, your site is only available locally
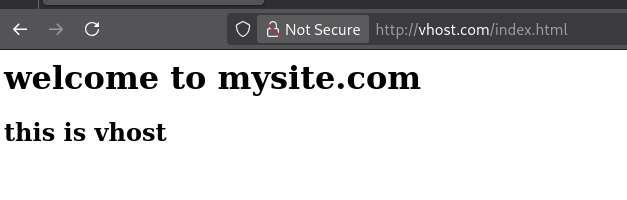
With all the above done you should be able to browse your page which looks like this
So we got our ultra basic website, lets do a simple db hardening, with the following commands:
- sudo mariadb
- select user, host, plugin from mysql.user where user='root' //check if root user is there
- alter user 'root'@'localhost' IDENTIFIED BY 'yourstrongpassword!'
Now you can login as root with mariadb -u root -p
Lets create our shop DB.
- create database shop;
- show databases; // show all databases
- use shop;
- show tables; // show all tables in db
- creat table products_tbl(product_id INT NOT NULL AUTO_INCREMENT, product_name VARCHAR(100) NOT NULL, PRIMARY KEY(product_id));
- select * from products_tbl;
- insert into products_tbl SET product_name = 'My First Product'
- insert into products_tbl SET product_name = 'Large pair of shoes'
- select * from products_tbl;
You should see this now + — — — — — — + — — — — — — — — — — -+ | product_id | product_name | + — — — — — — + — — — — — — — — — — -+ | 1 | My First Product | | 2 | Large pair of shoes | + — — — — — — + — — — — — — — — — — -+
Next we will have to configure apache to have php as it's priority.
nano /etc/apache2/mods-enabled/dir.conf
By default index.php should be very low, we need it to be at first.

Type apachectl confitest to see if the syntax is ok:

Now lets restart apache with: systemctl restart apache2.
Lets make a php info, which is sometimes what we see in a pentest.
- nano /var/www/vhost.com/public_html/info.php
- type <?php phpinfo(); ?> in the file
Now if we browse http://vhost.com/info.php, we should see the all familiar php info page which is an information disclosure.