
Introduction
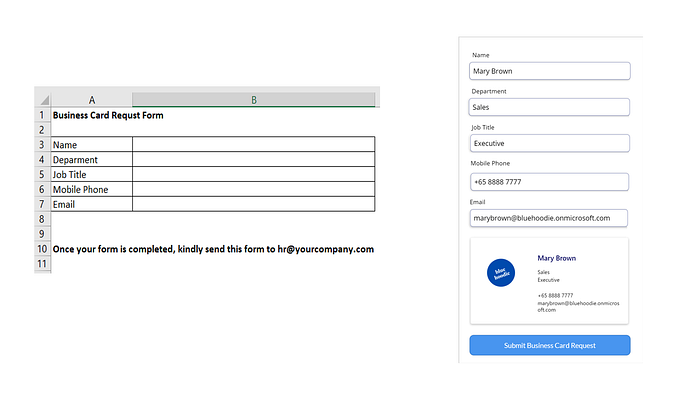
We are going to create a business card request form in PowerApps. Wait a minute, a request form in PowerApps? Do I need to build one in Power Apps? I can just create it in Excel, Word, Email, or Forms. Why do I need to build it in Power Apps?
Here are 5 reasons why we need to level up our Excel request form to Power Apps
- When a requestor submits a form, it can be easily be routed for Approval via Power Automate (Automated routing)
- Almost all the fields are auto-populated with the help of the Office 365 Users connector in Power Apps, reducing the risk of typo errors and increasing compliance in an organization. (You won't have colleagues negotiating for a title that is different from their designated one)
- Streamline the business card request process
- It is way cooler and your boss will be impressed by it which will add points to your appraisal (think cost savings, digital transformation and productivity gains)
- It will only take 15 minutes of your time to create the business card request app
What you will need:
- PowerApps for your front end interface (screen where your requestor will interact with)
- SharePoint List to store all your requests (back end list)
Identify the required fields
Let's first identify the data that we would like to collect. For this article, we will be focusing on these 5 fields, feel free to add in more fields that are relevant to your process
- Requestor Name
- Department
- Job Title
- Mobile Phone
Create fields in SharePoint
Next, we will create a SharePoint List to store all the fields that we have identified earlier. Go to your SharePoint Home Page, Click on New-> List

Select Blank List

Input a name and description for your list and click on Create

The Title column is created by default in the SharePoint list, thus our first task is to remove the title column to prevent confusion. Click on the gear icon and select List settings

As we won't be able to delete the title column, we will set the column as non-required. Click on the Title column,

Under Require that this column contains information, select No

Click on OK at the bottom of the screen and go back to your ListView. To create your first field- Requestor Name, Click on Add Column and select Single line of text

Under Name, input RequestorName and click on the Save button

Create columns by repeating the above step for the remaining fields, Department, Job Title, Mobile Phone and Email

To remove Title from your list view, click on the down arrow beside Title and select Show/hide columns

Unselect the Title column and select Modified, Created, Created by and Modified by. and click on Apply. The Created column will show when the item is first created and Created by shows who creates the record. The Modified and Modified By indicates the last date of modification and who modify the record


Under Integrate-> Power Apps -> Customize forms
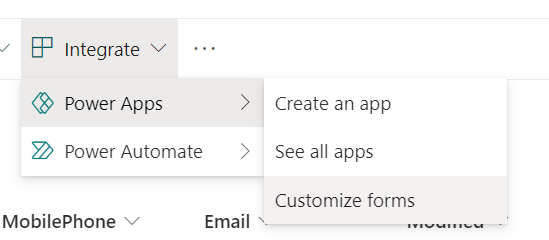
Wait a moment for PowerApps to load up and you will see your Business Card Request Application

Select SharePointForm1 and click on Edit Fields on the right-hand menu bar

Remove Title and Attachment field as we won't require these fields

Now we will start to transform our plain-looking form into a smart-looking application form.
Click on the first text box under the RequestorName DataCard, In the right-hand menu, click on Unlock to change properties

Under the Default property, remove Parent. Default as we would like the form to auto-populate the logged-in user name.

We can do so by typing in the following in the formula bar
User().FullNameOnce you are done typing, notice that PowerApps will auto-populate the data below the formula bar and in the text box

User() refers to the logged in user and calling FullName will retrieve the full name of the logged-in user
Let's try it again with the Email text box. Go ahead and give it a try using the User(). formula that we have done for our RequestorName. (Hint: You can type User(). in the formula bar and PowerApps will provide you options on what are the available formulas)
Type the following in the email textbox
User().Email
Notice that the User(). formulas only consist of User().Email, User().FullName and User().Image and we can't use it for the rest of our fields.
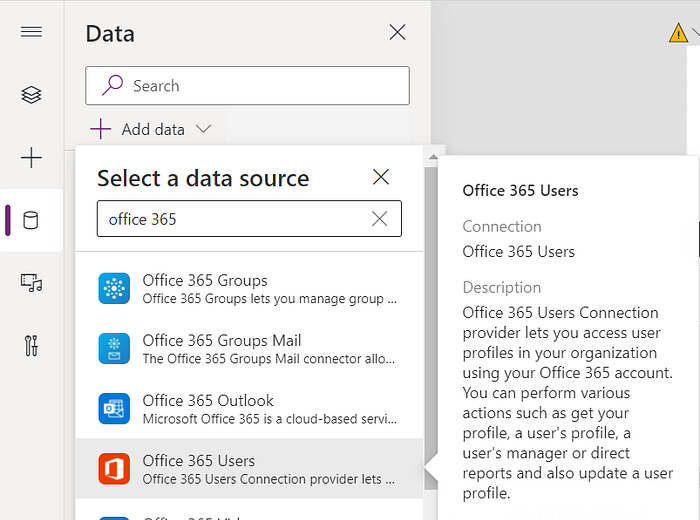
To auto-populate the department, job title and mobile phone number, we would need to add Office 365 Users connector. On the left-hand side, search for Office 365 Users and add it to your data source. Adding the Office 365 Users connector would allow us to access user profile information. For more information on the Office 365 User connector, check out the official documentation here
Select the department textbox and enter the following:
Office365Users.MyProfileV2().department
When you type in Office365Users.MyProfileV2(). , PowerApps will provide a list of available options that you can choose from. Feel free to explore the various options

Do the same for JobTitle (jobTitle) and MobilePhone(mobilePhone)
Office365Users.MyProfileV2().jobTitle
Office365Users.MyProfileV2().mobilePhone
And we are done with our smart fields. When a logged-in user visits the application, all the fields are auto-populated for them and they would only need to verify and submit their application. Isn't this a more efficient form application process?
To complete the app, we are going to add a header and a submit button. Click on the SharePointForm1 form and set values for the following property
Height: 600
Y: 100
DefaultMode: New
Add a label for the header


Add a button for the submit request button


Select button, under the OnSelect property, input
SubmitForm(SharePointForm1)
The SubmitForm function allows the requestor to submit the form to save it to the SharePoint List. We will add a successful notification message after the SubmitForm function to know that the request has been submitted successfully.
Notify("You have successfully submitted your request", NotificationType.Success, 2000)
Future Enhancements
- Connect your SharePoint List to Power BI to create a dashboard
- Create approval flows using Power Automate
The business card request app is a simple example of how we can turn manual excel forms into an interactive form and streamline workflow processes.